About renaming a codespace
When you create a codespace it's assigned an auto-generated display name. If you have multiple codespaces, the display name helps you to differentiate between codespaces. For example: literate space parakeet. You can change the display name for your codespace.
To find the display name of a codespace:
-
On GitHub, view your list of codespaces at https://github.com/codespaces.

-
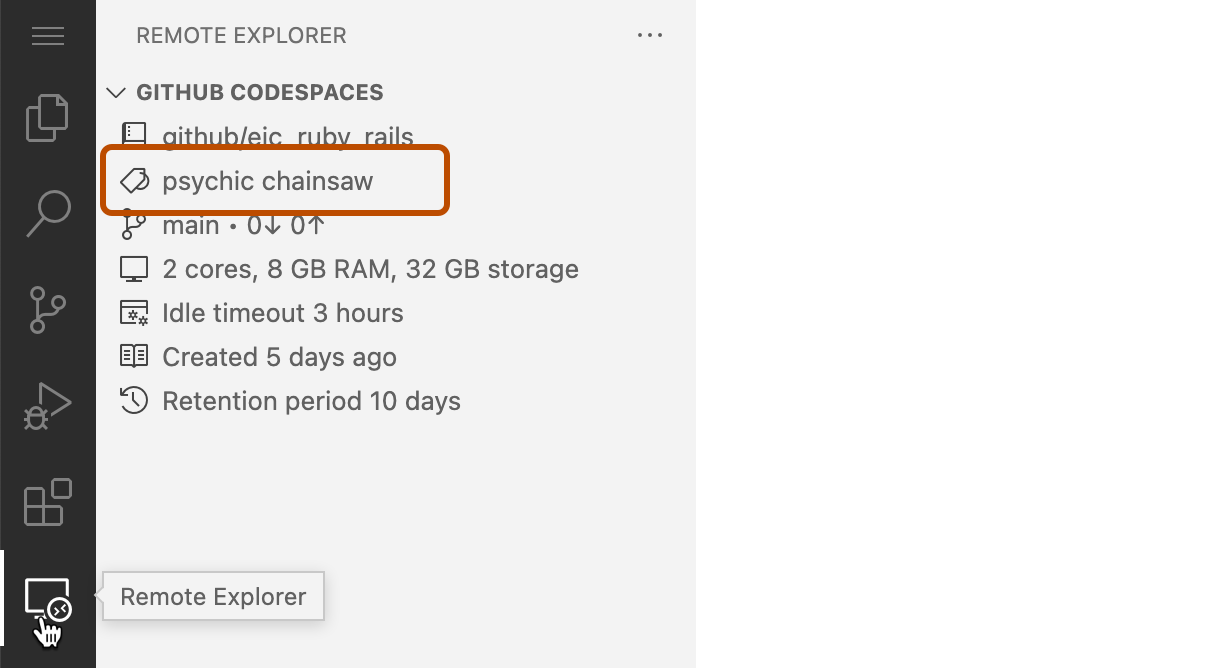
In the Visual Studio Code desktop application, or the VS Code web client, click the Remote Explorer. The display name is the second item in the list. For example:
psychic chainsawin the screenshot below.
Note
If the Remote Explorer is not displayed in the Activity Bar:
- Access the Command Palette. For example, by pressing Shift+Command+P (Mac) / Ctrl+Shift+P (Windows/Linux).
- Type:
details. - Click Codespaces: Details.
-
In a terminal window on your local machine, use this GitHub CLI command:
gh codespace list.
Permanent codespace names
In addition to a display name, every codespace also has a unique, permanent name. The permanent name is a combination of the initial display name, followed by some random characters - for example, literate-space-parakeet-w5vg5ww5p793g7g9. You can't change the permanent name.
You will occasionally need to know the permanent name of a codespace. For example, when you use some GitHub CLI commands, or when you discuss a particular codespace with GitHub support.
To find the permanent name of a codespace, do one of the following:
- Open the codespace in the browser. The subdomain of the URL is the name of the codespace. For example:
https://obscure-space-engine-grx7rgg6qp43v9j5.github.devis the URL for theobscure-space-engine-grx7rgg6qp43v9j5codespace. - If you cannot open a codespace, you can access the name from your list of codespaces at https://github.com/codespaces. Right-click the display name of the codespace and select your browser's option for copying the link address. The final part of the URL you copy is the permanent name of the codespace.
- In a codespace, use this command in the terminal:
echo $CODESPACE_NAME. - If GitHub CLI is installed, either locally or in a codespace, use this command in the terminal to list all of your codespaces:
gh codespace list.
The permanent name the codespace is also included in many of the log files. For example, in the GitHub Codespaces extension log, after fetching codespace or Connecting to codespace, and in the browser console log after clientUrl. For more information, see GitHub Codespaces logs.
Renaming a codespace
Changing the display name of a codespace can be useful if you have multiple codespaces that you will be using for an extended period. An appropriate name helps you identify a codespace that you use for a particular purpose.
If you have installed GitHub CLI, you can use it to work with GitHub Codespaces. For installation instructions for GitHub CLI, see the GitHub CLI repository.
To change the display name of a codespace, use the gh codespace edit subcommand:
gh codespace edit -c PERMANENT-CODESPACE-NAME -d 'NEW-DISPLAY-NAME'
In this example, replace PERMANENT-CODESPACE-NAME with the permanent name of the codespace whose display name you want to change. Replace NEW-DISPLAY-NAME with the display name you want to use for this codespace.
Display names can be up to 48 characters in length. The display name can contain any combination of characters, including spaces, provided you enclose it in single quotes.
For more information, see Using GitHub Codespaces with GitHub CLI.
You can change the display name for your codespace on GitHub.
-
In the top-left corner of GitHub, select , then click Codespaces to take you to the "Your codespaces" page at github.com/codespaces.
The current display name for each of your codespaces is displayed.
-
Click the ellipsis (...) to the right of the codespace you want to modify.
-
Click Rename.
-
In the prompt, under "Change display name to..." type your desired display name and click OK.