About machine types
Typically, you can run your codespace on a choice of remote machine types. These machine types offer a choice of hardware specifications ranging from 2 cores to 32 cores, although the full range of machine types may not always be available. Each machine type has a different level of resources and a different billing tier. For information, see About billing for GitHub Codespaces.
By default the machine type with the lowest valid resources is used when you create a codespace. You can choose an alternative machine type either when you create a codespace or at any time after you've created a codespace.
For information on choosing a machine type when you create a codespace, see Creating a codespace for a repository.
Unpublished codespaces (codespaces created from a template that are not linked to a repository on GitHub) always run on a virtual machine with the same specifications. You can't change the machine type of an unpublished codespace. For more information, see Creating a codespace from a template.
Changing the machine type
Note
Your choice of available machine types may be limited by a number of factors. These can include a policy configured for your organization, or a minimum machine type specification for your repository. For more information, see Restricting access to machine types and Setting a minimum specification for codespace machines.
-
In the top-left corner of GitHub, select , then click Codespaces to take you to the "Your codespaces" page at github.com/codespaces.
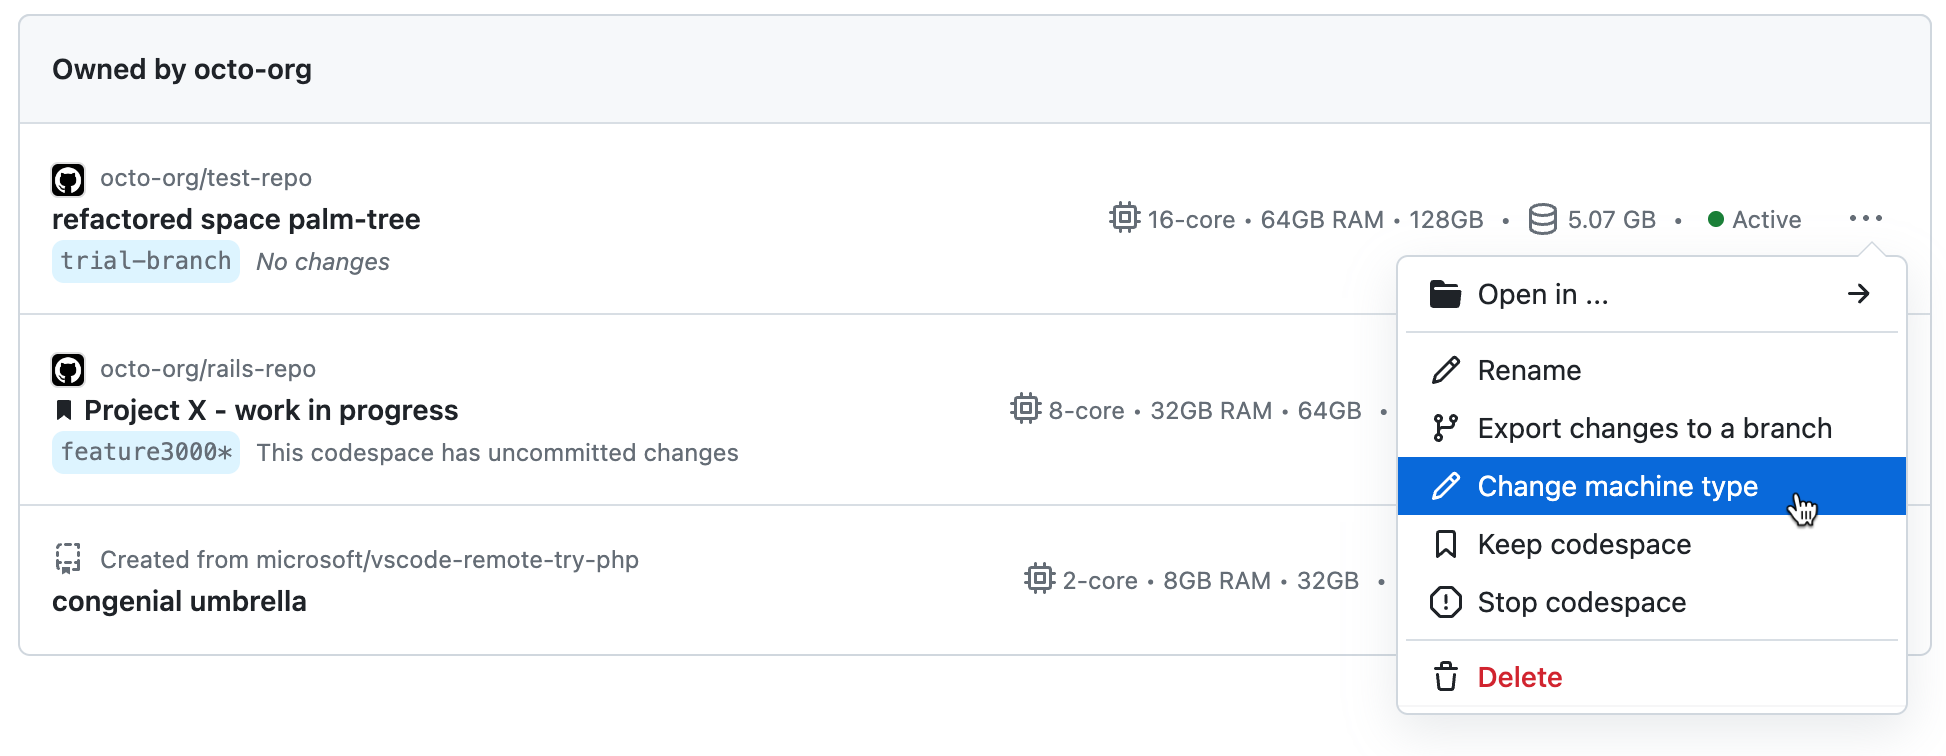
The number of cores, memory, storage capacity, and currently used storage are displayed for each codespace. Some details are omitted if you are using a narrow browser window.

-
Click the ellipsis (...) to the right of the codespace you want to modify.
-
Click Change machine type.

-
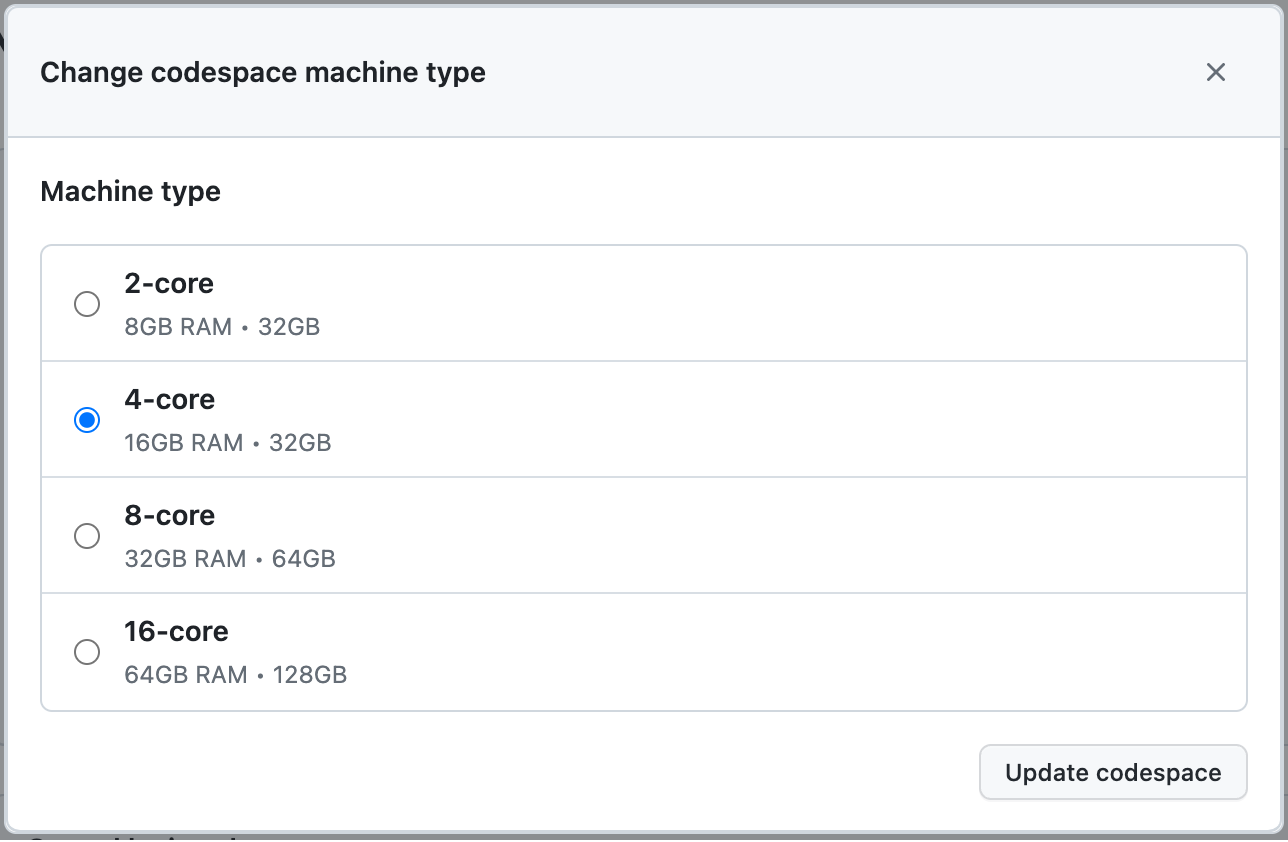
If multiple machine types are available for your codespace, choose the type of machine you want to use.

-
Click Update codespace.
-
In VS Code, open the Command Palette with Command+Shift+P (Mac) or Ctrl+Shift+P (Windows/Linux).
-
Search for and select "Codespaces: Change Machine Type."

-
If you're not following these instructions within a codespace, click the codespace that you want to change.

If you are following these instructions in a codespace, the change will apply to the codespace you're working in.
-
Select the machine type you want to use.
-
If you're changing to a machine type with a different storage capacity, a prompt will appear asking if you would like to continue. Read the prompt and click Yes to accept.
If you have installed GitHub CLI, you can use it to work with GitHub Codespaces. For installation instructions for GitHub CLI, see the GitHub CLI repository.
You can use the gh codespace edit --machine MACHINE-TYPE-NAME GitHub CLI command to change the machine type of a codespace. To use this command, you'll first need to find out the available machine types for your codespace.
-
To view your list of codespaces, in a terminal, enter the following command.
gh codespace list -
Optionally, to find the current machine type for a codespace, enter the following command.
gh api /user/codespaces/CODESPACE-NAMEReplace
CODESPACE-NAMEwith the permanent name of the codespace, for exampleliterate-space-parakeet-w5vg5ww5p793g7g9. The permanent names are listed under the NAME column in the list returned bygh codespace list.If you're prompted to request the
codespacescope, follow the instructions in the terminal.Details for the current machine are listed under the
machinefield. -
To find the available machine types for a codespace, enter the following command.
gh api /user/codespaces/CODESPACE-NAME/machinesReplace
CODESPACE-NAMEwith the permanent name of the codespace, for exampleliterate-space-parakeet-w5vg5ww5p793g7g9. -
To change the machine type for a codespace, enter the following command.
gh codespace edit --machine MACHINE-TYPE-NAMEReplace
MACHINE-TYPE-NAMEwith the name of an available machine type for your codespace, for examplestandardLinux32gb. -
Using the arrow keys, navigate to the codespace you want to change, then press Enter.
If you changed to a virtual machine with a different storage capacity (for example, from 32 GB to 64 GB), your codespace will be unavailable for a short time while the machine type is changed. If the codespace is currently active, it will automatically be stopped. When the change is complete, you'll be able to restart the codespace running on the new machine type.
If you changed to a virtual machine with the same storage capacity, the change will be applied the next time you restart the codespace. An active codespace will not be stopped automatically. For more information on restarting a codespace, see Stopping and starting a codespace.