About managing enterprise accounts with GraphQL
To help you monitor and make changes in your organizations and maintain compliance, you can use the Enterprise Accounts API and the Audit Log API, which are only available as GraphQL APIs.
The enterprise account endpoints work for both GitHub Enterprise Cloud and for GitHub Enterprise Server.
GraphQL allows you to request and return just the data you specify. For example, you can create a GraphQL query, or request for information, to see all the new organization members added to your organization. Or you can make a mutation, or change, to invite an administrator to your enterprise account.
With the Audit Log API, you can monitor when someone:
- Accesses your organization or repository settings.
- Changes permissions.
- Adds or removes users in an organization, repository, or team.
- Promotes users to admin.
- Changes permissions of a GitHub App.
The Audit Log API enables you to keep copies of your audit log data. For queries made with the Audit Log API, the GraphQL response can include data for up to 90 to 120 days. For a list of the fields available with the Audit Log API, see the Interfaces.
With the Enterprise Accounts API, you can:
- List and review all of the organizations and repositories that belong to your enterprise account.
- Change Enterprise account settings.
- Configure policies for settings on your enterprise account and its organizations.
- Invite administrators to your enterprise account.
- Create new organizations in your enterprise account.
For a list of the fields available with the Enterprise Accounts API, see Managing enterprise accounts.
Getting started using GraphQL for enterprise accounts
Follow these steps to get started using GraphQL to manage your enterprise accounts:
- Authenticating with a personal access token
- Choosing a GraphQL client or using the GraphQL Explorer
- Setting up Insomnia to use the GraphQL API
For some example queries, see An example query using the Enterprise Accounts API.
1. Authenticate with your personal access token
-
To authenticate with GraphQL, you need to generate a personal access token from developer settings. For more information, see Managing your personal access tokens.
-
Grant admin and full control permissions to your personal access token for areas of your enterprise you'd like to access. For full permission to private repositories, organizations, teams, user data, and access to enterprise billing and profile data, we recommend you select these scopes for your personal access token:
repoadmin:orguseradmin:enterprise
The enterprise account specific scopes are:
admin:enterprise: Gives full control of enterprises (includesmanage_runners:enterprise,manage_billing:enterpriseandread:enterprise)manage_billing:enterprise: Read and write enterprise billing data.read:enterprise: Read enterprise profile data.
-
Copy your personal access token and keep it in a secure place until you add it to your GraphQL client.
2. Choose a GraphQL client
We recommend you use GraphiQL or another standalone GraphQL client that lets you configure the base URL.
You may also consider using these GraphQL clients:
The next steps will use Insomnia.
3. Setting up Insomnia to use the GitHub GraphQL API with enterprise accounts
-
Add the base url and
POSTmethod to your GraphQL client. When using GraphQL to request information (queries), change information (mutations), or transfer data using the GitHub API, the default HTTP method isPOSTand the base url follows this syntax:- For your enterprise instance:
https://<HOST>/api/graphql - For GitHub Enterprise Cloud:
https://api.github.com/graphql
- For your enterprise instance:
-
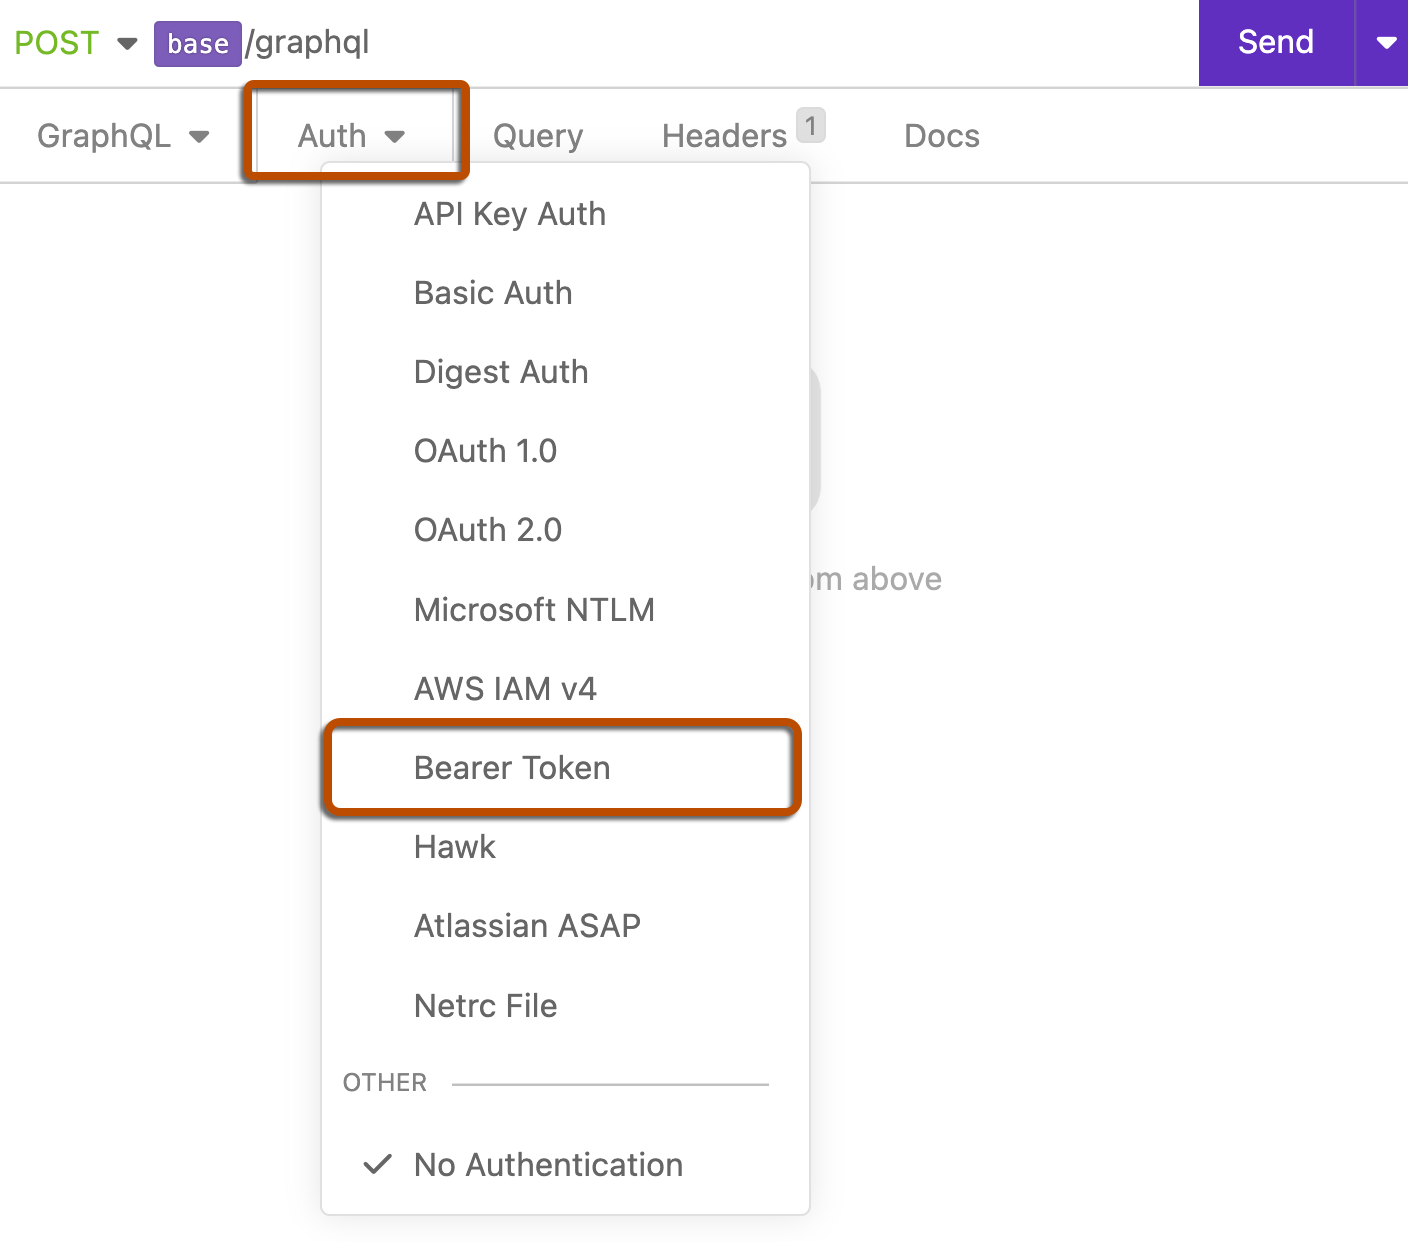
Select the "Auth" menu and click Bearer Token. If you've previously selected a different authentication method, the menu will be labeled with that method, such as "Basic Auth", instead.

-
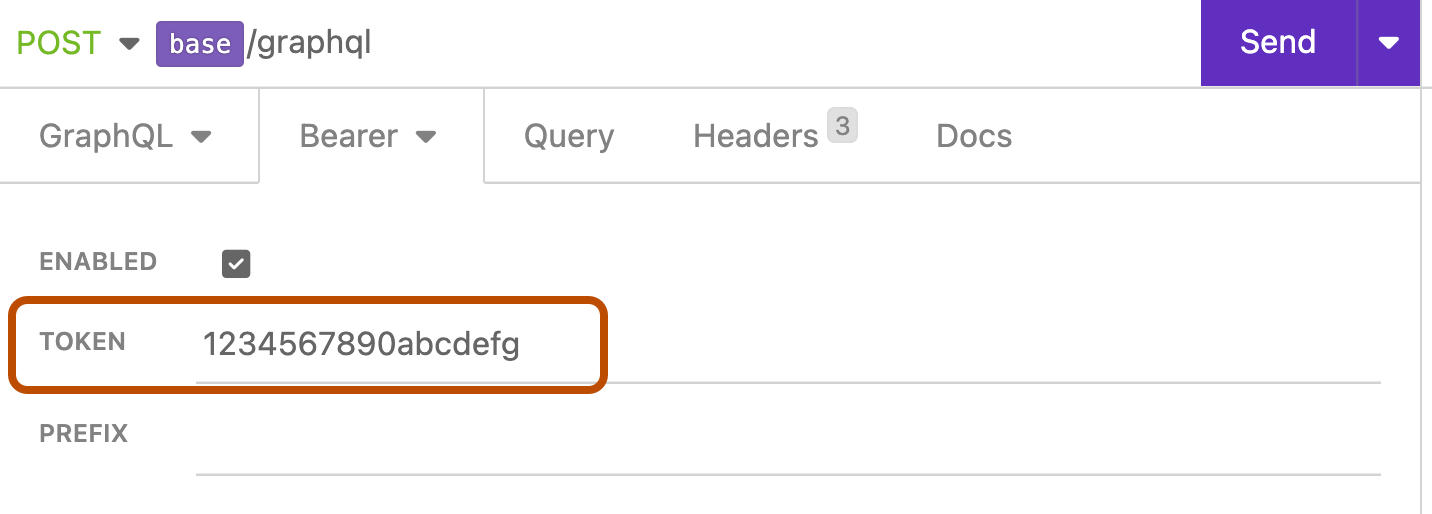
In the "TOKEN" field, enter your personal access token from an earlier step.

-
Click Headers.

-
Under the Headers tab, click Add.
-
In the "header" field, enter
Content-Type. -
In the "value" field, enter
application/json.
Now you are ready to start making queries.
An example query using the Enterprise Accounts API
This GraphQL query requests the total number of public repositories in each of your appliance's organizations using the Enterprise Accounts API. To customize this query, replace <enterprise-account-name> with the handle for your enterprise account. For example, if your enterprise account is located at https://github.com/enterprises/octo-enterprise, replace <enterprise-account-name> with octo-enterprise.
query publicRepositoriesByOrganization($slug: String!) {
  enterprise(slug: $slug) {
    ...enterpriseFragment
  }
}

fragment enterpriseFragment on Enterprise {
  ... on Enterprise{
    name
    organizations(first: 100){
      nodes{
        name
        ... on Organization{
          name
          repositories(privacy: PUBLIC){
            totalCount
          }
        }
      }
    }
  }
}

# Passing our Enterprise Account as a variable
variables {
  "slug": "<enterprise-account-name>"
}
The next GraphQL query example shows how challenging it is to retrieve the number of public repositories in each organization without using the Enterprise Account API. Notice that the GraphQL Enterprise Accounts API has made this task simpler for enterprises since you only need to customize a single variable. To customize this query, replace <name-of-organization-one> and <name-of-organization-two>, etc. with the organization names on your instance.
# Each organization is queried separately
{
  organizationOneAlias: organization(login: "nameOfOrganizationOne") {
    # How to use a fragment
    ...repositories
  }
  organizationTwoAlias: organization(login: "nameOfOrganizationTwo") {
    ...repositories
  }
  # organizationThreeAlias ... and so on up-to lets say 100
}

## How to define a fragment
fragment repositories on Organization {
  name
  repositories(privacy: PUBLIC){
    totalCount
  }
}
Query each organization separately
query publicRepositoriesByOrganization {
  organizationOneAlias: organization(login: "<name-of-organization-one>") {
    # How to use a fragment
    ...repositories
  }
  organizationTwoAlias: organization(login: "<name-of-organization-two>") {
    ...repositories
  }
  # organizationThreeAlias ... and so on up-to lets say 100
}
# How to define a fragment
fragment repositories on Organization {
  name
  repositories(privacy: PUBLIC){
    totalCount
  }
}
This GraphQL query requests the last 5 log entries for an enterprise organization. To customize this query, replace <org-name> and <user-name>.
{
  organization(login: "<org-name>") {
    auditLog(last: 5, query: "actor:<user-name>") {
      edges {
        node {
          ... on AuditEntry {
# Get Audit Log Entry by 'Action'
            action
            actorLogin
            createdAt
# User 'Action' was performed on
           user{
              name
                email
            }
          }
        }
      }
    }
  }
}
For more information about getting started with GraphQL, see Introduction to GraphQL and Forming calls with GraphQL.
GraphQL fields and types for the Enterprise Accounts API
For more details about the new queries, mutations, and schema defined types available for use with the Enterprise Accounts API, see the sidebar with detailed GraphQL definitions from any GraphQL reference page.
You can access the reference docs from within the GraphQL explorer on GitHub. For more information, see Using the Explorer. For other information, such as authentication and rate limit details, check out the guides.