
AWS Installation
Self-hostedThis guide explains how to deploy Entropy Data on Amazon Web Services (AWS). AWS offers multiple deployment options, from simple container services to fully managed Kubernetes clusters.
Prerequisites
- Active AWS account
- AWS CLI installed and configured
- SMTP server for transactional emails (such as AWS SES, Mailgun, SendGrid, or similar). Optional for the ECS Fargate template, but required for invitations and password resets.
- (Optional) eksctl for EKS deployments
Deployment Options
AWS provides several options for deploying Entropy Data:
- AWS App Runner - Simplest fully managed option (detailed below)
- Amazon ECS (Elastic Container Service) - Container orchestration with AWS Fargate behind a load balancer (CloudFormation template below)
- Amazon EKS (Elastic Kubernetes Service) - Full Kubernetes for enterprise deployments (see Kubernetes installation guide)
- AWS Elastic Beanstalk - PaaS solution for Docker containers
AWS App Runner Deployment (Recommended)
AWS App Runner provides the simplest deployment path with automatic scaling and built-in load balancing.
Deploy Using CloudFormation
Click the button below to deploy Entropy Data to AWS using CloudFormation:

Step 1: Configure Stack Parameters
Provide a stack name and configure the CloudFormation parameters. The most important parameters are:
- DomainName: Domain name for your Entropy Data instance
- SMTP settings: Configure email delivery (you can use an AWS SES service as described below)
- SuperAdmins: Email address(es) of administrators who will have access to /admin page for advanced administrations
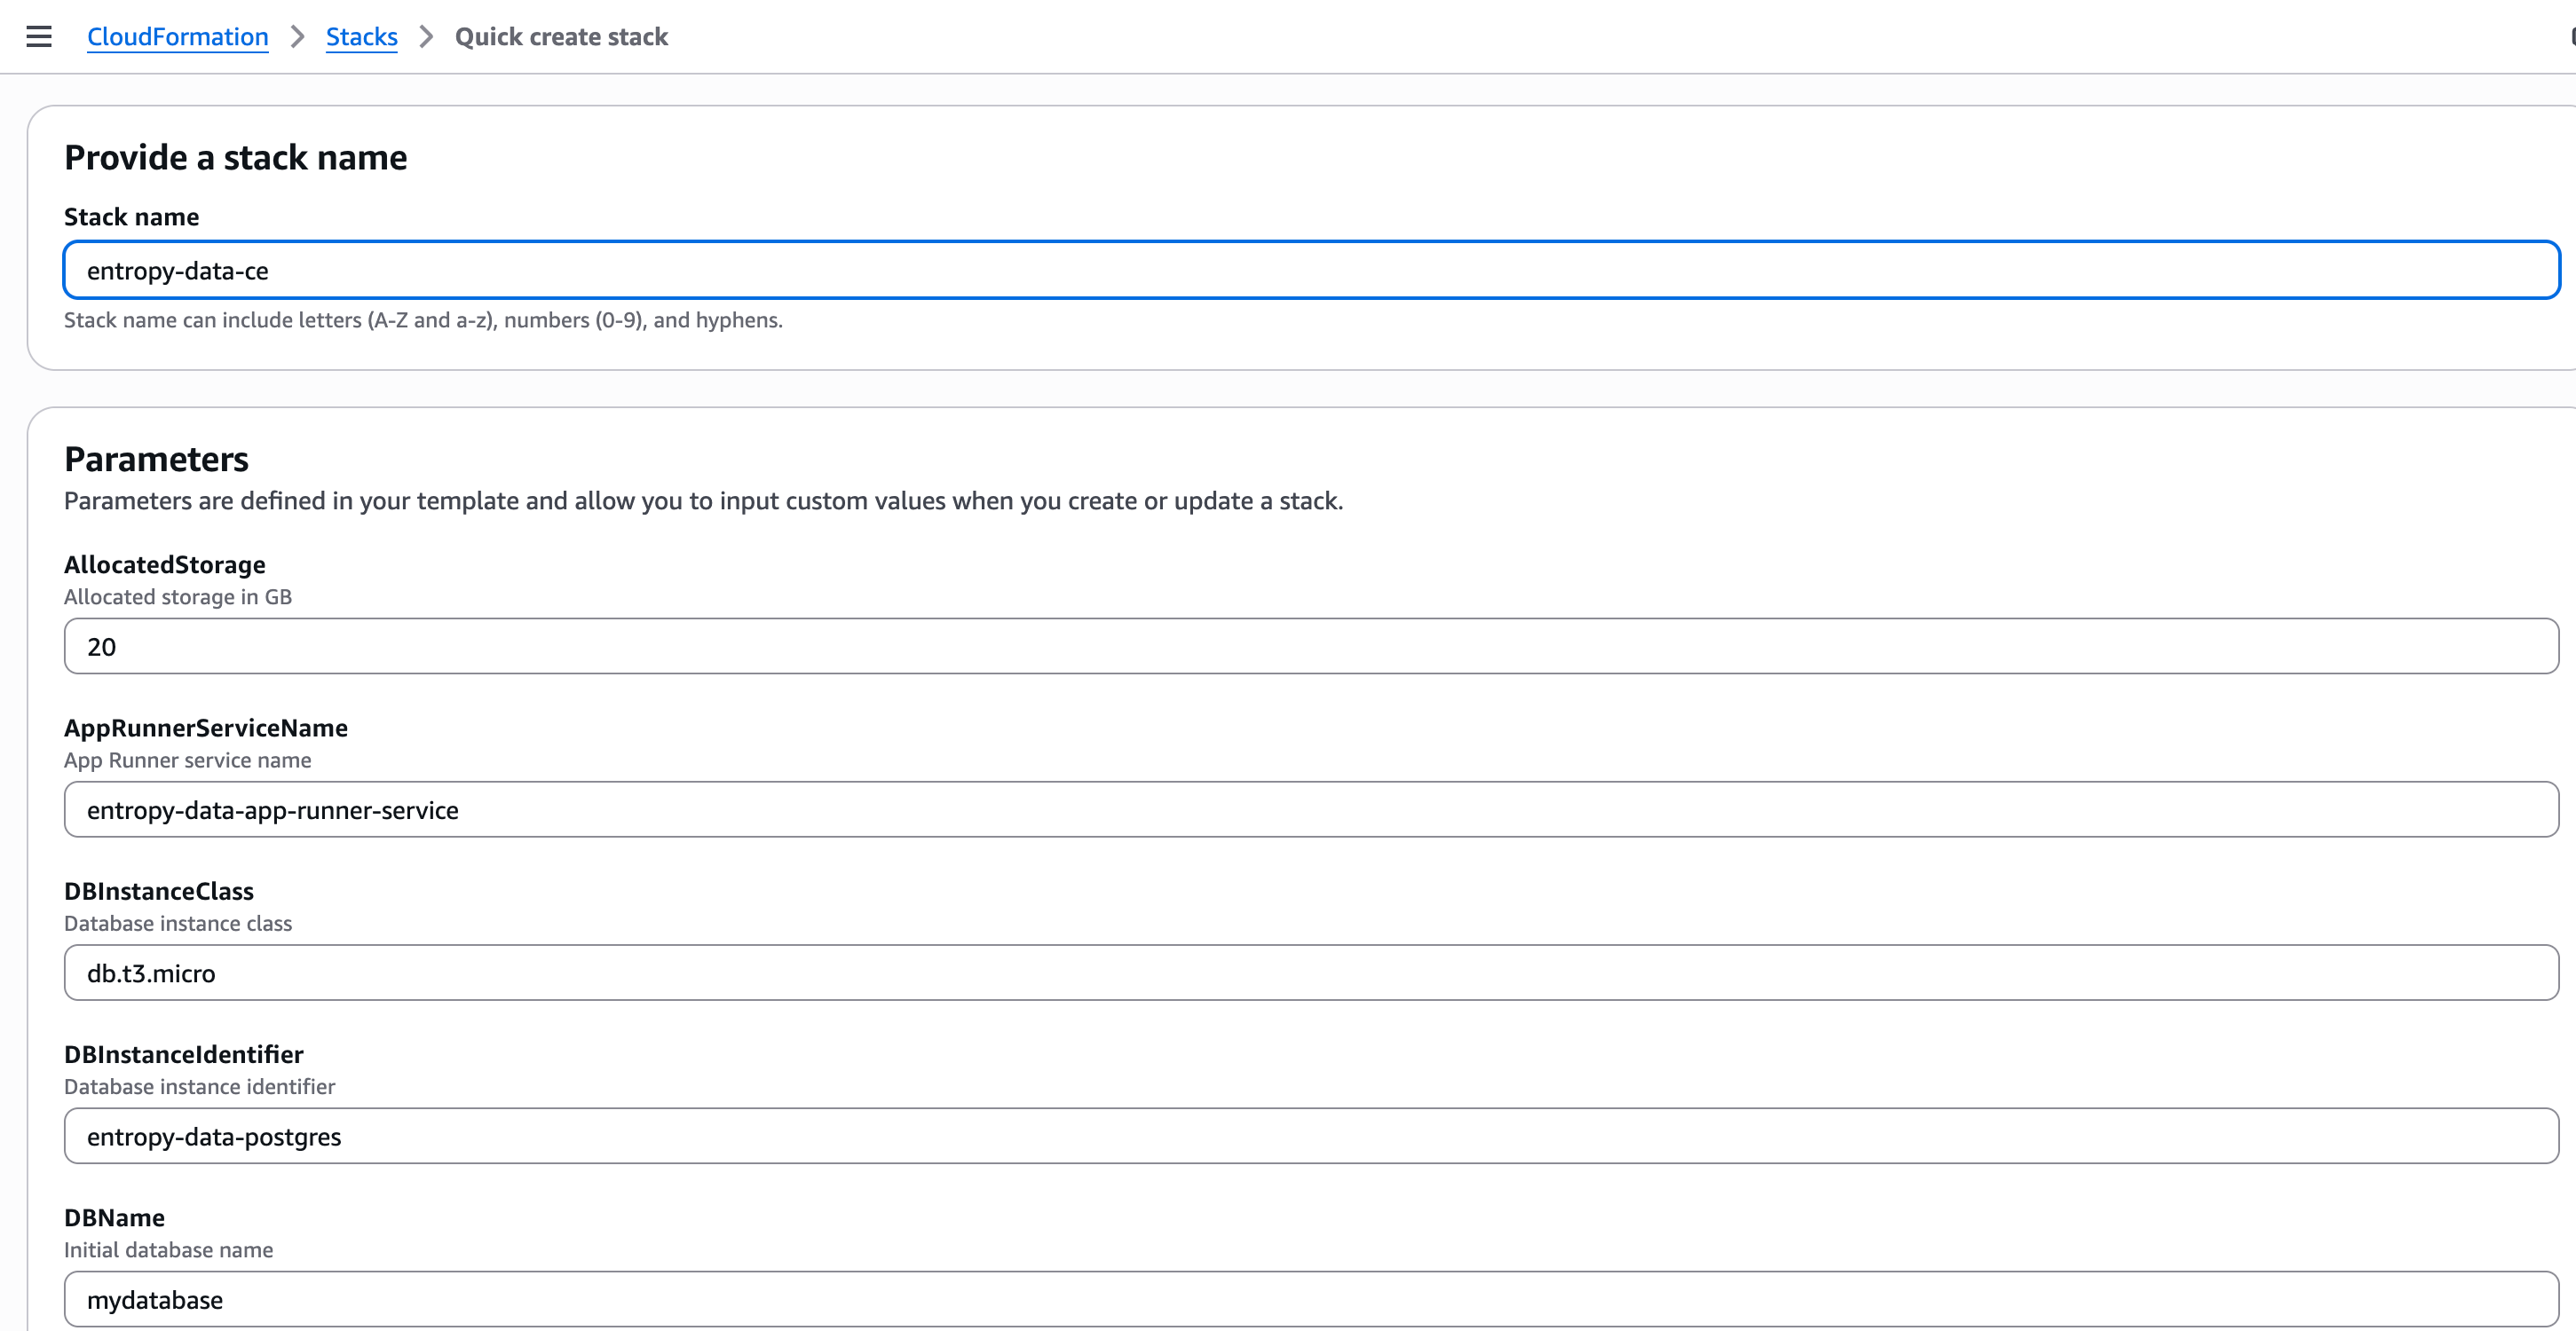
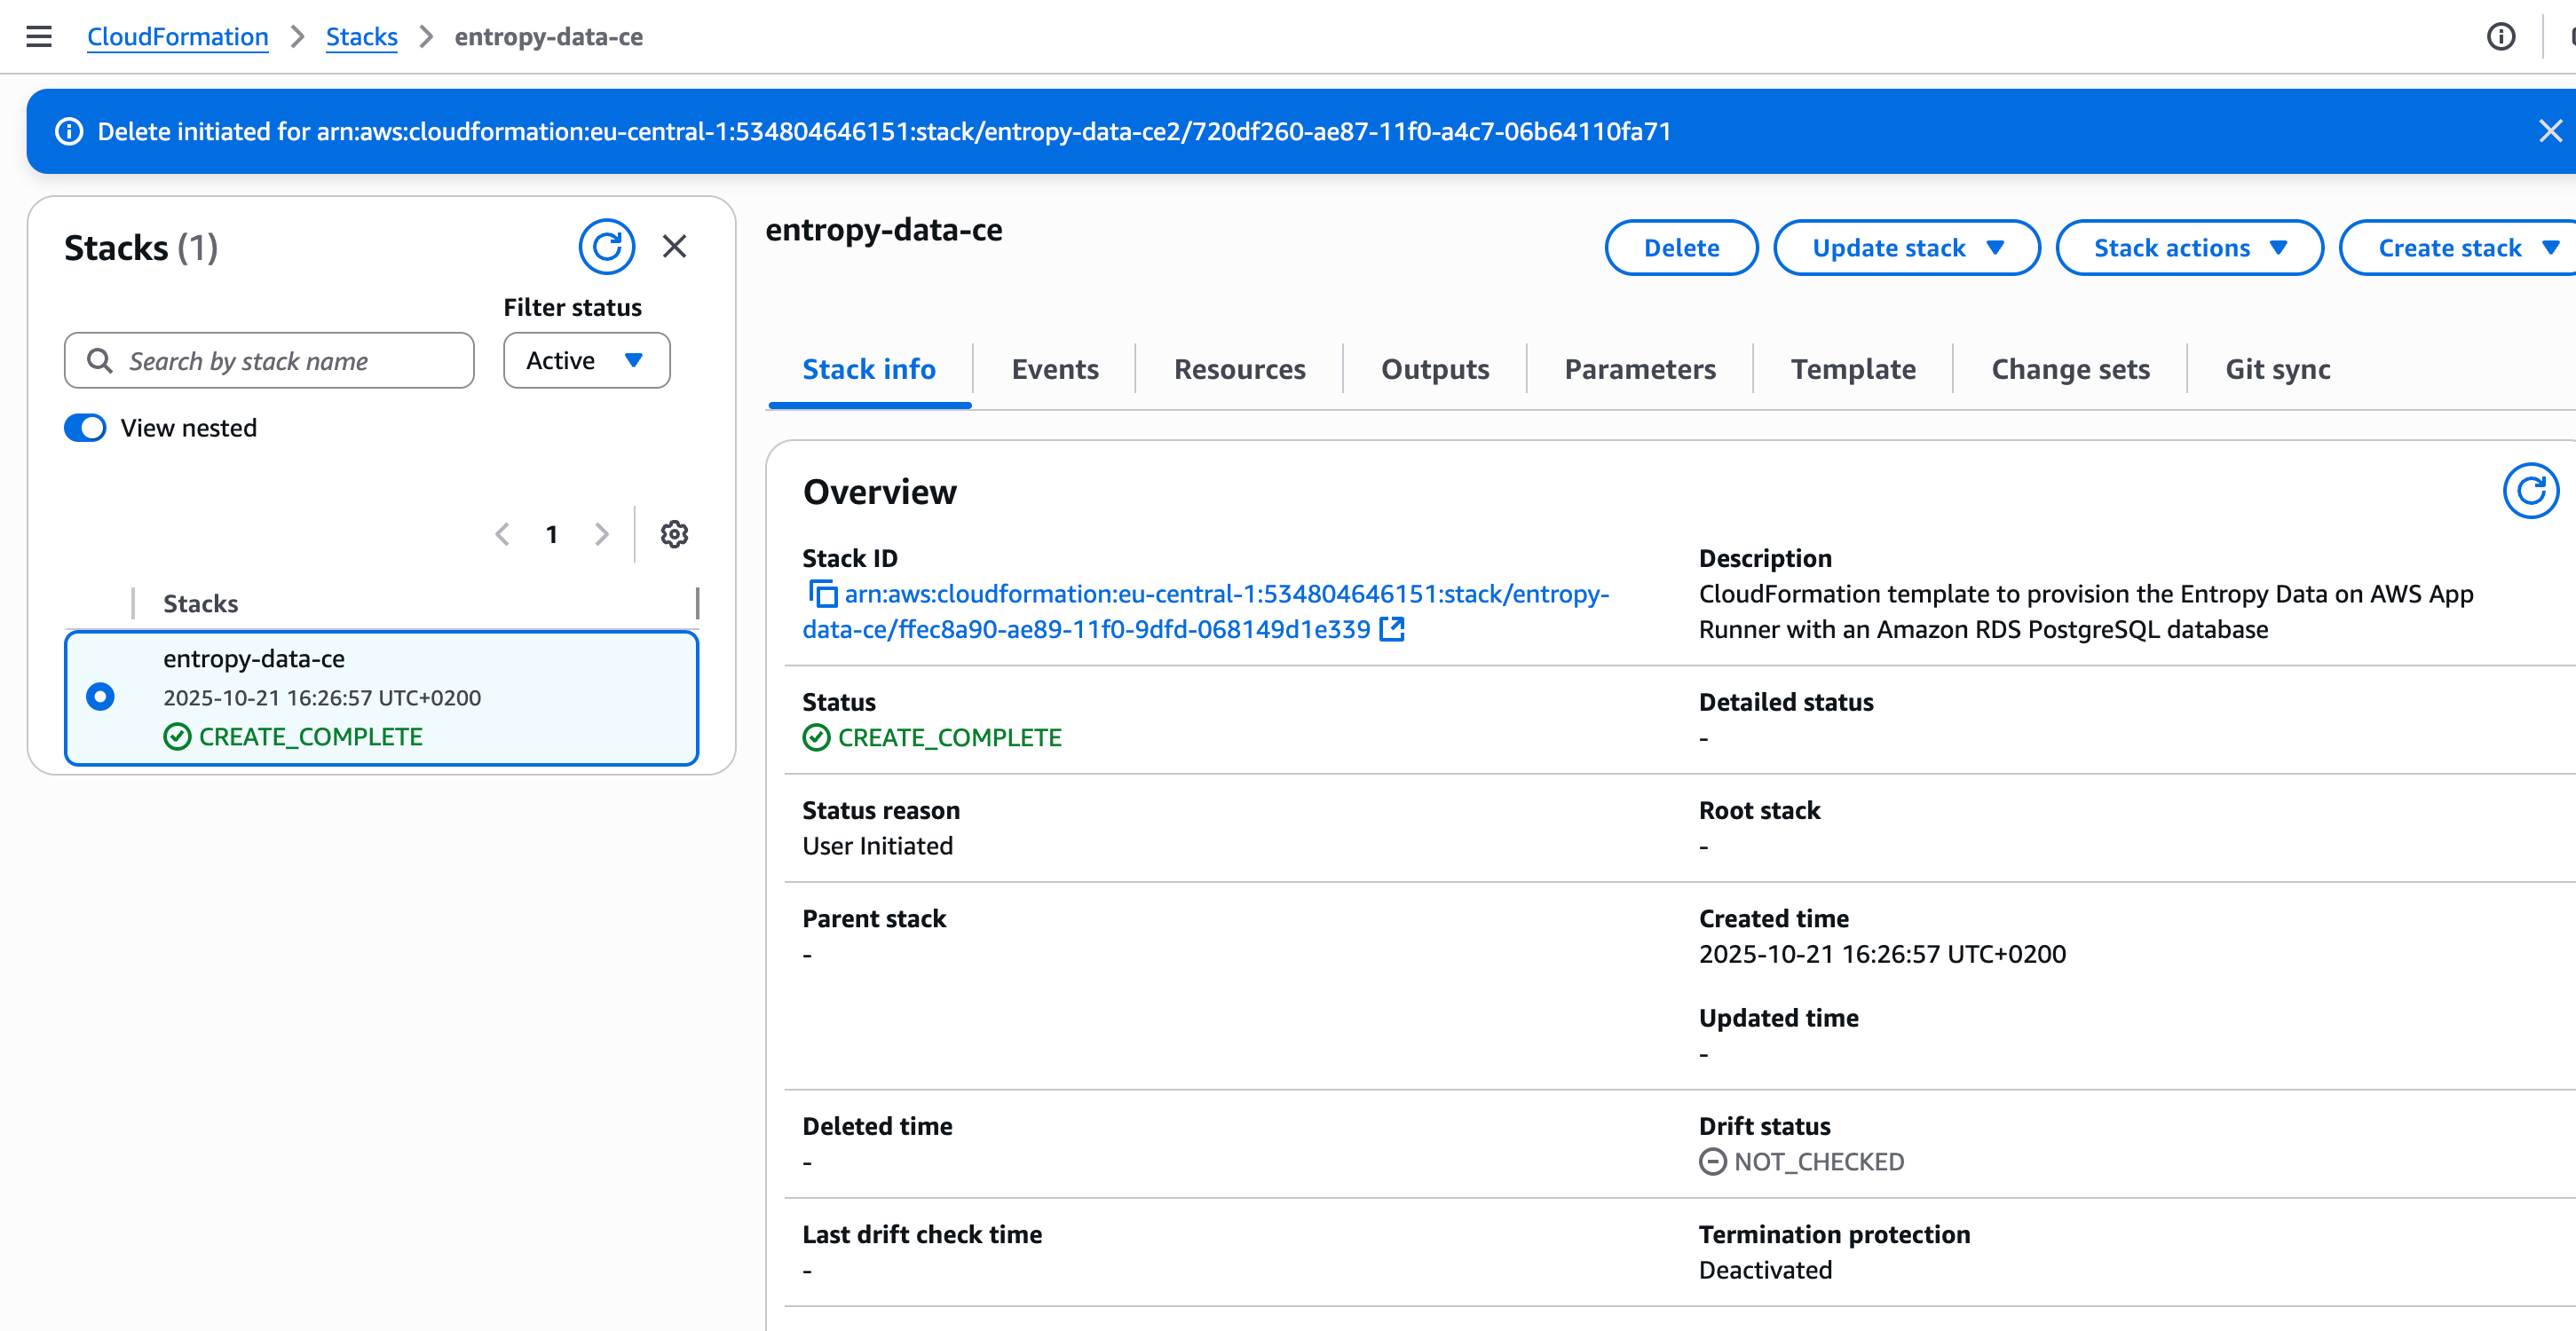
Step 2: Monitor Stack Creation
The CloudFormation stack will create all necessary resources including VPC, RDS PostgreSQL database, and App Runner service. This typically takes 10-15 minutes.
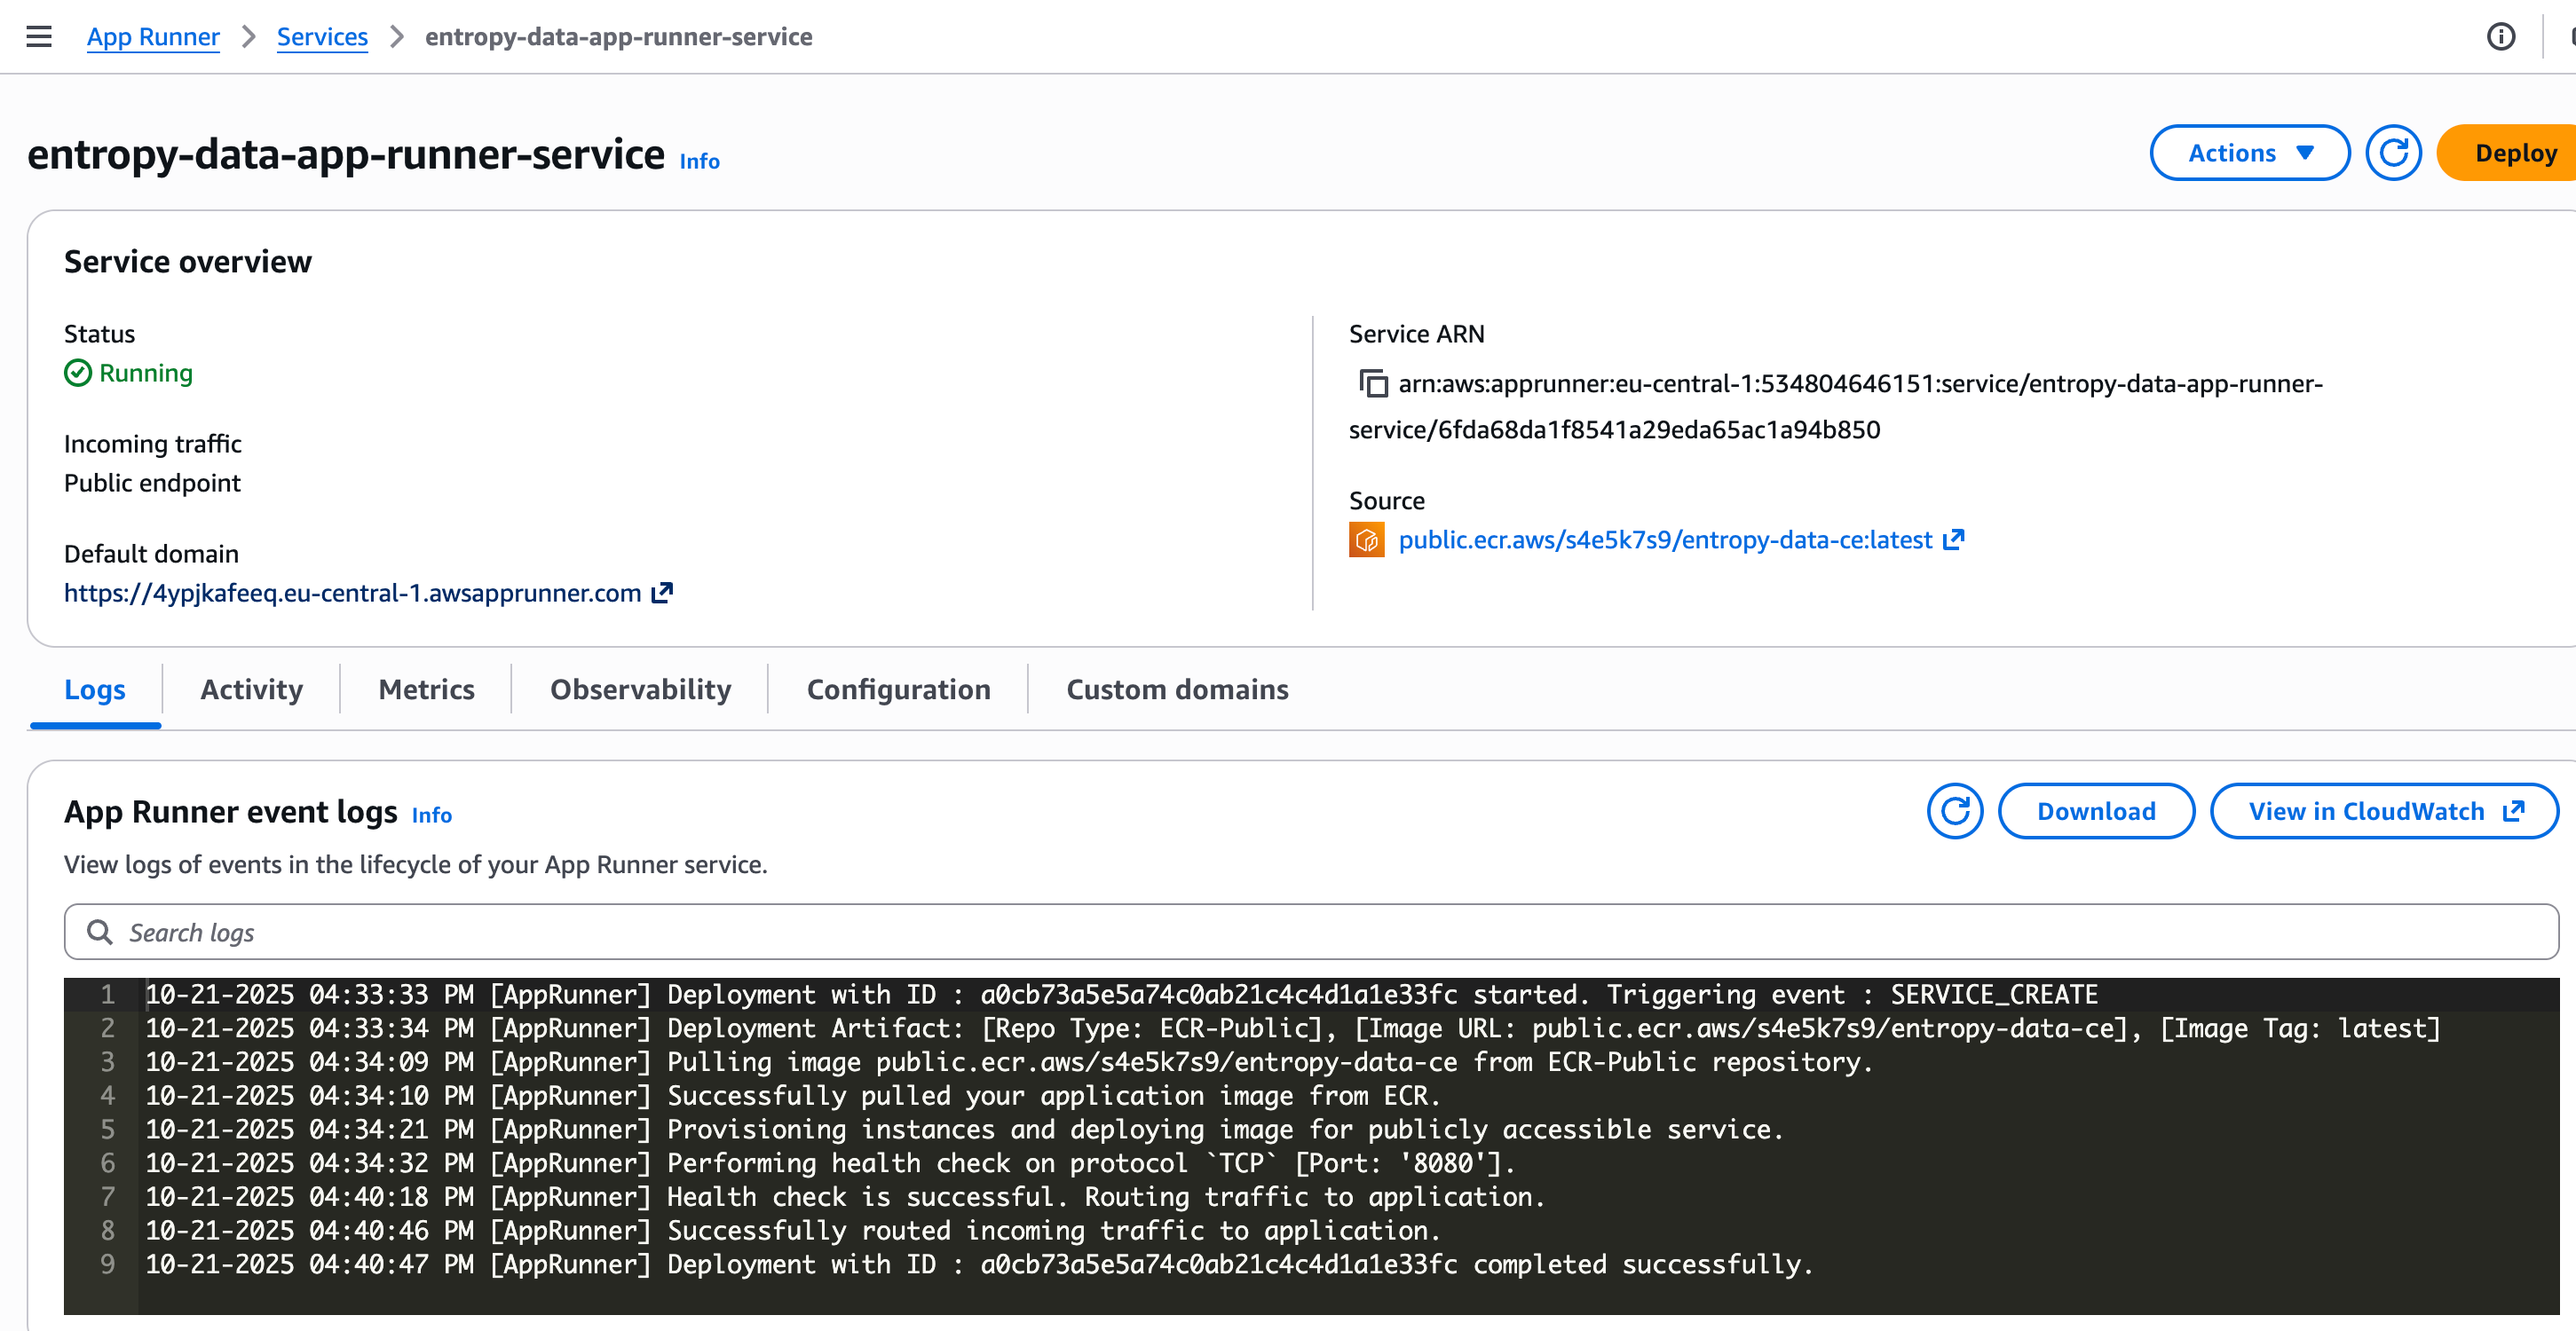
Step 3: Access Your App Runner Service
Once the stack is created, navigate to App Runner to view your service details and access the application URL.
Step 4: Configure Custom Domain (Optional)
By default, App Runner provides a generated domain (e.g., https://abc123.eu-central-1.awsapprunner.com). To use your own custom domain:
- In the App Runner console, select your service
- Navigate to the Custom domains tab
- Click Link domain
- Enter your domain name (e.g.,
entropy.example.com) - App Runner will provide validation records (CNAME or certificate validation records)
- Add these DNS records to your domain's DNS configuration
- Once validated, App Runner will automatically provision an SSL/TLS certificate
- Update the
PUBLIC_URLenvironment variable in your CloudFormation stack to match your custom domain
Note: DNS propagation can take up to 48 hours, though it typically completes within a few minutes to hours.
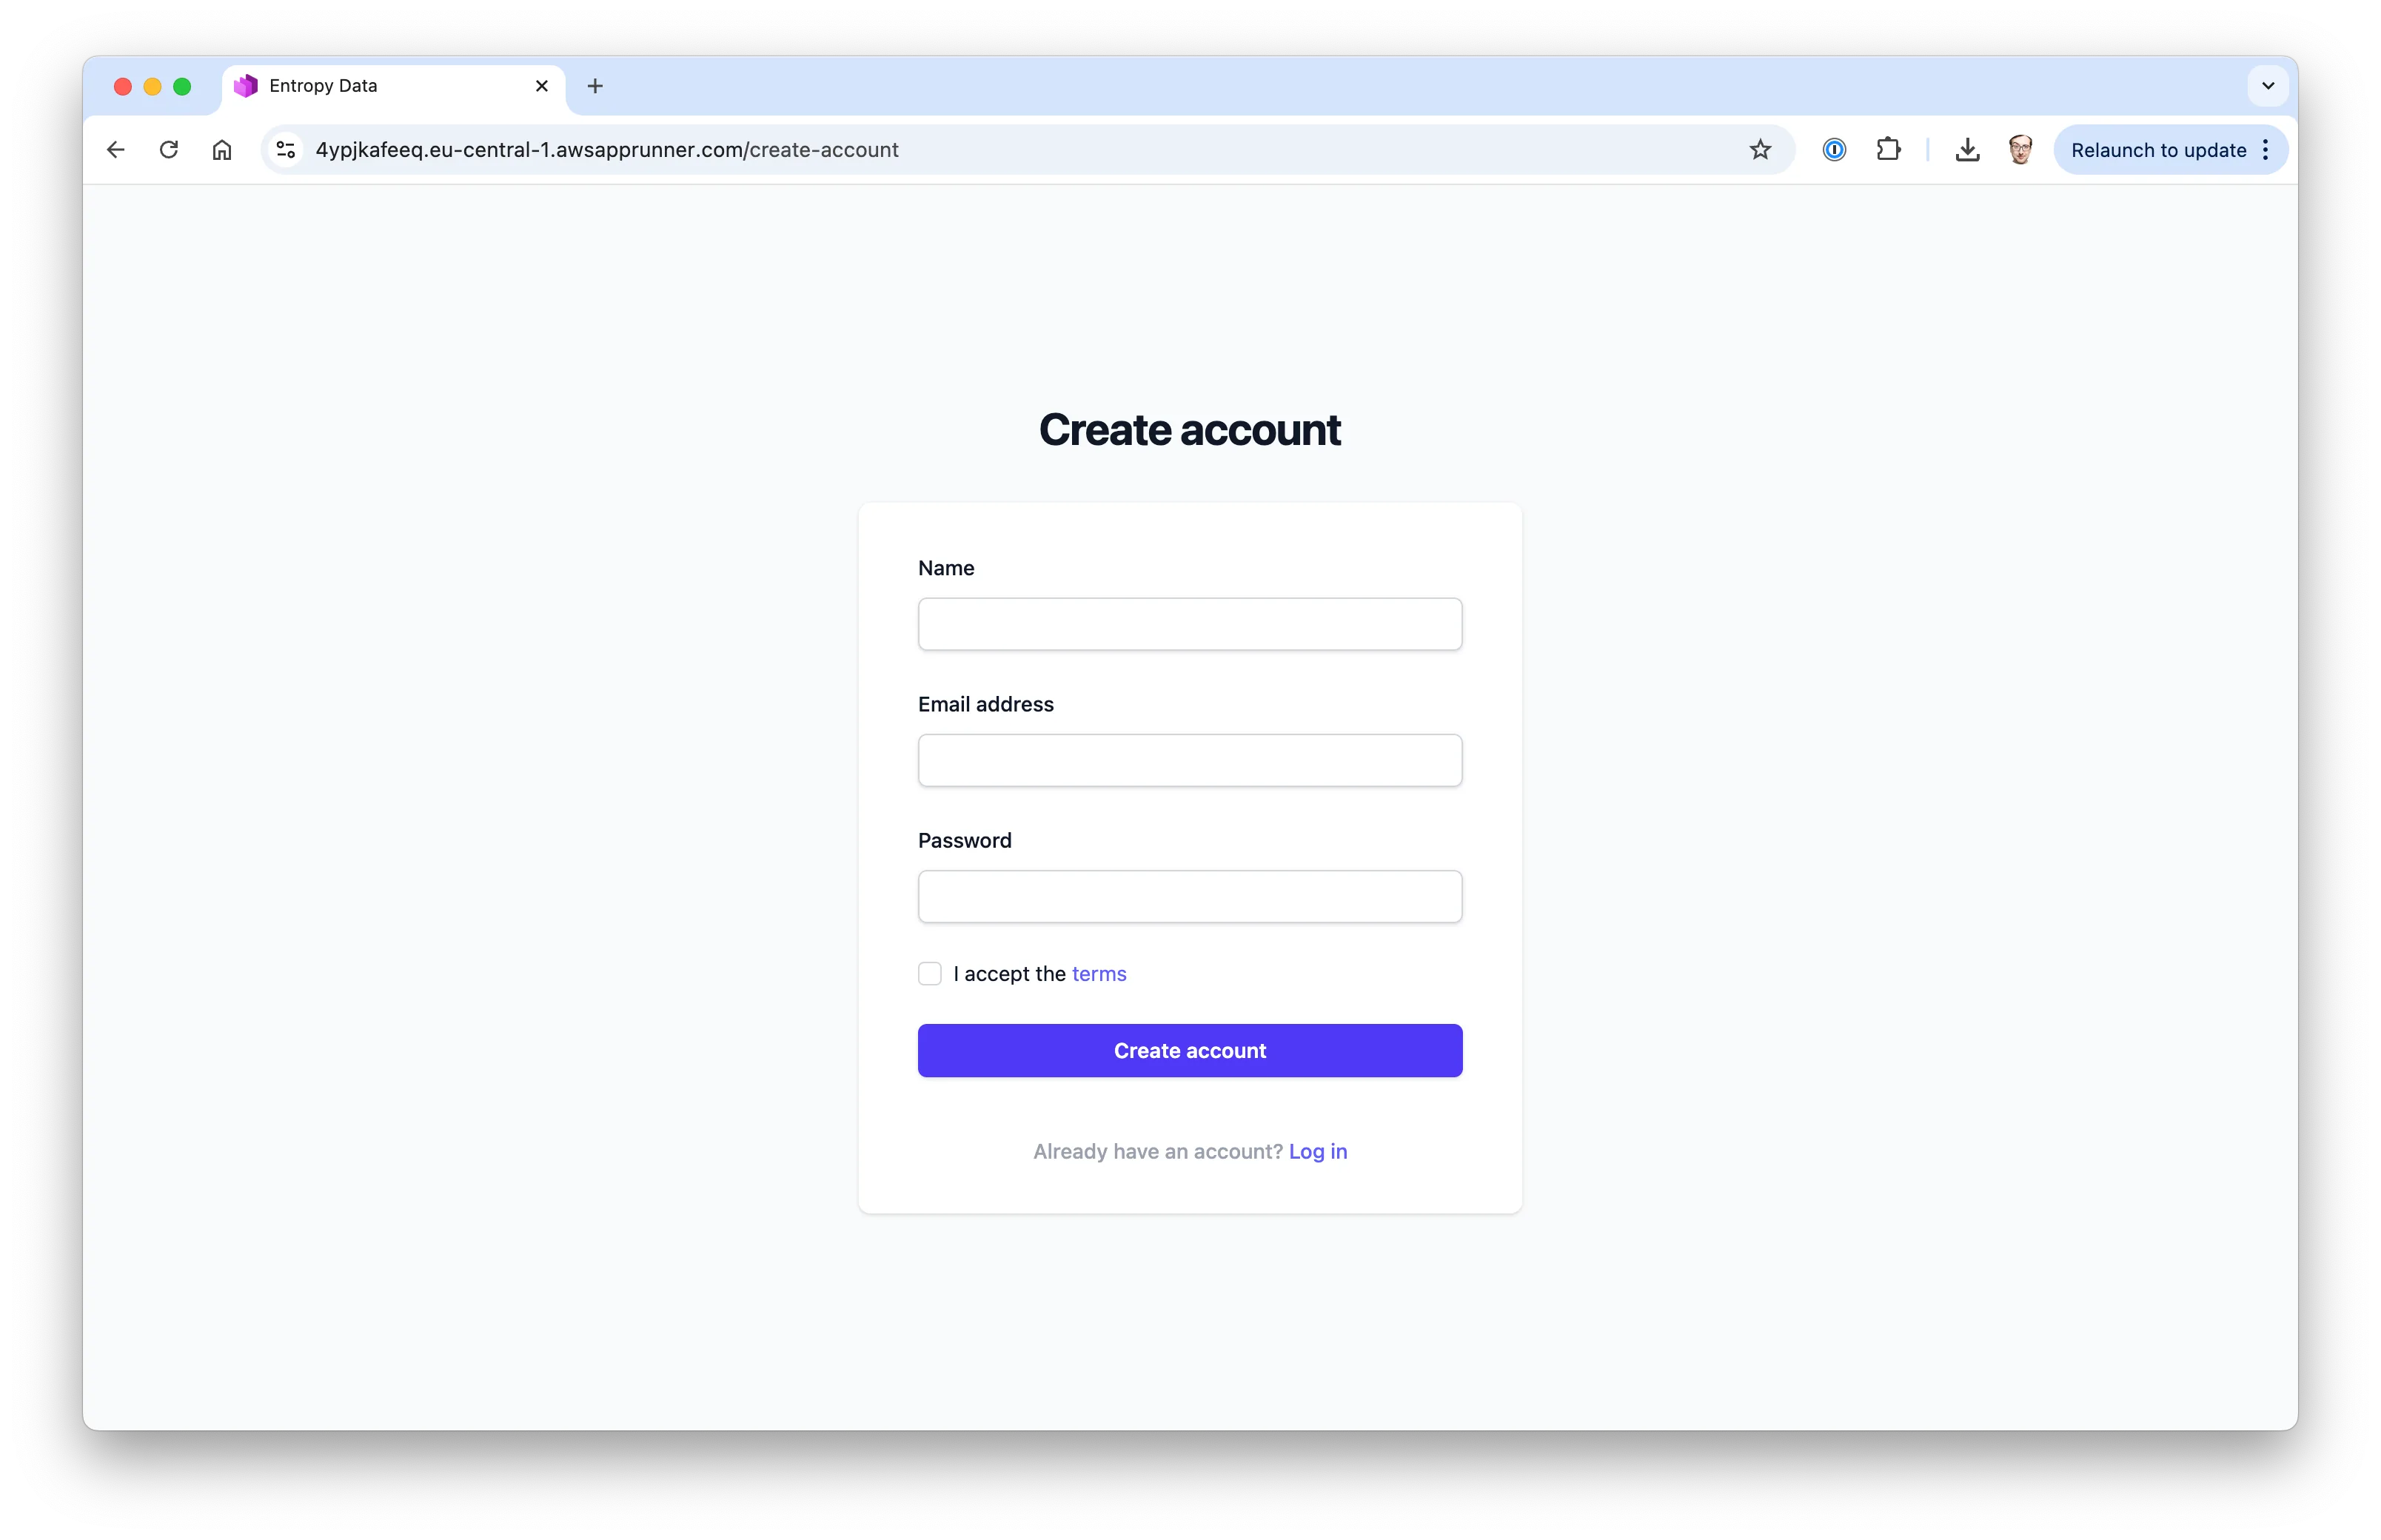
Step 5: Create Your Account
Open the App Runner service URL in your browser and create your first account .
Amazon ECS Fargate Deployment
If App Runner is not available in your account or region, use the ECS Fargate template. It creates a VPC, an RDS PostgreSQL database, an ECS service with autoscaling, and an Application Load Balancer.
Deploy Using CloudFormation
The template is also available on GitHub for deployment with the AWS CLI.
Required permissions: The stack creates IAM roles for the ECS task, so the deploying user needs IAM write permissions (iam:CreateRole, iam:AttachRolePolicy, iam:PutRolePolicy, iam:PassRole, iam:DeleteRole) in addition to permissions for CloudFormation, EC2/VPC, ECS, Elastic Load Balancing, RDS, Secrets Manager, CloudWatch Logs, and Application Auto Scaling. The AWS managed PowerUserAccess policy is not sufficient: stack creation fails at the IAM roles and the rollback fails as well. Use AdministratorAccess or a custom policy that includes the IAM actions above. When deploying with the AWS CLI, pass --capabilities CAPABILITY_IAM.
Step 1: Configure Stack Parameters
All parameters have defaults except SuperAdmins, so a first test deployment only needs a stack name and your email address. The parameters match the App Runner template (image, database, SMTP, SuperAdmins) with these differences:
- SMTP settings: Optional. Leave
SMTPHostempty to deploy without email delivery and add it later by updating the stack. - ApplicationHostWeb: Public URL of your instance, e.g.
https://entropy.example.com. Leave empty to use the load balancer DNS name over HTTP for a first test. - CertificateArn: ACM certificate for HTTPS. Request it in the same region as the stack. Leave empty for HTTP only.
- TaskCpu / TaskMemory / DesiredCount / MaxCount: Fargate task size and autoscaling range.
MaxCountdefaults to1, which disables scale-out. Set it higher thanDesiredCountto enable CPU-based autoscaling. - Azure SSO: Optional Microsoft Entra ID parameters, see SSO.
Stack creation takes about 15 minutes, mostly for the database.
Step 2: Access the Application
The stack output ApplicationURL contains the URL. Open it, you are redirected to the account creation page. Create your first account with one of the email addresses listed in SuperAdmins.
Step 3: Configure Custom Domain (Optional)
- Request a certificate for your domain in AWS Certificate Manager (same region as the stack)
- Create a CNAME record from your domain to the
LoadBalancerDNSNamestack output - Update the stack with
CertificateArnandApplicationHostWebset. HTTP requests are then redirected to HTTPS.
Adding Environment Variables
All configuration options are environment variables. Values without a stack parameter can be added to the Environment list of the container definition in the template. Secrets (database credentials, SMTP password, SSO client secret) are stored in AWS Secrets Manager and referenced from the task definition, they do not appear in plain text.
Upgrading
Update the stack with a new ImageIdentifier tag. ECS performs a rolling deployment and rolls back automatically if the new version does not pass the health check.
Deleting the Stack
The database has deletion protection enabled by default. To delete the stack, first update it with DBDeletionProtection set to false, then delete the stack. A final snapshot of the database is kept.
Configure AWS SES
AWS Simple Email Service (SES) is a cost-effective email service that can be used to send transactional emails. If you already have an SMTP service for transactional emails, you can skip this section. This section explains how to set up AWS SES and configure it in your CloudFormation stack.
Setting up AWS SES
Step 1: Add and Verify Your Email Address or Domain
- Navigate to the Amazon SES console
- In the left sidebar, click on Identities under Configuration
- Click Create identity
- Choose Email address for quick setup, or Domain for production use (recommended)
- For email address: Enter the email address you want to use as the sender (e.g.,
info@example.com) - For domain: Enter your domain name (e.g.,
example.com) and follow the DNS verification steps - Click Create identity
- If using email address verification, AWS will send a verification email. Click the verification link to complete verification.
- If using domain verification, add the provided DNS records (TXT, CNAME, MX) to your domain's DNS configuration
Recommended: Use domain verification for production deployments as it allows you to send from any email address at your domain without individual verification.

Step 2: Configure Domain Authentication (Recommended)
For better email deliverability, configure SPF, DKIM, and DMARC as described.
These settings help ensure your emails are not marked as spam and improve deliverability rates.
Step 3: Create SMTP Credentials
- In the Amazon SES console, navigate to SMTP settings in the left sidebar
- Note the SMTP endpoint for your region (e.g.,
email-smtp.eu-central-1.amazonaws.com) - Click Create SMTP credentials in the top right
- Enter a descriptive IAM User Name (e.g.,
entropy-data-smtp-user) - Click Create user
- Important: Download and save the SMTP credentials (username and password). You will need these for the CloudFormation configuration
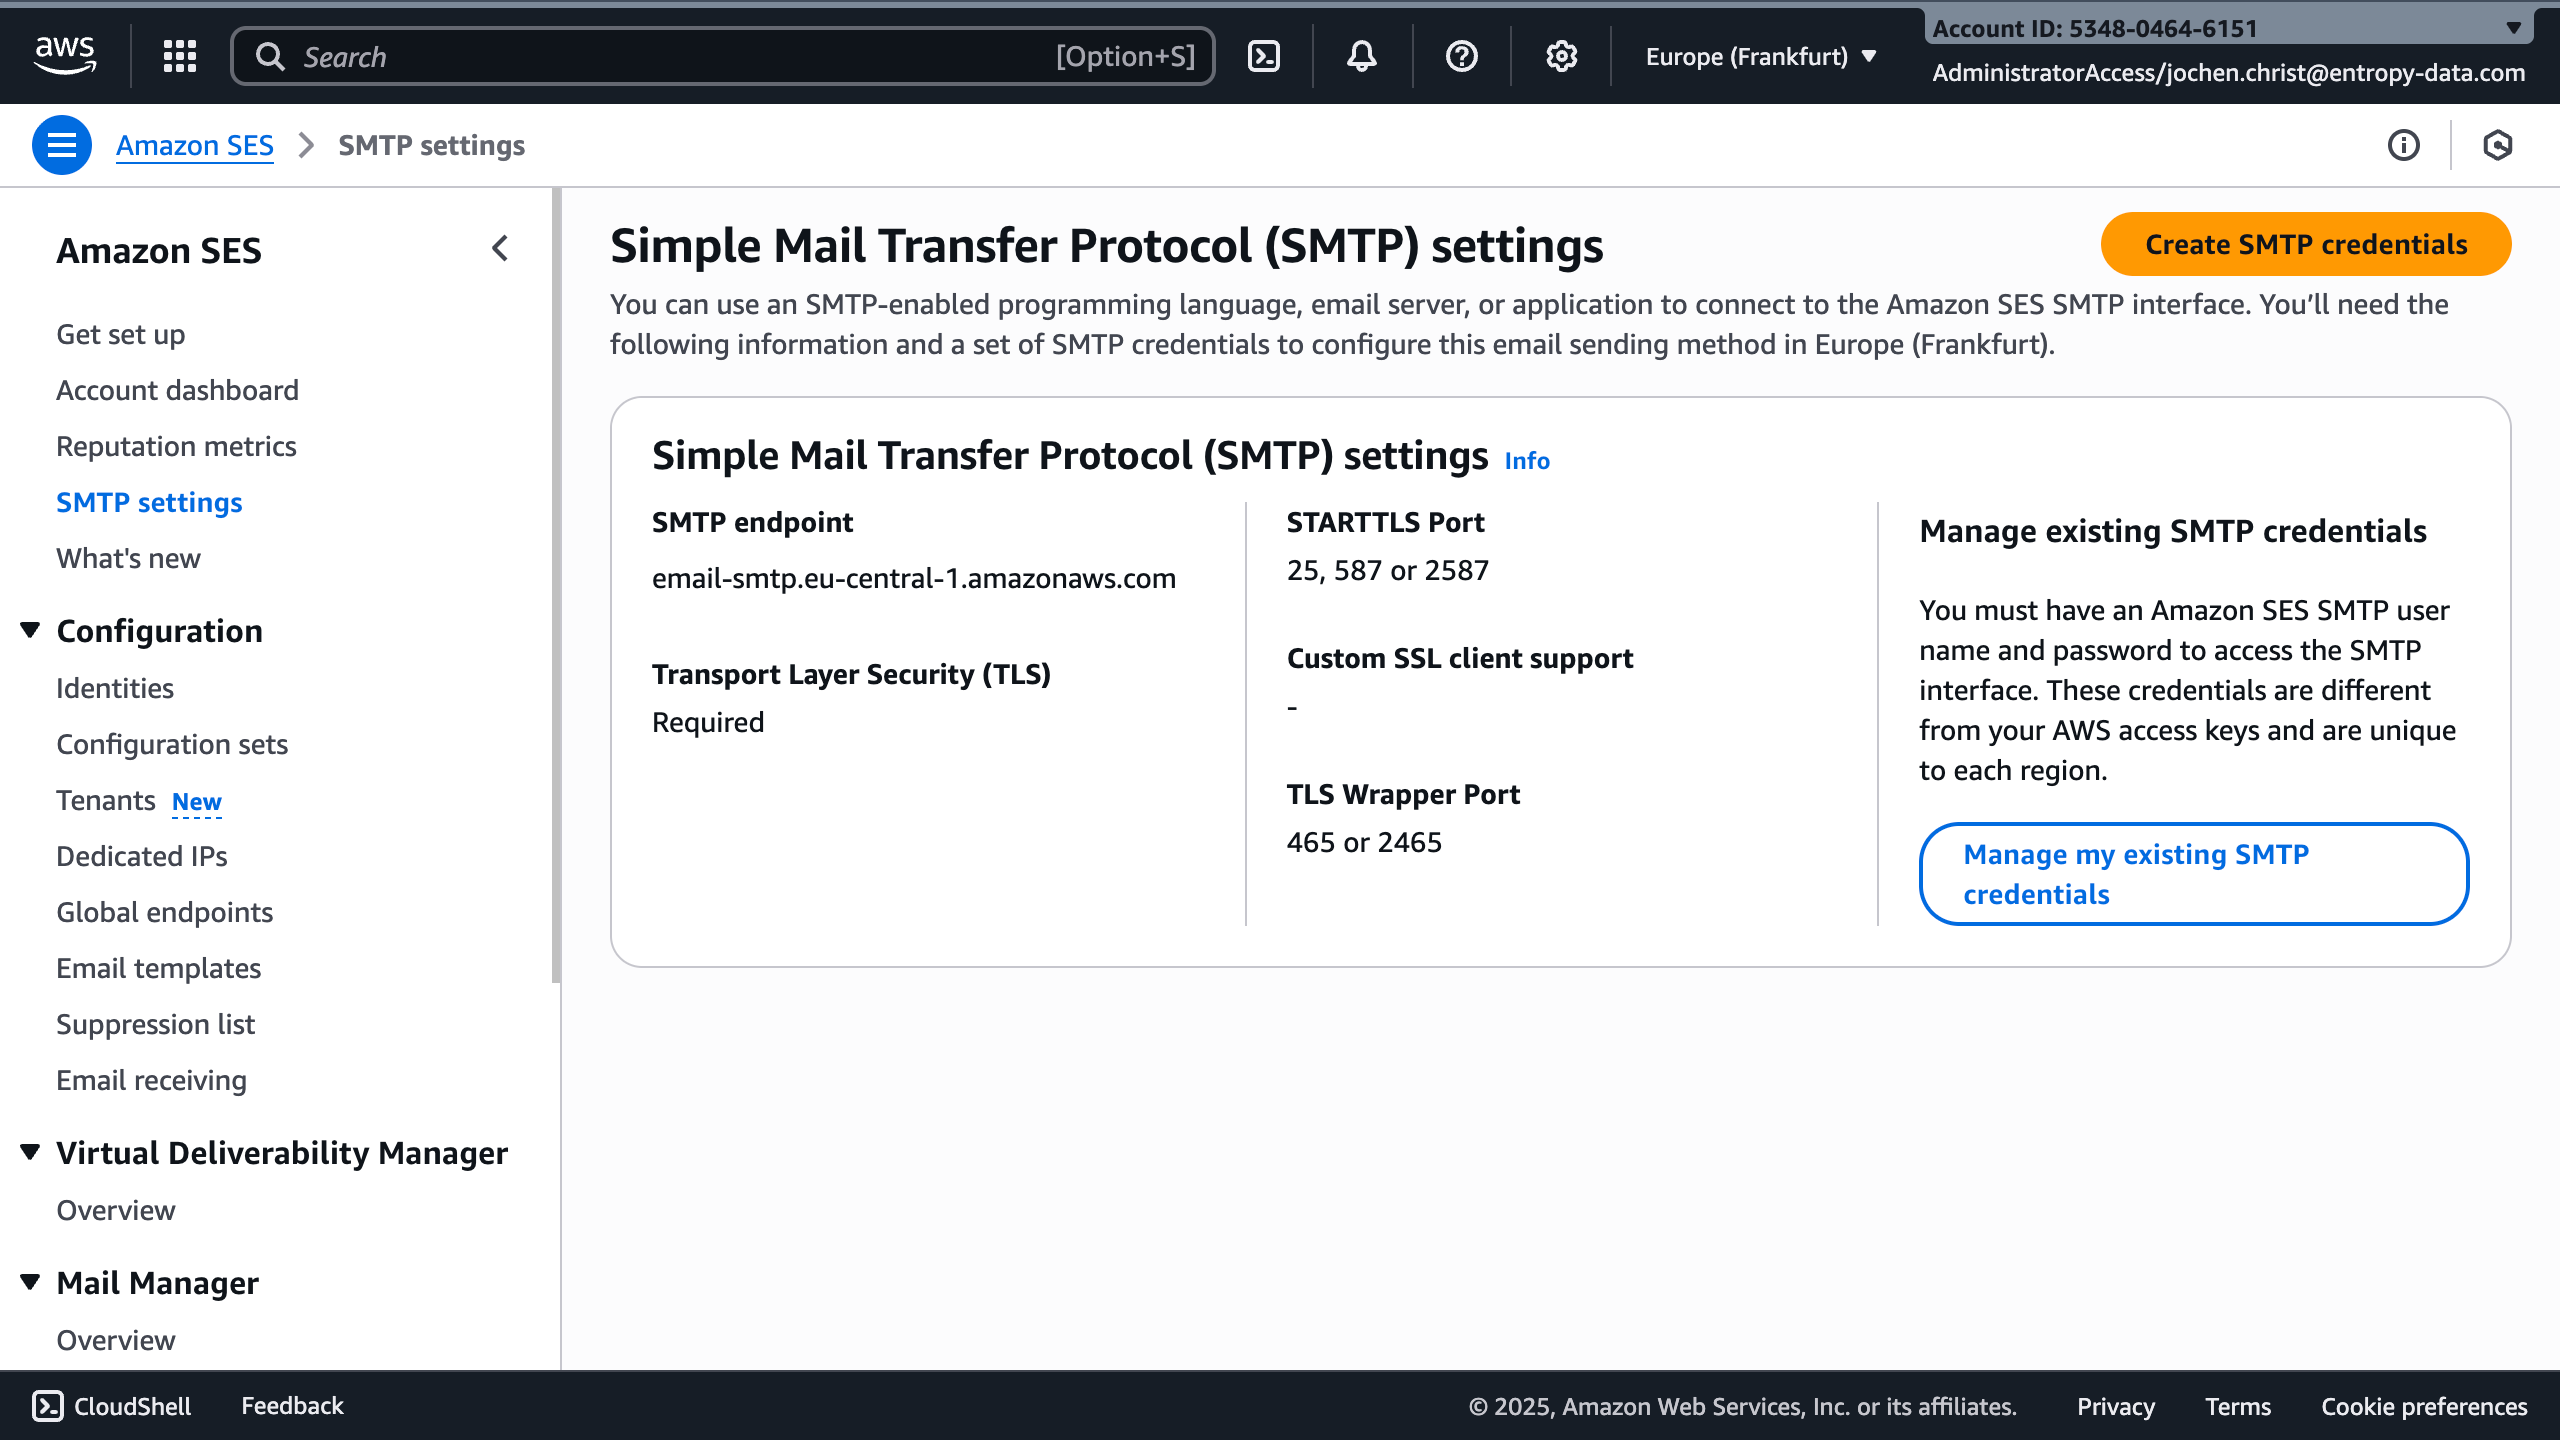
Step 4: Note Your SMTP Configuration Details
The SMTP settings page displays all the information you'll need:
- SMTP endpoint: The hostname for your region (e.g.,
email-smtp.eu-central-1.amazonaws.com) - STARTTLS Port: 25, 587, or 2587
- TLS Wrapper Port: 465 or 2465
- Transport Layer Security (TLS): Required
CloudFormation SMTP Parameters
When deploying the CloudFormation stack, configure the following SMTP parameters:

- MailFrom: Email address to send emails from (must be verified in SES, e.g.,
info@example.com) - SMTPBasicAuth: Set to
trueto use basic authentication for SMTP server - SMTPHost: SMTP server hostname (e.g.,
email-smtp.eu-central-1.amazonaws.com) - SMTPPassword: SMTP server password (from the credentials you created in Step 3)
- SMTPPort: SMTP server port (use
587) - SMTPStartTLS: Set to
trueto use STARTTLS for SMTP server (recommended for port 587) - SMTPUsername: SMTP server username (from the credentials you created in Step 3, NOT the IAM user name)
SES Sandbox Mode
By default, new AWS SES accounts start in sandbox mode, which has the following limitations:
- You can only send emails to verified email addresses and domains
- You can only send from verified email addresses and domains
- You can send up to 200 emails per 24-hour period
- You can send up to 1 email per second
To remove these limitations and send emails to any recipient:
- Navigate to the Amazon SES console
- In the left sidebar, click Account dashboard
- Look for the Sending statistics section which will show if you're in sandbox mode
- Click Request production access
- Fill out the request form with details about your use case
- AWS typically reviews and approves requests within 24 hours
Testing Your Configuration
After deploying the CloudFormation stack with your SMTP settings:
- Access your Entropy Data instance URL
- Create a new user account or reset your password
- Check that you receive the verification email
- Monitor the SES console under Account dashboard > Sending statistics to track email delivery
Next Steps
- Configure SSO for user authentication
- Set up SCIM for user provisioning
- Configure observability for monitoring
- Review all configuration options
- Explore AWS integration