Set up GitHub Copilot in VS Code
This guide walks you through setting up GitHub Copilot in Visual Studio Code. To use Copilot in VS Code, you need to have access to GitHub Copilot with your GitHub account and have the Copilot extensions installed in VS Code.
If you don't yet have a Copilot subscription, you can use Copilot for free by signing up for the Copilot Free plan and get a monthly limit of completions and chat interactions.
Get access to GitHub Copilot
There are different ways to get access to GitHub Copilot:
| Type of User | Description |
|---|---|
| Individual |
|
| Organization/Enterprise member |
|
Set up Copilot in VS Code
VS Code provides a streamlined experience to set up GitHub Copilot. This installs the GitHub Copilot extensions and signs you in to your GitHub account. If you don't have a Copilot subscription yet, it activates the Copilot Free plan.
-
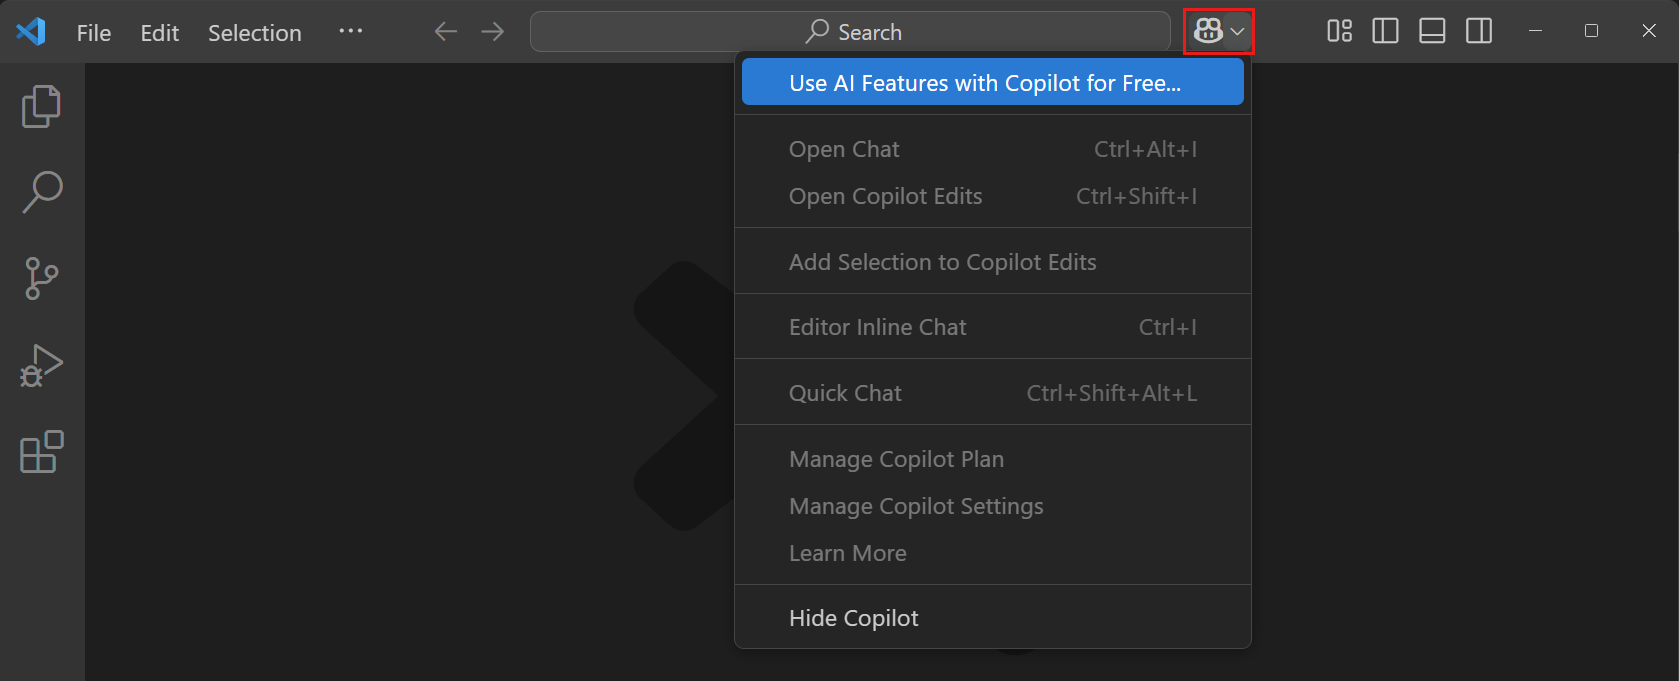
Select Use AI Features with Copilot for Free... from the Copilot menu in the VS Code title bar or from the Command Palette (⇧⌘P (Windows, Linux Ctrl+Shift+P))
 Tip
TipYou can also open the Chat view directly by using the keyboard shortcut ⌃⌘I (Windows, Linux Ctrl+Alt+I) or with the Open Chat command.
-
Select Sign in to Use Copilot for Free to sign in to your GitHub account. This step also installs the Copilot extensions.
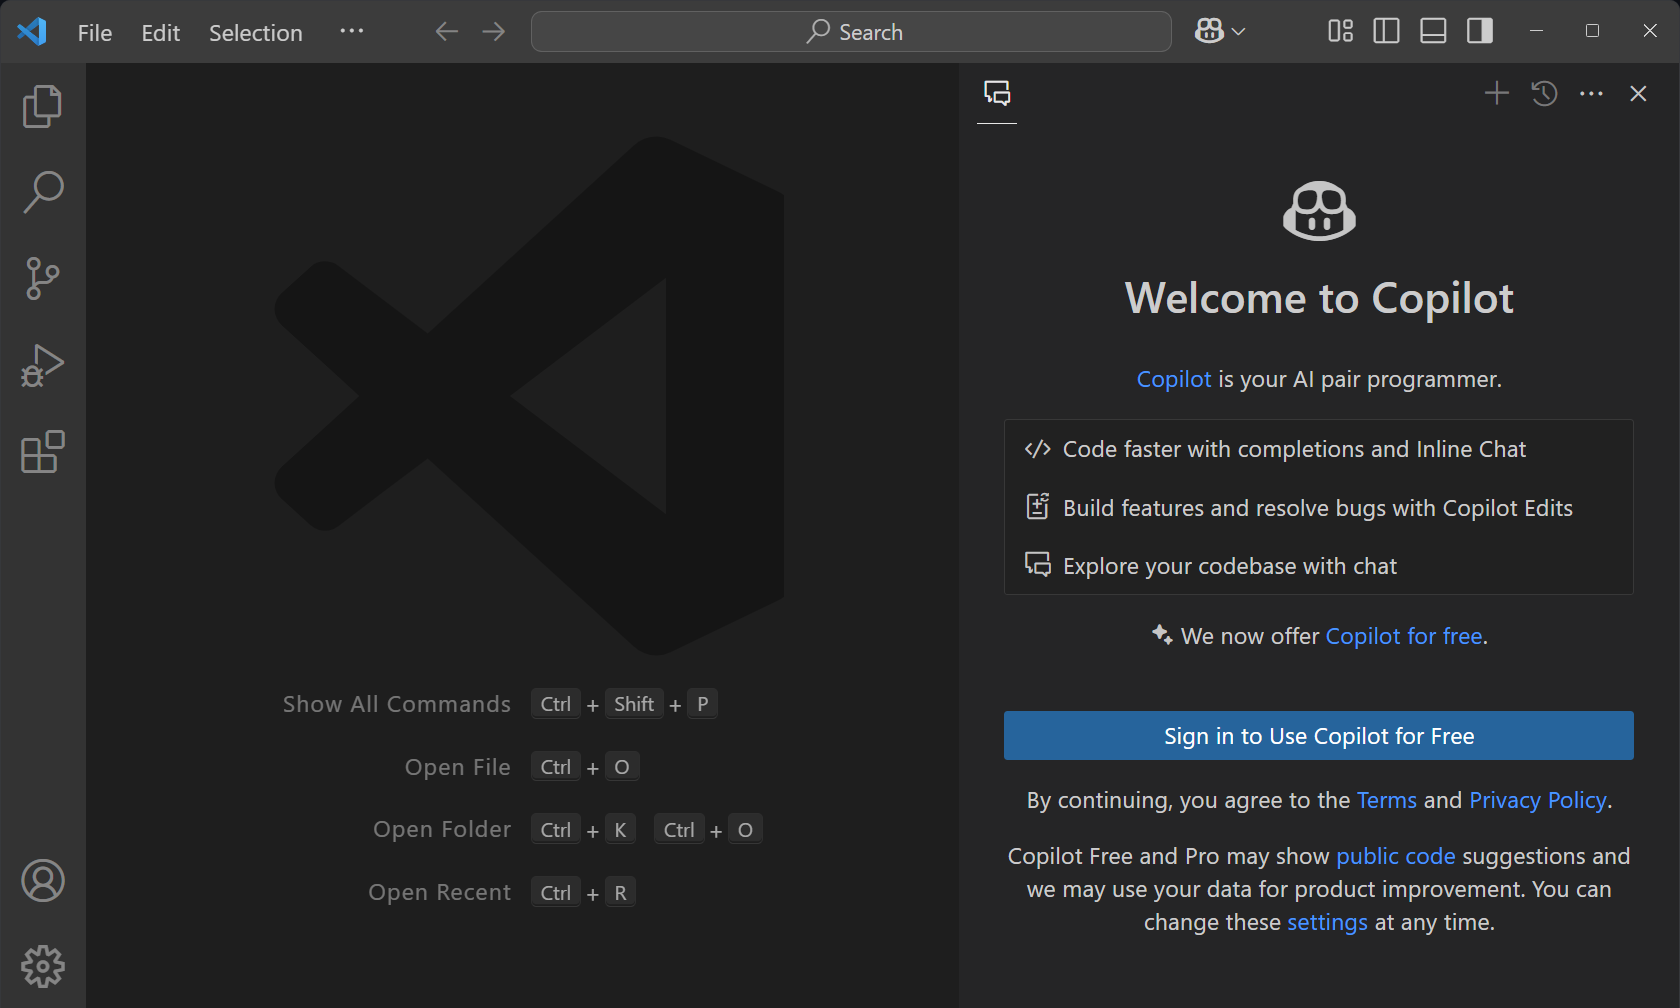
If you already have a Copilot subscription, you can now start using Copilot in VS Code.
-
If you don't yet have a Copilot subscription, follow the steps in the browser to sign up for the Copilot Free plan
ImportantTelemetry in your free version of GitHub Copilot is currently enabled. By default, code suggestions that match public code, including code references in the VS Code and <github.com> experience, are allowed. You can opt out of telemetry data collection by disabling telemetry in VS Code by setting telemetry.telemetryLevel to
off, or you can adjust both telemetry and code suggestion settings in Copilot Settings.
Get started with Copilot in VS Code
After you've signed in to your GitHub account and have access to Copilot, start to explore AI-powered coding in VS Code.
-
Verify that the Chat view (⌃⌘I (Windows, Linux Ctrl+Alt+I)) shows, and that you can enter a prompt in the chat input box.
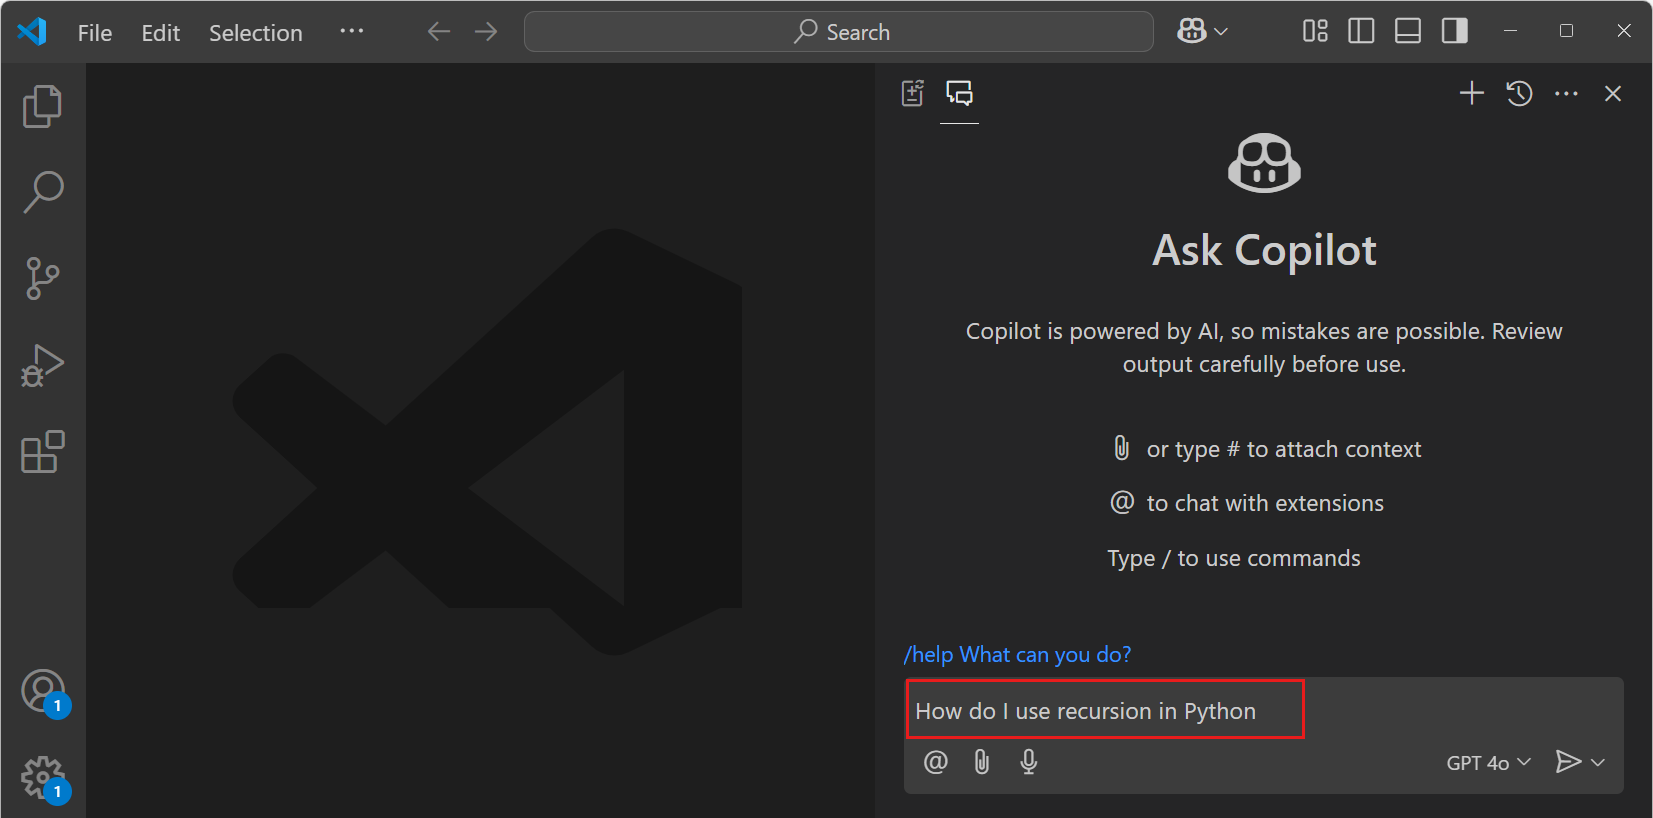
Notice that you can choose from multiple language models to use with Copilot.
-
Continue with the Copilot Quickstart to discover the key features of Copilot in VS Code.
Manually set up GitHub Copilot in VS Code
To manually set up GitHub Copilot in VS Code, perform the following steps:
-
Install the GitHub Copilot extensions in VS Code
You can also open the Extensions view and search for GitHub Copilot to install the extension.
NoteWhen you install the GitHub Copilot extension, the GitHub Copilot Chat extension is also installed.
-
Sign in to Copilot from VS Code
Sign in to your GitHub account by entering GitHub Copilot: Sign in in the Command Palette (⇧⌘P (Windows, Linux Ctrl+Shift+P))

Use a different GitHub account with Copilot
If your Copilot subscription is associated with another GitHub account, sign out of your GitHub account in VS Code, and sign in with another account.
-
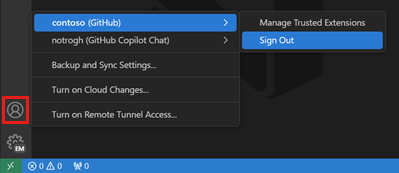
Select the Accounts menu in the Activity Bar, and then select Sign out for the account you're currently signed in with for Copilot.
-
Sign in to your GitHub account by entering GitHub Copilot: Sign in in the Command Palette (⇧⌘P (Windows, Linux Ctrl+Shift+P))
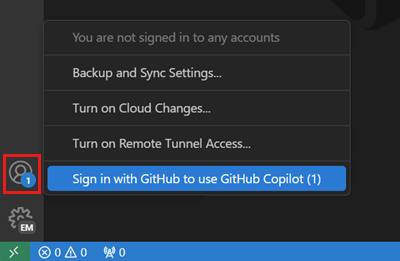
Alternatively, sign in to GitHub in VS Code by selecting the Accounts menu in the Activity Bar, and then Sign in with GitHub to use GitHub Copilot.
Next steps
-
Continue with the Copilot Quickstart to discover the key features of Copilot in VS Code.
-
Check our Copilot cheat sheet for an overview of the key Copilot commands and shortcuts.