Ruby on Rails (RoR) is an effective internet application framework that follows the version-View-Controller (MVC) structure. One of the standout features of Rails is its capacity to generate boilerplate code through scaffolding, which hastens the improvement system by presenting a foundation for CRUD (Create, study, replace, Delete) operations. Scaffolding automates the creation of fashions, views, and controllers, allowing developers to focus on including commercial enterprise common sense and refining their programs. This article focuses on discussing how to start with Scaffolding in Ruby on Rails.
Table of Content
Prerequisites
Before you start with scaffolding in Ruby on Rails, make sure you have the following:
- Ruby is installed on your system.
- Rails framework installed.
- Basic understanding of Ruby and Rails concepts.
- A code editor (e.g., VSCode, Sublime Text).
- Terminal or command line access.
Steps to Use Rails Scaffolding
Step 1: Create a New Rails Application
Use the following command to create a new rails application:
//bash
rails new MyBlog

This command sets up a new Rails application in a directory called 'MyBlog'. Navigate to this directory to begin operating for your utility.
//bash
cd MyBlog

Step 2: Set Up the Database
Use the following command to set up the database:
//bash
rails db:create

This command creates the database as per the configuration in 'config/database.yml'.
Step 3: Generate Scaffolding for Post Resource
Use the following command to generate scaffolding for post resource:
//bash
rails generate scaffold Post title:string content:text

This command generates the necessary files for the Post resource, including model, controller, views, and migration files.
Step 4: Migrate the Database
Enter the below command in terminal to migrate the database:
//bash
rails db:migrate

This command applies the migrations to create the vital database tables.
Step 5: Review the Generated Controller Code
Use the below command to review the generated controller code:
//bash
nano app/controllers/posts_controller.rb

The 'PostsController' file includes moves for dealing with CRUD operations.
Example Code:
class PostsController < ApplicationController
  def index
    @posts = Post.all
  end

  def show
    @post = Post.find(params[:id])
  end

  def new
    @post = Post.new
  end

  def create
    @post = Post.new(post_params)
    if @post.save
      redirect_to @post
    else
      render :new
    end
  end

  def edit
    @post = Post.find(params[:id])
  end

  def update
    @post = Post.find(params[:id])
    if @post.update(post_params)
      redirect_to @post
    else
      render :edit
    end
  end

  def destroy
    @post = Post.find(params[:id])
    @post.destroy
    redirect_to posts_path
  end

  private

  def post_params
    params.require(:post).permit(:title, :content)
  end
end
Step 6: Enhance the Model
Use the following command to enhance the model:
//bash
nano app/models/post.rb

Example Code:
class Post < ApplicationRecord
  validates :title, presence: true, length: { minimum: 5 }
  validates :content, presence: true
end
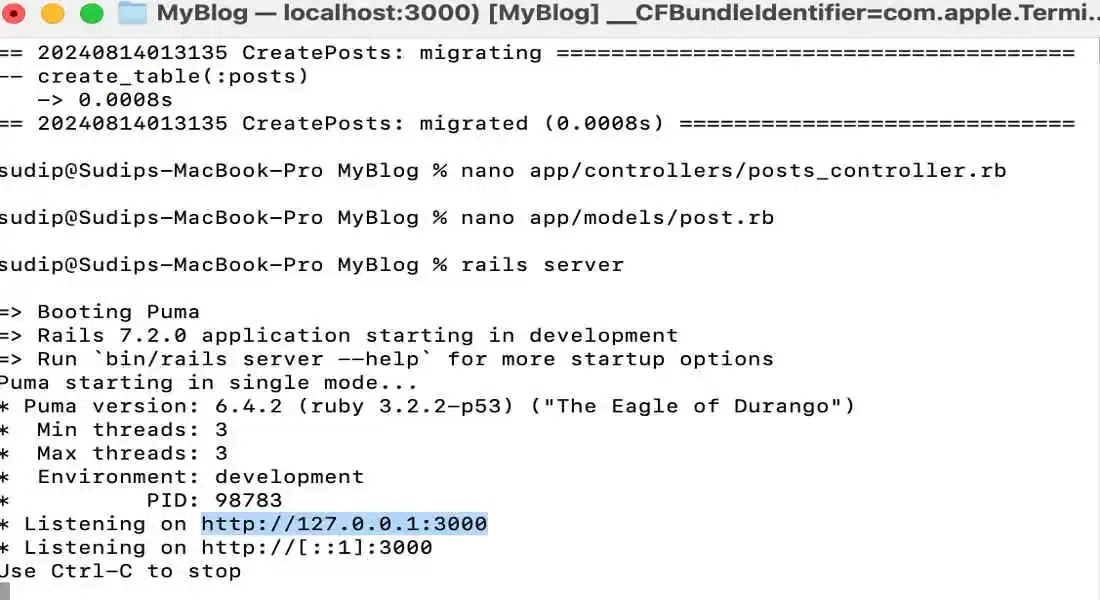
Step 7: Start the Rails Server
Use the command to start the Rails server:
//bash
rails server

Run this command to start the Rails server and get entry to your application at 'http://localhost:3000/posts'.
Step 8: Access Your Application


Open your internet browser and go to 'http://localhost:3000/posts' to view the software.
Note:
There is an alternative way to create Scaffolding. If you prefer more control, you can manually create models, controllers, and views. Even as the rails generate scaffold command is convenient, you may additionally create scaffolding little by little with the aid of generating the model, controller, and views in my opinion.
Step 9: Generate Model
Use the below command to generate the model:
//bash rails generate model Post title:string content:text

Step 10: Generate Controller
Following command will be used to generate controller:
//bash rails generate controller Posts

Step 11: Create Views Manually
Create view documents such as 'index.html.erb', 'show.html.erb', 'new.html.erb', and 'edit.html.erb' in the app/views/posts folder.
erb <h1>Posts</h1> <%= link_to 'New Post', new_post_path %> <table> <thead> <tr> <th>Title</th> <th>Body</th> <th colspan="3"></th> </tr> </thead> <tbody> <% @posts.each do |post| %> <tr> <td><%= post.title %></td> <td><%= post.body %></td> <td><%= link_to 'Show', post %></td> <td><%= link_to 'Edit', edit_post_path(post) %></td> <td><%= link_to 'Destroy', post, method: :delete, data: { confirm: 'Are you sure?' } %></td> </tr> <% end %> </tbody> </table>
How Scaffolding is Different?
Scaffolding differs from manually coding every aspect in that it automates the advent of essential code, permitting builders to rapidly prototype and broaden applications.
- It serves as a place to start and can be changed as the software program grows in complexity.
- At the identical time as scaffolding is top notch for purchasing up and strolling speedy, it may generate extra code than vital, which may need refinement because the project evolves.
Conclusion
Ruby on Rails scaffolding is a powerful device that hurries up the development of net packages by generating the fundamental shape wanted for CRUD operations. It’s a outstanding way to get a prototype up and jogging speedy, allowing builders to awareness on including custom functions and good judgment. while scaffolding is efficient, it’s important to understand the underlying code it generates so you can personalize and optimize your utility as needed.