React MUI How to customize
Last Updated :
28 Apr, 2025
React MUI is a UI library that provides fully-loaded components, bringing our own design system to our production-ready components. MUI is a user interface library that provides predefined and customizable React components for faster and easy web development, these Material-UI components are based on top of Material Design by Google.
React MUI How To Customize is the process of modifying the default styles and behavior of components in the Material-UI library to fit the specific needs of a project or application. This customization can include changes to colors, typography, layout, and other design elements to match the look and feel of the project.
How To Customize Content:
- One-off Customization: It refers to making small changes to the default styling of a specific component in a single instance, rather than creating a global theme or customizing all instances of a particular component. This can be done by using the 'sx' prop, Overriding styles with class names, or with State classes.
- Reusable Component: It refers to a component that can be used in multiple places throughout an application, rather than being specific to a single location or page. These components can be customized using the 'styled' function that overrides the default styles for a specific component.
- Global theme overrides: It refers to the process of customizing the default styling of all components in an application by creating a global theme. This can be done by using the 'createTheme' function to create a new theme object that overrides the default values for various styling options, such as colors, typography, and spacing. Once a theme is created, it can be passed to the 'ThemeProvider' component,
- Global CSS override: It refers to the process of customizing the default styling of all components in an application by applying global CSS styles. This can be done by importing a CSS file containing custom styles into the root of the application, or by using the 'GlobalStyles' component to create a global style component that can be used to apply styles to specific elements or classes throughout the application.
Creating React Project:
Step 1: Create React app by writing the below code in any command line.
npx create-react-app app_name
Step 2: Then, we have to move into the folder we will be working on.
cd project_name
Step 3: We will be installing the @mui/material library for working on our project.
npm install @mui/material @emotion/react
npm install @emotion/styled @mui/icons-material
Project Structure:
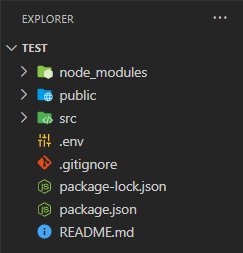 Folder Structure
Steps to run the application: Write the below code in the terminal to run the server:
npm start
Example 1: Below is the code for styling a Box component using the 'sx' prop.
JavaScript
import styled from "@emotion/styled";
import { Box } from '@mui/material';

const Text = styled.div`
    padding-left: 10px;
    padding-right: 5px;
`;

const Logo =
'https://media.geeksforgeeks.org/wp-content/uploads/20230104121959/logo.jpg';

const SimpleExample = () => {
    return (
        <Box sx={{
            width: '200px', height: '400px', boxShadow: 2,
            margin: '10px', bgcolor: '#9dedb2'
        }}>
            <img src={Logo} alt='GFG logo' width='200px'
                height='200px' />
            <Text>A Computer Science portal for geeks.
                It contains well written, well thought and
                well explained computer science and programming
                articles.
            </Text>
        </Box>
    );
}

export default SimpleExample;
Output:
 Simple example using 'sx' prop
Example 2: Below is the code for making a Reusable Slider component using Global CSS override.
JavaScript
import * as React from 'react';
import { Slider, Box } from '@mui/material';
import { alpha, styled } from '@mui/material/styles';
import GlobalStyles from '@mui/material/GlobalStyles';

const SuccessSlider = styled(Slider)(({ theme }) => ({
    width: 250,
    color: theme.palette.error.main,
    '& .MuiSlider-thumb': {import * as React from 'react';
import { Slider, Box } from '@mui/material';
import { alpha, styled } from '@mui/material/styles';
import GlobalStyles from '@mui/material/GlobalStyles';

const SuccessSlider = styled(Slider)(({ theme }) => ({
    width: 250,
    color: theme.palette.error.main,
    '& .MuiSlider-thumb': {
        '&:hover, &.Mui-focusVisible': {
            boxShadow:
`0px 0px 0px 8px ${alpha(theme.palette.error.main, 0.16)}`,
        },
        '&.Mui-active': {
            boxShadow:
`0px 0px 0px 14px ${alpha(theme.palette.success.main, 0.16)}`,
            color: theme.palette.success.main
        },
    },
}));

const Example = () => {
    return (
        <Box sx={{
            boxShadow: 2,
            margin: '50px',
            width: '350px',
            textAlign: 'center'
        }}>
            <GlobalStyles styles={{ h1: { color: 'purple' } }} />
            <h1>This is a Slider</h1>
            <SuccessSlider defaultValue={30}
                valueLabelDisplay='on'
                sx={{ margin: '20px' }} />
        </Box>
    )
}

export default Example;
        '&:hover, &.Mui-focusVisible': {
            boxShadow:
`0px 0px 0px 8px ${alpha(theme.palette.error.main, 0.16)}`,
        },
        '&.Mui-active': {
            boxShadow:
`0px 0px 0px 14px ${alpha(theme.palette.success.main, 0.16)}`,
            color: theme.palette.success.main
        },
    },
}));

const Example = () => {
    return (
        <Box sx={{ boxShadow: 2,
                   margin: '50px',
                   width: '350px',
                   textAlign: 'center' }}>
            <GlobalStyles styles={{ h1: { color: 'purple' } }} />
            <h1>This is a Slider</h1>
            <SuccessSlider defaultValue={30}
                           valueLabelDisplay='on'
                           sx={{ margin: '20px' }} />
        </Box>
    )
}

export default Example;
Output:
 This is a Reusable Slider Component using Global CSS override
Reference: https://mui.com/material-ui/customization/how-to-customize/