How to Use Google Drive in Linux
Last Updated :
20 Sep, 2024
Google Drive is one of the famous cloud storage services provided by Google. Google Drive allows users to store files online and access them from anywhere. Google Drive is available for all major platforms i.e. Windows, MacOS, Linux, and others. In this article, we will learn how to use Google Drive in Linux to store and access our files.
How to Access Google Drive on Linux
Accessing Google Drive on any platform including Linux is very simple. We just need a web browser to navigate Google Drive.
- Step 1: Open any Web browser on your Linux computer. For example, let's open Firefox.
- Step 2: On your web browser go to drive.google.com to visit the official website of Google Drive.
- Step 3: On the webpage enter your valid email ID and password and you will be logged in.
 Entering Login Credentials
- Step 4: Now you can explore the Drive and upload any file or access already uploaded or shared files.
 Exploring Drive Contents
If you prefer to integrate Google Drive directly into your Linux system for file synchronization, there are multiple tools available, including command-line utilities and graphical (GUI) tools. These tools provide more advanced functionality such as real-time syncing and offline access.
Rclone is a command-line program used for managing and synchronizing files across various cloud storage services, including Google Drive. It supports a wide range of operations such as copying, syncing, and moving files, offering extensive configuration options and efficient performance. Rclone is particularly favored for its flexibility and powerful scripting capabilities.
Step 1: Install Rclone
Open the terminal in your Linux computer and run the following command to install Rclone.
sudo apt install rclone
This command will give you superuser access and ask for a password. Once verified, the application will be downloaded and installed.
Output:
 Installing Rclone
After installation is done, it is time to configure Rclone with Google Drive. Run the following command to start the configuration,
rclone config
Output:
 Configuring Rclone
Step 3: Create a new Remote
Enter "n" for the new remote and give a name for the mount.
 Creating New Remote
Enter "13" to choose Google Drive and then enter "1" to give full access to Google Drive.
 Giving Full Access to Google Drive
Step 4: Authenticate Google Account
Leave all other fields as default and you will be taken to the web browser to select your Google Account.
 Authenticate Google Account
Step 5: Explore Rclone
Once authentication is done you will be taken back to the Terminal and you will have options to make changes to the drive using CLI.
 Exploring Rclone
Now you can quit this config menu and start using Google Drive in Terminal. For example, run the following command to list all the files and directories inside Google Drive.
rclone ls geeksfolder
or,
Create a new directory and add it to Google Drive by running the following command.
mkdir newfolder
rclone mount --daemon --vfs-cache-mode full geeksfolder:/./newfolder/
2. Using Google-drive-ocamlfuse
Google-drive-ocamlfuse is a command-line tool that allows users to mount their Google Drive as a file system on Linux. It provides seamless access to Google Drive files, enabling standard file operations like reading, writing, and synchronizing, directly from the terminal. This tool is appreciated for its ease of use and integration with the Linux file system.
Step 1: Install Google-drive-ocamlfuse
Firstly we will install Google-drive-ocamlfuse on the computer. Add a new repository to download the packages required. Then we need to update the system. Once done, we can install the application.
sudo add-apt-repository ppa:alessandro-strada/ppa
sudo apt-get update
sudo apt-get insatall google-drive-ocamlfuse
Output:
 Install Google-drive-ocamlfuse
Step 2: Create a new Directory
Once installed, create a new directory in the system for Google Drive using the following command,
mkdir gfg
google-drive-ocamlfuse ~/gfg/
The first command will create a new directory and the second one will map the directory with Google Drive.
Output:
 Create a new Directory
Step 3: Authenticate Google Drive
Authenticate the Google Account using which you want to access Google Drive. Just allow all the permissions asked and you are all set to use Google Drive using Google-drive-ocamlfuse this includes view, edit, create, and delete access to Google Drive.
 Authenticate Google Drive
 GNOME Online Accounts is a GUI tool that integrates online services, including Google Drive, into the GNOME desktop environment. By adding a Google account, users can seamlessly access and manage their Google Drive files directly from the GNOME file manager. This integration offers a user-friendly and convenient way to synchronize and interact with Google Drive on Linux.
Step 1: Open Settings
Open Settings on your Computer with GNOME desktop (Ubuntu Linux comes with GNOME built-in.). In Settings, go to "Online Accounts" and select "Google".
 Opening Settings
Step 2: Sign In with valid credentials
Give a valid email and password and accept the terms to continue. You need to provide full access to our Google account to GNOME for better usability.
 Sign In with valid credentials
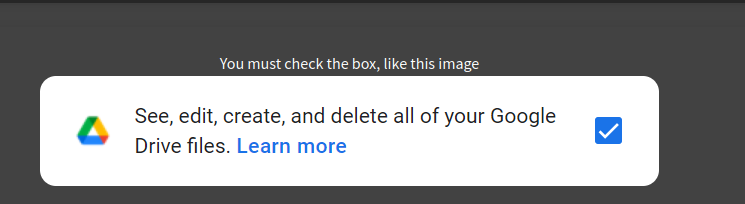
 Step 3: Turn on Required Accesses
Once you give the required permission a box will open with toggles to enable/disable different permissions. For Files keep the toggle at On.
 Turn on Required Accesses
 Step 4: Explore File Manager
Once you have completed all the steps, you should see a network drive in your file manager. This is the Google Drive that you have mapped.
 Explore File Manager
 As you can see it has the same folder that we created earlier.
Kio GDrive is a GUI tool that integrates Google Drive with the KDE desktop environment. It allows users to access and manage their Google Drive files directly from the Dolphin file manager. Kio GDrive provides a seamless and intuitive way to browse, upload, download, and synchronize Google Drive files within the KDE Plasma desktop.
Step 1: Install KIO GDrive
Unlike GNOME, we need to install KIO GDrive on your computer, before we can use it. Run the following command in the Terminal to install KIO GDrive.
sudo apt install kio-gdrive
Output:
.png) Install KIO GDrive
Install KIO GDrive Step 2: Make LibreOffice KDE compatible
KIO GDrive is compatible with KDE-based systems. So we need to make the LibreOffice compatible with KIO. Run the following command to install an additional package.
sudo apt install libreoffice-kde
Output:
 Make LibreOffice KDE compatible
 Step 3: Install Dolphin
As KIO GDrive is a KDE-based application, we will also need a Dolphin file manager to use KIO GDrive. Run the following command to install Dolphin.
sudo apt install dolphin
Output:
 Install Dolphin
 Step 4: Explore Drive
Open Dolphin and Select Google Drive from the options given in Network.
 Explore Drive
 Follow the same steps given in the previous example to connect your Google Account and that's it you can use Google Drive as a local directory in your Linux PC as we show in GNOME.
Conclusion
In conclusion, accessing and managing Google Drive on Linux is straightforward and versatile, with options ranging from web-based access to dedicated command-line and GUI tools. Whether using Rclone, Google-drive-ocamlfuse, GNOME Online Accounts, or Kio GDrive, Linux users have multiple methods to integrate and synchronize their Google Drive files efficiently. These tools cater to different preferences and desktop environments, ensuring a smooth and productive experience for all users.
Similar Reads
How to Use Google Maps Offline?
Quick Preview to Use Google Maps OfflineMaps! Open Offline Maps > Tap the Downloaded Map.The Downloaded Section will be present to use.Did you know that you can use Google Maps even without an internet connection? Yes, it's true! Navigating through places can be tough, especially when you don't h
3 min read
Google Docs - How to Log In
Looking to log into the Google Docs website or looking for a way to access Google Docs? Logging into Google Docs is the first step toward accessing your documents, collaborating with others, and creating new content effortlessly. Imagine you're a student working on a research paper that requires col
9 min read
How to Use Google Docs
Google Docs is one of the most universal and user-friendly tools for creating, editing, and collaborating on documents, whether you’re on the web or mobile. Its cloud-based platform makes it accessible from anywhere, and its easy-to-use interface ensures that even beginners can get started quickly.
11 min read
How to Install and Use Git in Google Colab?
Google Colab is a popular platform for data scientists and machine learning enthusiasts to write and execute Python code in a Jupyter Notebook environment. While it provides a robust environment for coding, integrating version control systems like Git can enhance productivity by allowing you to trac
2 min read
How to Use Google Drive for Desktop
To easily manage and share content across all your devices and the cloud, use Google’s desktop sync client. With Drive for Desktop, you can access your Drive files and folders directly from Windows File Explorer or macOS Finder on your computer. When you edit, delete, or move a file on the cloud, th
8 min read
How to Assign Tasks in Google Drive
Ever wondered how to make teamwork a breeze on Google Drive? Well, you're in for a treat! Learn the easy way to assign tasks and make collaborating with others super simple. From managing projects to working together smoothly, we'll show you the ropes. Get ready to boost your teamwork with Google Dr
7 min read
How to Install Google Chrome on Kali Linux
Want to use Google Chrome on your Kali Linux system? Kali Linux is a special operating system made for security testers and hackers, and it comes with Firefox as its default browser. But if you prefer Chrome for its speed, features, or just because you’re used to it, you can add it easily! Since Chr
4 min read
How to use gpu in google colab?
Google colab is a service provided by Google for a lot of researchers and developers around the globe. It is a Jupyter Notebook-like environment in one single place without any prerequisites. It is free to use with a limited number of computer resources and engines including free access to GPUs i.e.
3 min read
How to use Google Fonts in CSS ?
Google Fonts in CSS allows you to easily include and style web fonts by linking to a font's URL and applying it via the font-family property in your stylesheet. The library contains a vast collection of fonts that can be used in web design, mobile apps, etc. The syntax for using Google Fonts in CSS
2 min read
How to Share Files on Google Drive
In today's fast-paced digital world, efficient file sharing is crucial for smooth collaboration and productivity. Whether you're working on a team project, sharing important documents with colleagues, or simply distributing files to friends and family, Google Drive offers a seamless and effective so
4 min read