How To Make An Invitation Card On Google Docs
Last Updated :
20 May, 2024
Google Docs, Google's versatile word-processing application, is not just for drafting documents and collaboration; it can also serve as a handy tool for creating personalized invitation cards.
Creating an invitation that not only captures the essence of your event but also looks visually appealing is a crucial step in setting the right tone. If you're aiming for a seamless and creative invitation-making process, Google Docs is your go-to tool.
Here, we'll see some quick and easy steps to create an Invitation Card on Google Docs.
 How To Make An Invitation Card On Google Docs
How To Create An Invitation Card On Google Docs
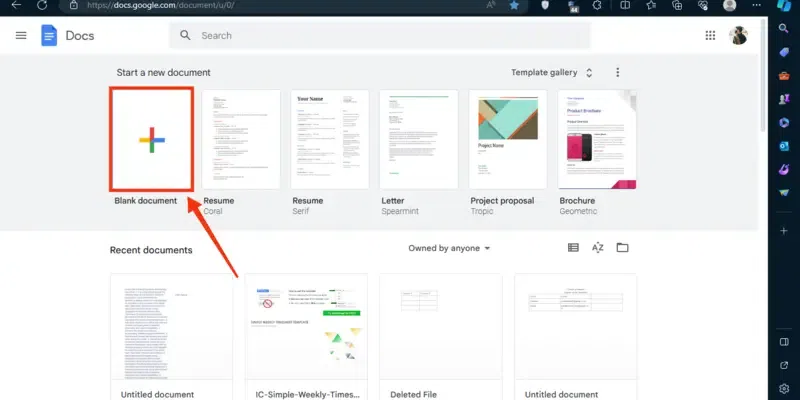
Step 1: Open Google Docs and Select a Document
Visit the Google Docs website and choose a new document to create an invitation card.
 Select a Document
Step 2: Start Customizing your Card
Now start customizing your card as you need, the first thing you can customize is the page setup. To do so click on the "File" menu located in the toolbar.
 Click on File Menu
Step 3: Select "Page Setup"
When you click on the "File" menu s drop-down menu will appear containing some options, among all the options select "Page Setup".
 Select "Page Setup"
Step 4: Adjust Page Properties
You can now customize each and everything related to your page in Page Setup including the Page Color. You can change the page size and make it as per as your need, and also you change the page color by clicking on the "Page Color" icon.
 Adjust Page Size >> Page Color >> Click "Ok"
Step 5: Insert the Text Content
Every invitation card includes a text and in this step, you can enter the text of your invitation card such as the Event name and Date, Event Place, Timing, and many other things.
 Insert Text
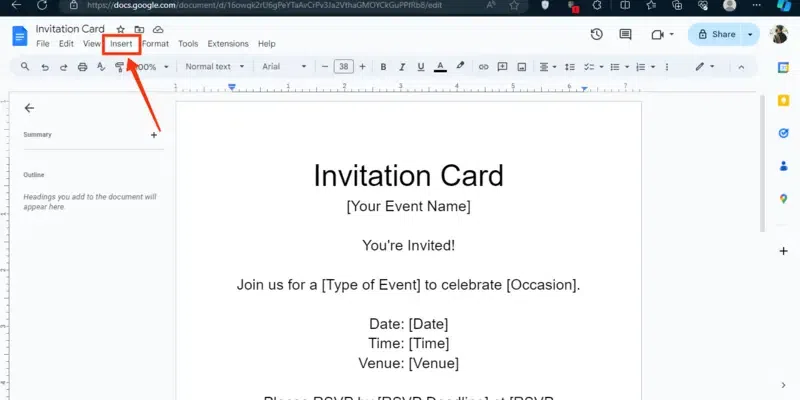
Step 6: Insert Image
Inserting an Image into your Invitation card gives an attractive look to your card so click on the "Insert" menu in order to insert the image in the template.
 Click on the "Insert" button
Step 7: Select "Image" and Choose "Upload Source"
From the drop-down menu after clicking on the "Insert" menu select the "Image" option and also specify the image uploading source such as "Upload from the Computer".
 Select "Image" >> Choose "Upload Source"
Step 8: Start Formatting
When you are finished uploading the image to your template, start formatting your text and image. To do so click on the "Format" menu.
 image Uploaded >> Click on Format menu
Step 9: Select Text and Choose Format Type
Now select the "Text" option from the menu and choose the formatting you want to apply to your text such as Bold, Italic, Underline, etc.
 Select "Text" >> Format your Text
Step 10: Align & Indent
Now select the "Align & Indent" to align your text and image so that your templates look attractive.
 Select "Align & Indent"
Step 11: Share your Invitation Card
You can directly share your invitation card from Google Docs by clicking on the "Share" button or by copying the link of the document.
 Share your Invitation Card
Step 12: Print your Invitation Card
If you want a hard copy of your invitation card, then you can print your "Invitation Card" directly from "Google Docs". To do so click on the "File" menu and select "Print" from the menu.
 Click on "File" >> Select "Print":
Step 13: Adjust Copies & Pages and Click on "Print"
Now a new window will open on the screen in which all the properties will be given, and you can adjust all printing properties as you need, so just specify the no. of copies and click on the "Print" button print your document.
 Specify No. of Copies >> Click on "Print"
Build an Invitation Template in Google Docs
Step 1: Explore Different Kinds of Invitation Templates
To make an invitation template on Google Docs you will need a template from which you can easily design your template, so explore different templates and choose one.
 Explore Different Templates
Step 2: Pick Out an Invitation Template
Now among all the templates pick out a template for your use.
 Pick Out a Template
Step 3: Click the ‘Google Docs' Button
After choosing a template click on the "Google Docs" button to open it in your Google Docs, the copy of the document will be opened in your Google Docs.
 Click on "Edit in Google Docs"
Step 4: Upload a Background Image
To upload a background image in your template, click on the "File" menu and select the "Watermark" button.
 Click on the "Insert" menu >> Select "Watermark"
Step 5: Click on "Select Image" and Choose Image
Now click on the "Select Image" icon located on the right side of the interface and choose an image for the template.
 Click on "Select Image"
Step 6: Adjust the Text Color
To adjust the text color just select the text and click on the "Color Pencil" icon to choose your desired color.
 Select the Text >> Choose Color
Step 7: Write Down an RSVP
Now write down an RSVP to request a response from the recipient on or before a specified date.
 Write Down RSVP
Step 8: Download the Template
After customizing your template click on the "File" menu and select the "Download" button to download the template.
 Click on "File" menu >> Select "Download" button
Conclusion
Making an Invitation Card on Google Docs is a simple task as Google Doc features help us in creating an Invitation card. All you have to do is open Google Docs and select a new document to edit it, then start customizing your document according to your invitation card as you can customize the page setup, page color, and so on.
After you can insert images to your invitation card to make it attractive, after inserting images and text to your document align it as you need.