If you have started Java learning, you must have the Java Development Kit (JDK) installed on your system. OpenJDK is a free and open-source version of Java that provides everything you need to develop and run Java applications. It’s a popular choice for developers because it’s easy to install and works well across different Linux systems.
This guide will show you step-by-step instructions on how to install OpenJDK on a Linux system, verify the installation, and set it up for your projects. The steps covered here apply to most Linux distributions, ensuring you have everything you need to get started with Java.
How to Install OpenJDK in Linux
Follow the below step-by-step procedure to complete the installation of OpenJDK in Linux. All the steps are performed here in this guide on Ubuntu Linux distribution.
Step 1: Update Your System
- Before installing any software, it's a good idea to update your system's package manager. Open a terminal and run the following command.
sudo apt update 
After this you need to upgrade the package manager, and for this run the following command.
sudo apt upgrade
- This ensures your system has the latest package information and updates installed.
Step 2: Check Available OpenJDK Versions
- To see which versions of OpenJDK are available in your package manager, use the following command:
sudo apt search openjdk
Note: After this command you need to enter you password.
- This will display a list of available OpenJDK versions. As of now, the latest stable version is OpenJDK 21.
Step 3: Install the Latest Version of OpenJDK
- To install OpenJDK 21, run this command:
sudo apt install openjdk-21-jdk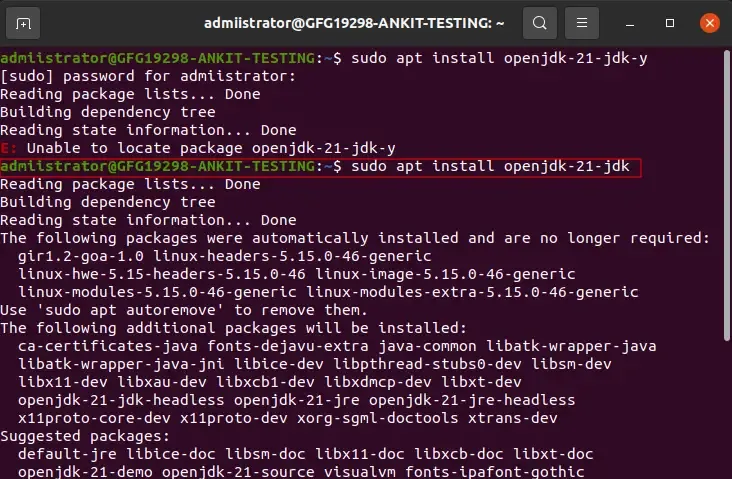
Note: Make sure you are connected with internet while opting this command
- This command installs the OpenJDK Development Kit (JDK), which includes the Java Runtime Environment (JRE) and development tools like the
javaccompiler.
Step 4: Verify the Installation
- After installation, confirm that OpenJDK is properly installed by checking the Java version:
java -version
- The output should look something like this:
openjdk version \"21.0.1\" 2025-01-01OpenJDK Runtime Environment \(build 21.0.1\+12-Ubuntu-1\)OpenJDK 64-Bit Server VM \(build 21.0.1\+12-Ubuntu-1, mixed mode, sharing\)
- If you see this, OpenJDK is successfully installed on your system.
Step 5: Set OpenJDK as the Default Java Version (Optional)
- If you have multiple versions of Java installed, you can set OpenJDK 21 as the default version by running:
sudo update-alternatives --config java- This command will show a list of installed Java versions.
Step 6: Configure the Environment Variables (Optional)
- For some applications, you might need to set the
JAVA_HOMEenvironment variable. To do this, follow these steps: - Open the environment file using a text editor:
sudo nano /etc/environment- Add the following line at the end of the file:
JAVA_HOME=\"/usr/lib/jvm/java-21-openjdk-amd64\"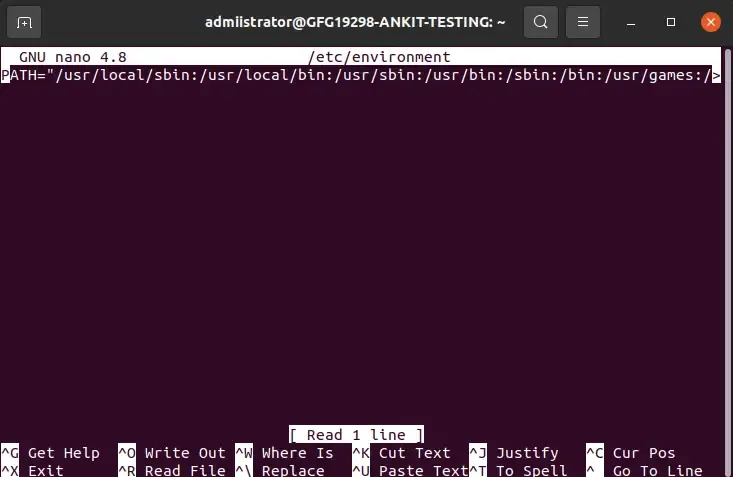
- Save and close the file. Then, reload the environment variables:
source /etc/environment- Verify the
JAVA_HOMEvariable:
echo $JAVA_HOME- This should display the path you set.
Conclusion
Installing OpenJDK on Linux is a straightforward process that ensures you have the tools needed to develop and run Java applications. By following the steps outlined in this guide, you can easily set up the latest version of OpenJDK on your system. Whether you are a beginner learning Java or an experienced developer, OpenJDK provides a reliable platform for your projects.