How to install Kloxo-MR in Linux
Last Updated :
23 Jan, 2023
Kloxo-MR is a free web hosting panel available for Linux distributions. The name of the Lxadmin earlier knew it. But in 2017, The Lxadmin name was changed to the name Kloxo-MR. As there was some issue with the name. And also, there was a massive response from the user to change the application's name. So, the name is changed and is now known as the Kloxo-MR. It is similar to a web hosting panel as the cPanel. But users are interested to use this application, as this application is completely free. Users can operate different services of the Kloxo-MR. This application is an open-source application.
Users can run the Apache server with a combination of other applications as well. This is the unique component of Kloxo-MR. Also, there is a graphical user interface is present that helps to operate different services easily. Users can change the web applications from one server to another server using Kloxo-MR. For all of these reasons, Kloxo-MR is a better alternative to cPanel. Before installing Kloxo-MR, users need to perform some configuration. Also, before installing the Kloxo-MR application, users must first download the Kloxo-MR repository. After all of that, users can run the command to install Kloxo-MR on the machine.
Installation of Kloxo-MR in Linux
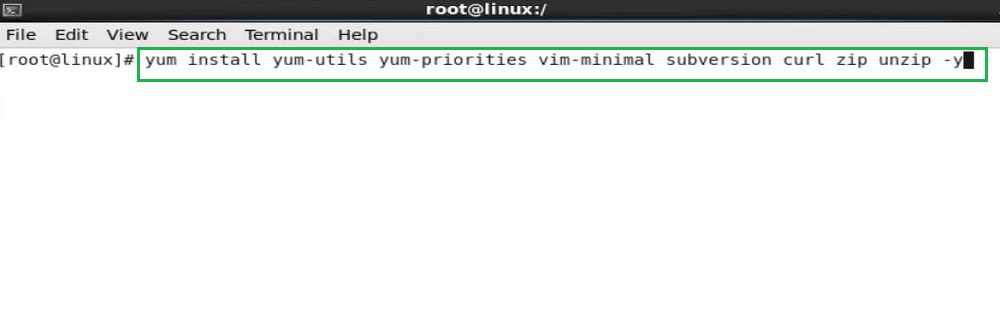
Step 1: At first, users need to open the terminal of Linux. Users need to execute the following command. This command will help to make some configuration-related changes in the machine. Mainly these are the dependencies that are important for executing Kloxo-MR. So, these need to be configured first.
yum install yum-utils yum-priorities vim-minimal subversion curl zip unzip -y
Step 2: Again, users need to execute the following command. This command will help to install the Telnet dependency in the machine. This dependency will help to download the repository for Kloxo-MR. That will be the next step. Before that, all the configuration-related issues need to be solved. This command will help to remove that problem with the repository.
yum install telnet wget -y

Step 3: Now, after installing all the dependencies & making changes in the configuration. Users need to install the repository first. For that purpose, users need to execute the below-mentioned command. This command will download the repository in the machine.
wget https://github.com/mustafaramadhan/kloxo/raw/release/kloxo-mr.repo -no-check-certificate

Step 4: Users need to wait till the process is completed. It will take some time to download the repository on the machine.

Step 5: Now, users need to install Kloxo-MR now. For that purpose, users need to execute the below-mentioned command. This command will install Kloxo-MR on the device. As all the configuration & dependencies are downloaded, there will be no issue with the installation. It will simply install the application.
yum install kloxomr -y

Step 6: It will take some time to complete the installation. Users need to wait till the process is completed.

Step 7: At last, when the installation is completed, a square box will be visible. This means that the installation is successful. But the installation is not yet completed. To complete the installation purpose, users need to run one more command.

Step 8: Now, users need to execute the below-mentioned command. This command is already mentioned in the above-stated square box. This command will help to finalize the installation process. It will take some time to complete the installation. Users need to keep patient for the completion of the installation.
sh /script/upcp

Step 9: At last, when the installation is completed, users will find one Congratulation message. This means the Kloxo-MR installation process is completed.

Step 10: Now, in the congratulatory message, there is a link provided. Using that link, users can able to open the Kloxo-MR dashboard. There, users have to provide a username & password. Initially, both of them will be the "admin". After that, users need to click on Login. So, they will enter the page.

Hence, we have successfully installed Kloxo-MR in Linux.
Usage of Toolkit of Kloxo-MR in Linux
Example 1: Add Domain Name
Step 1: After login into the page, users will find a dashboard there. But, the dashboard is not will be a concerning matter in this case. On the very upper-hand side users will find some tabs. There will be one specific tag. That will be termed as Domain. Users need to click on that tab.

Step 2: Now, a page will open in front of them. That page will ask for some necessary information from users. Users need to fill up the information there. Users need to only provide the domain name there. As per their choice, users can give any domain name. Other than that, there is no more information is needed to provide. After writing all the information, users need to click on Add button there.
Note: Other than providing necessary information, users need to click on some checkboxes. These checkboxes are provided to use the domain name easily. The checkboxes that are marked in the image, users are requested to mark the same. It is advised not to mark any checkbox without knowing its proper reason. Else it will cause trouble. Users need to follow the checkboxes that are marked here.

Example 2: Configure FTP Service
Step 1: Users need to again start from the Home page of Kloxo-MR. In the Resource section, there will be one option called FTP Users. Users need to double-click there to open that page. It will open a similar form for FTP user adding. This will help to configure the FTP Service there.

Step 2: Now, users need to provide the necessary information there. There is some information that will include automatically. There is no need to manually add them. Also, there is some information that needs not to be modified. A list of performable operations will help users in this case.
- Users need to provide the FTP name there. Users can provide any name of their own choice. There is no limitation to providing the name in the FTP section.
- Users don't need to make any changes in the server area. Whatever the server or domain name, users have provided earlier will be added automatically there. It is advised not to make any changes there.
- Users need to provide passwords. Users can provide any password, but that should have a minimum length of 8 digits. After providing the password, users need to rewrite the same password there. There is a button called "Generate Password". Users are requested not to do anything with that button. That will fill up the password section automatically. That is not advised to do.
- Other than these changes on the page, there is no need to do anything. After providing such information, users need to leave other informational it is. It will fill up automatically. After filling in all the information, users need to click on Add button.

Conclusion
Kloxo-MR is a web-controlling panel. This software can only be installed in Linux distributions. This software can be an alternative to cPanel applications. Here, users can able to handle their websites easily. Having the power of web control helps to modify the websites as per the need. This will help users to step up with new technologies in the web development platform. In this article, we discussed the process to install Kloxo-MR in Linux distribution. Along with that, the process to add a domain name in the Kloxo-MR is also demonstrated. The guidance to configure the FTP service in Kloxo-MR is also provided in this article.
Similar Reads
Non-linear Components In electrical circuits, Non-linear Components are electronic devices that need an external power source to operate actively. Non-Linear Components are those that are changed with respect to the voltage and current. Elements that do not follow ohm's law are called Non-linear Components. Non-linear Co
11 min read
Spring Boot Tutorial Spring Boot is a Java framework that makes it easier to create and run Java applications. It simplifies the configuration and setup process, allowing developers to focus more on writing code for their applications. This Spring Boot Tutorial is a comprehensive guide that covers both basic and advance
10 min read
Class Diagram | Unified Modeling Language (UML) A UML class diagram is a visual tool that represents the structure of a system by showing its classes, attributes, methods, and the relationships between them. It helps everyone involved in a project—like developers and designers—understand how the system is organized and how its components interact
12 min read
3-Phase Inverter An inverter is a fundamental electrical device designed primarily for the conversion of direct current into alternating current . This versatile device , also known as a variable frequency drive , plays a vital role in a wide range of applications , including variable frequency drives and high power
13 min read
Backpropagation in Neural Network Back Propagation is also known as "Backward Propagation of Errors" is a method used to train neural network . Its goal is to reduce the difference between the model’s predicted output and the actual output by adjusting the weights and biases in the network.It works iteratively to adjust weights and
9 min read
What is Vacuum Circuit Breaker? A vacuum circuit breaker is a type of breaker that utilizes a vacuum as the medium to extinguish electrical arcs. Within this circuit breaker, there is a vacuum interrupter that houses the stationary and mobile contacts in a permanently sealed enclosure. When the contacts are separated in a high vac
13 min read
Polymorphism in Java Polymorphism in Java is one of the core concepts in object-oriented programming (OOP) that allows objects to behave differently based on their specific class type. The word polymorphism means having many forms, and it comes from the Greek words poly (many) and morph (forms), this means one entity ca
7 min read
CTE in SQL In SQL, a Common Table Expression (CTE) is an essential tool for simplifying complex queries and making them more readable. By defining temporary result sets that can be referenced multiple times, a CTE in SQL allows developers to break down complicated logic into manageable parts. CTEs help with hi
6 min read
Python Variables In Python, variables are used to store data that can be referenced and manipulated during program execution. A variable is essentially a name that is assigned to a value. Unlike many other programming languages, Python variables do not require explicit declaration of type. The type of the variable i
6 min read
Spring Boot Interview Questions and Answers Spring Boot is a Java-based framework used to develop stand-alone, production-ready applications with minimal configuration. Introduced by Pivotal in 2014, it simplifies the development of Spring applications by offering embedded servers, auto-configuration, and fast startup. Many top companies, inc
15+ min read