Garuda Linux is a recent Linux distro that is primarily based on Arch Linux (a former Linux distribution). This distro was mainly created by keeping performance-centric tasks in mind, such as - Gaming, Video Editing, and Compiling huge amounts of code. Other than this, it also offers easy-to-use features and an attractive GUI. This distro comes with a wide range of Linux desktop environments like - GNOME, KDE, Cinnamon, XFCE, etc. You can check out other desktop environments and download them by clicking on this link: https://garudalinux.org/downloads.html.
Note: This guide is for the fresh installation of Garuda Linux on a machine and not for Dual booting alongside other OS like Windows. If you proceed with this guide on a laptop, then the currently installed OS and Data will be erased.
Downloading and Installing Garuda Linux
So, before we begin with our installation of Garuda Linux, we will need the Disk Image file, also known as the ISO file, of our favorite desktop environment of Garuda Linux. It will be better if you research all the available desktop environments of Garuda Linux on the web. After you are done, you can download it here- https://garudalinux.org/downloads.html
Note: Make sure that your system meets the specified requirements which will be shown after you click on the above link.

After you have downloaded your favorite desktop environment's ISO, we will move on to the installation procedure.
1. Creating a bootable drive for Garuda Linux
In this tutorial, we will use ventoy to create a bootable drive.
Step 1: Download the zip file from the GitHub releases page of ventoy - https://github.com/ventoy/Ventoy/releases
Step 2: Extract the zip file from your computer and open the extracted folder.
Step 3: Connect the Pendrive which you want to make the bootable drive to your PC. Double-click on Ventoy2Disk.exe, or Ventoy2disk.sh to launch the ventoy application.
Step 4: Now you will see the following window:

Step 5: Now click on the blue green colored refresh button (shown in the below screenshot), to see your connected drive on this application:

Step 6: Now click on the dropdown menu under Device and choose the drive which you want to make bootable.

Step 7: Now you need to configure some options, so click on the Options button in the top left-hand corner of the window. A menu will appear. Now click on Secure Boot Support and make sure it is checked.

Step 8: After this select your preferred partition style. If you have BIOS on your computer then you can only use the MBR partitioning style, whereas if you have UEFI, you can use both MBR and GPT partitioning styles. Most of the systems use UEFI, but if you are not sure, you can search about your laptop model or if you are using a desktop, you can search for the motherboard's serial number to get the related info.

Step 9: After configuring all the options, click on install-to-install ventoy on your chosen disk.

Note: All the data on the chosen disk will be erased after you hit install.
Step 10: Now your Pen drive will be partitioned into 2 drives, one will likely be of a much smaller size (this partition contains ventoy), while on the other partition, you can put your ISO files and install them on your PC.
Step 11: After this, you can copy your ISO file of Garuda Linux to the bigger-sized partition, and with this done, our bootable drive is ready.
2. Configuring our BIOS/UEFI options
Now to ensure that we boot into our bootable drive, we will have to turn off the secure boot from BIOS/UEFI (don't worry, we will turn it back on once the installation is completed).
So, open the BIOS/UEFI page on your PC and turn off the secure boot. The steps to do this vary from manufacturer to manufacturer. Thus, you can get help from the web according to the manufacturer of your Motherboard.
3. Booting to our bootable drive
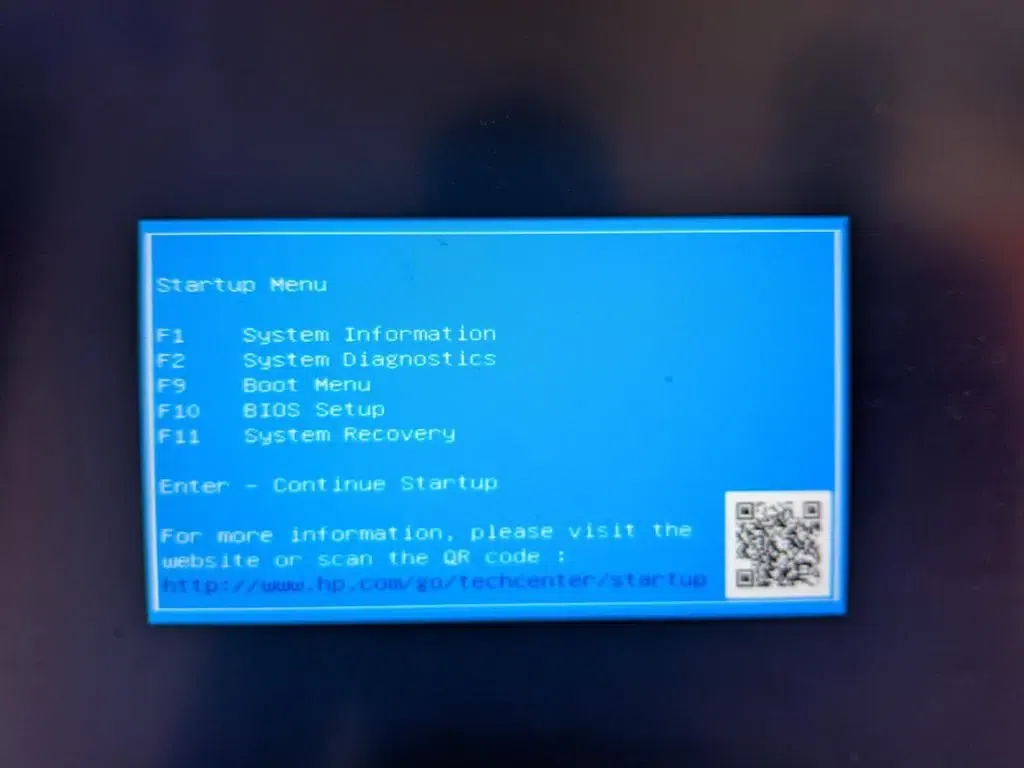
After completing the BIOS/UEFI configuration, you will have to boot using the USB drive. Again, this thing varies from manufacturer to manufacturer. Mostly you can do this by repeatedly pressing F9, F10, or ESC keys during boot, until you land on a menu to choose the bootable drive or change the boot priority. Here we will choose our newly created bootable Pen drive (which we created using Ventoy) to boot into it. Below is an example of an HP laptop:
Step 1: Startup Menu
We have to choose the Boot Menu from the options. For that, we have to press F9 in this example.
Step 2: Boot Menu
Here we will choose SanDisk from this list as we made that Pen drive as a bootable device in this guide. You need to choose your respective boot device from this menu and hit enter to boot onto it.

Step 3: Ventoy Menu
After booting into our USB drive, we will see a list of ISO(s) which we have put inside our USB drive. Here we copied Garuda Linux ISO in our drive, so we will choose that ISO from the options. See the screenshot below:

4. Setting up Garuda Linux Configuration
Step 1: So, after choosing garuda's iso file, you will be asked to boot into Garuda's Live Boot. Here you have to choose the appropriate graphics driver, for example, if you have an NVIDIA Graphics Card, then you have to choose NVIDIA drivers. In case of any problems, you can choose to boot from open-source drivers. You can see this in below screenshot:
.webp)
Step 2: After choosing the appropriate graphics driver, you will boot into the live boot environment of Garuda Linux. There will be a variety of options present on your screen, you have to choose to install Garuda Linux as shown in the screenshot.

Step 3: Now you will see a welcome screen, click the next button to move to the next tab.
Step 4: Now in this screen, you have to configure your time zone and location options. Configure it accordingly and click next.

Step 5: Select your desired keyboard layout and language configurations and hit next.

Step 6: On this screen, you have to choose what kind of partitions you want. Choosing erase disk option will completely remove your data from the disk, so if there is any other OS installed, it will be deleted too. If you are OK with this, choose to erase the disk and proceed to the next step. You can also make multiple partitions in the Manual Partitioning option.

Step 7: Now set up your username and desired password on this screen and hit next when you are done.
Step 8: This screen will show all your configuration's summary. Hit next if you accept this configuration.

Step 9: Now the installation process will begin, the installer will erase the disk and install Garuda Linux on your system. It will take some time according to your disk specs.

Step 10: After the installation is finished, check the Restart Now button and click the Done button to reboot to garuda Linux.
Note: Make sure to remove the pen drive after you hit the done button.

Step 11: You have successfully installed garuda on your desktop. Login using your credentials and you are good to go.

Conclusion
Garuda Linux is a recently developed Linux distribution that is highly designed by keeping in mind that it has to be performance-centric, and it provides an excellent and attractive graphical user interface (GUI) to users. This idea has come because of tasks like video editing, gaming, and large-scale code compiling. To download it and configure it in your system, one can install its ISO file and follow the easy steps that are mentioned in the above context. However, before installing it one must ensure that his/her system meets the specified requirements, and you should note that installing Garuda Linux will erase any data on the machine.