Google Docs is a free online document editor provided by Google. Google Docs makes it easier to create a document for personal and professional uses with a variety of features. People often take photos of notes on the blackboard a billboard, or from a newspaper for using it later. These text contents in photos may be needed to type into a document. Sometimes the image may be having 1 or 2 lines of content in it. Sometimes it can have many lines of text in the image. It takes a lot of time to type all that into a document by seeing the image every time.
Fortunately using Google Docs, we can save time on our work. Google Docs comes with an OCR tool. OCR means Optical Character Recognition which helps in getting all the text content in an image and converting it to digitally typed text. Using this, Google Docs helps us to save time typing all the contents in images to a digitally typed text in a document in Google Docs. This tool of Google helps in converting text in bills on financial analysis, images of book pages, and more.
In this article, we will be discussing converting an image to text in Google Docs.

How To Convert an Image to Text in Google Docs
Step 1: Open Google Drive and Click on '+ New'
Open Google Drive in any modern web browser on your desktop or laptop device. Click on the '+ New' button at the left-most side of the panel.
.webp) Open Google Drive and Click on '+ New
Open Google Drive and Click on '+ NewStep 2: Click on 'File upload'
A dropdown menu opens. Click on 'File upload'.
.webp) Click on 'File upload'
Click on 'File upload'Step 3: Select the Image
A dialog window opens up. Locate the image from your computer folder to upload to Google Drive. Make sure that the image has some letters or numbers in it. Click on the image to upload it from any folder on your computer.
.webp) Select the Image
Select the ImageStep 4: Click on 'Open'
Click on the 'Open' button in the dialog box to upload the selected image to Google Drive. Now the selected image is uploaded to your Google Drive.
.webp) Click on 'Open'
Click on 'Open'Step 5: Select 'Open with' and Click on 'Google Docs'
Right-click on the image. A dropdown menu opens up. Click on 'Open with'. Another sub dropdown opens up. Click on 'Google Docs' in it.
.webp) Select 'Open with' and Click on 'Google Docs'
Select 'Open with' and Click on 'Google Docs'Step 6: Preview
Now the image gets opened in a new document in Google Docs. The image and the text that appeared on the image are now present in the document. The text appears in the image is converted to digital text and it is displayed exactly below the image in the document in Google Docs.
.webp) The image and the converted text opened in a document
The image and the converted text opened in a documentStep 7: Select the Converted Text
The converted digital text appears in different text colors such as yellow, orange, or other colors. Users can edit and format that converted text. Select and highlight the converted text.
.webp) Select the Converted Text
Select the Converted TextStep 8: Click on the 'text color' icon
Click on the 'text color' icon in the toolbar of Google Docs.
.webp) Click on the 'text color' icon
Click on the 'text color' iconStep 9: Click on any color
A dropdown of colors is opened. Click on any color to change the text color to make it readable. Here we are clicking on Black color.
.webp) Click on any color
Click on any colorStep 10: Click on the '+' icon
Click on the '+' icon in the toolbar of Google Docs to increase the font size of the converted text. Click on it as many times as you want.
.webp) Click on the '+' icon
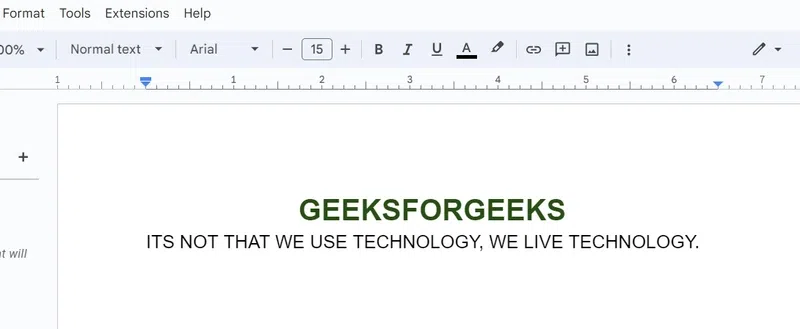
Click on the '+' iconNow the text color and font size of the converted text have been changed.
.webp) Click on the '+' icon
Click on the '+' iconStep 11: Preview the converted text from the image
The text on the image is converted to digital text and is present in a document in Google Docs now. This helps users to save time typing the contents of the image.
.webp) Preview the converted text from the image
Preview the converted text from the imageConvert an Image to Text in Google Docs Using Extension
In this method, we need to install an extension in Google Docs to help convert the image to text within Google Docs. Let us see the steps in detail below:
Step 1: Open Google Docs on your computer and open the document
Open Google Docs in any modern web browser on your desktop or laptop device. Open the document in Google Docs.
 Document opened in Google Docs
Step 2: Click on 'Extensions' -> 'Add ons' -> Get add-ons'
In the menu bar of Google Docs, click on 'Extensions'. A dropdown opens. Click on 'Add ons'. Another sub dropdown opens up. Click on 'Get add-ons'.
 Click on 'Extensions' -> 'Add ons' -> Get add-ons'
Step 3: Type 'Img to Docs' and Press the 'Enter' key
A dialog window opens up with Google Workspace Marketplace with the search bar.
.webp) In the search bar, type 'Img to Docs' and press 'Enter' key
In the search bar, type 'Img to Docs' and press 'Enter' keyIn the search bar, type 'Img to docs' and press the 'Enter' key to search.
 Type in the search bar
Step 4: Click on the icon 'Img to Docs - Image OCR' and Click on the 'Install' button
The search results are displayed. Click on the icon 'Img to Docs - Image OCR'.
.webp) Click on the icon 'Img to Docs - Image OCR' and Click on the 'Install' button
Click on the icon 'Img to Docs - Image OCR' and Click on the 'Install' buttonThe add-on is opened in a new dialog window. Click on the 'Install' button.
 Click on the 'Install' button
Step 5: Choose your Google account from the list of accounts already signed in or choose to sign in to Google
A popup window opens up asking the user to sign in with a Google account. Choose the Google account from the list of accounts displayed or sign in to your google account.
.webp) Choose your Google account from the list of accounts already signed in or choose to sign in to Google
Choose your Google account from the list of accounts already signed in or choose to sign in to GoogleStep 6: Click on 'Allow'
Another page opens in the popup window. Click on the 'Allow' button.
.webp) Click on the 'Allow' button
Click on the 'Allow' buttonStep 7: Click 'Done' in the popup
Now the add-on has been installed. Click on 'Done'.
.webp) Click 'Done' in the popup
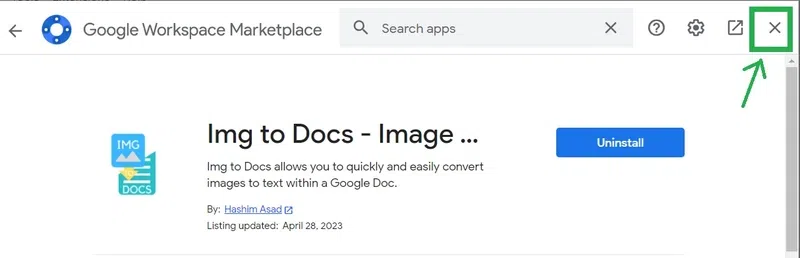
Click 'Done' in the popupStep 8: Click on 'X' at the top right-most corner of the dialog window
Click on 'X' at the top right-most corner of the dialog window to close it, and go back to the Google Docs document.
 Click on the X icon at the top rightmost corner of the dialog window
Step 9: Click on 'Extensions' -> 'Img to Docs - Image OCR' -> Start
Now open the add-on from the document in Google Docs. Click on the 'Extensions' tab in the menu bar. A dropdown opens up. Click on 'Img to Docs - Image OCR' -> Start.
 Click on 'Extensions' -> 'Img to Docs - Image OCR' -> Start
Step 10: Click on the cloud button 'Drag files or click to upload'
The add-on is opened and displayed on the right side of the document. Click on the cloud icon in the panel 'Drag files or click to upload'.
 Click on the cloud symbol button to upload the image
Step 11: Double-click on the image you want to extract text from your device
Choose the image from your computer in the window and double-click on the image.
.webp) Double-click on the image you want to extract text from your device
Double-click on the image you want to extract text from your deviceStep 12: Click on the 'Insert' button after the image is processed
The image gets processed in the add-on, and the text on the image is displayed in the text box below. Click on the 'Insert' button after the image is processed.
.webp) Click on the 'Insert' button after the image is processed
Click on the 'Insert' button after the image is processedStep 13: Text to Image Conversion Successful
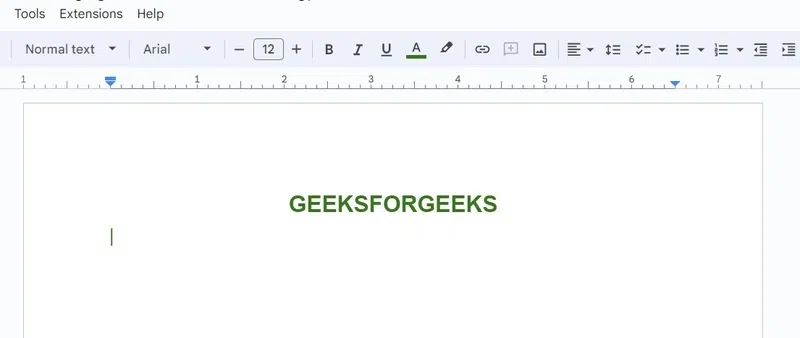
The text that appears on the image is now converted to text and it is added to the document in Google Docs.
 Image converted to text in Google Docs
Convert an Image to Text in Google Docs Using Google Keep
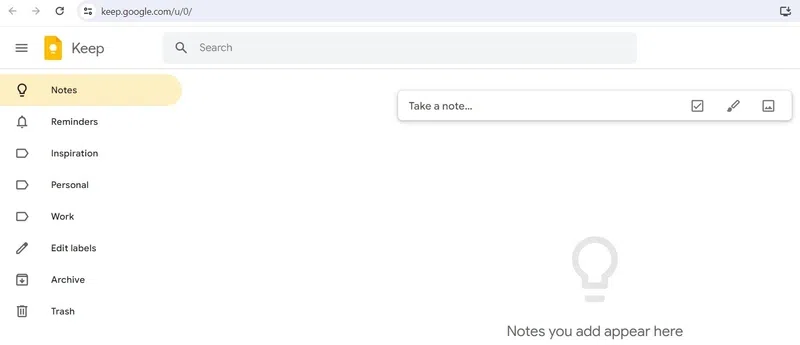
Step 1: Open Google Keep on your computer
Visit Google Keep in any modern web browser on your desktop or laptop device.
 Google Keep opened in web browser
Step 2: Click on the Image Icon
Click on the image icon which is next to the brush icon.
 Click on the image icon next to the brush icon
Step 3: Locate the Folder and Click on the Image
A window opens up allowing you to choose an image from your computer. Move to the folder you want and choose the image by clicking on the image.
.webp) Locate the Folder and Click on the Image
Locate the Folder and Click on the ImageStep 4: Click on the 'Open' button
Click on the 'Open' button in the window.
.webp) Click on the 'Open' button
Click on the 'Open' buttonStep 5: Click on the three vertical dots icon which is below the image
Now the image gets inserted into Google Keep. Click on the three vertical dots icon which is directly below that image.
.webp) Click on the three vertical dots icon which is below the image
Click on the three vertical dots icon which is below the imageStep 6: Click on 'Grab image text' in the menu
A menu opens. Click on 'Grab image text' in the menu.
.webp) Click on 'Grab image text' in the menu
Click on 'Grab image text' in the menuAn alert is displayed at the bottom left corner of the web page where the image text is grabbed.
.webp) image text is grabbed.
image text is grabbed.Step 7: Click on the Three Vertical Dots Icon
Again click on the three vertical dots icon below that image.
Click on the Three Vertical Dots IconStep 8: Click on 'Copy to Google Docs'
Click on 'Copy to Google Docs' in the menu.
.webp) Click on 'Copy to Google Docs'
Click on 'Copy to Google Docs'Convert an Image to Text in Google Docs Using Free Image to Text Online Tools
There are many free websites online which also help in converting text on images to digital text.
Step 1: Visit www.imagetotext.io on your computer
Visit https://www.imagetotext.io/ in the web browser of your desktop or laptop device.
 Type the URL in the web browser and click it
Step 2: Click on 'Browse'
Click on the 'Browse' button or drag an image to the webpage.
.webp) Click on 'Browse'
Click on 'Browse'Step 3: Locate the folder to choose the image and click on the image
A window opens up allowing you to choose an image from your computer. Move to the folder you want and choose the image by clicking on the image.
Locate the folder to choose the image and click on the imageStep 4: Click on the 'Open' button
Click on the 'Open' button in the window.
Click on the 'Open' buttonStep 5: Click on the 'Submit and Extract' button
The image gets uploaded to the webpage. After the image is uploaded, click on the 'Submit and Extract' button.
 Click on the 'Submit and Extract' button
Step 6: Click on the copy icon next to the image
Click on the copy icon which is next to the image to copy the converted text on that image.
 Click on the copy icon at the rightmost corner
Step 7: Open Google Docs in your browser on your computer
Open Google Docs, and open a document to paste the converted text.
 A document opened in Google Docs
Step 8: Place the cursor
Place the cursor anywhere in the document where you want to place the text.
 Place the cursor anywhere you want in the document
Step 9: The converted text from the image is pasted to Google Docs successfully
Click on the 'Ctrl' + 'V' button on the keyboard to paste the text. The converted text is pasted to a Google Docs document.
 The text on the image is converted to digital text in a document in Google Docs
Conclusion
In this article, we have discussed the image-to-text conversion which happens using Google Docs. We have discussed the steps in a detailed approach. OCR helps in converting the image text to digital text in Google Docs. There are different ways to convert an image to text in Google Docs and we have covered all these methods in detail. We can also use Google Keep, add-on, and free online websites to convert images to text in Google Docs.
Similar Reads
How To Put Text Over An Image In Google Docs
Placing text over images in Google Docs can make your documents visually appealing and more engaging. This is a useful technique for creating presentations, flyers, or marketing materials. While Google Docs is mainly for text editing, there are ways to overlay text on images with some simple tricks.
6 min read
How to Add Captions to Images in Google Docs
Add Captions to Images in Google Docs - Quick StepsOpen Google Docs >> Select a DocumentSelect the Image >> Click on the Inline OptionType your Caption >> Format the Caption Adding captions to images in Google Docs is a great way to provide context and improve the clarity of your c
11 min read
How to Rotate Images in Google Docs
Here, we will cover How to spin or rotate in Google Docs easily. You can spin it left or right until it seems the way you need. Whether for college, work, or a school project, this skill becomes accessible. If you've got a photo, it's no longer pretty right—no issues. You can flip it around with a
6 min read
How to Insert Images in Google Docs (Desktop & Mobile)
Images add clarity and visual appeal to documents, making them essential for reports, presentations, and creative content. Google Docs provides various methods to insert images, whether it's through the toolbar, drag-and-drop, or linking via URL, ensuring flexibility in how visuals can be included.T
11 min read
How to Insert Word Art in Google Docs
Google Docs is a cloud-based product where you can create projects, implement reports, create personal documents, and so on. Google Docs is a free tool that gives you many advantages such as accessing your documents from anywhere, auto-saving features, and real-time collaboration. One such useful an
6 min read
How to Convert a PDF to Google Docs: 4 Methods
How to Turn a PDF into a Google Doc - Quick StepsOpen Google Drive Click on Upload > Upload the PDFLocate the PDF > Perform a Right-click Select "Open With" > Google DocsGo to File Menu in Google Docs > Download as Google DocsLooking to convert a PDF into an accessible Google Doc? Conver
8 min read
How To Make A Concept Map On Google Docs
Create a concept map in Google Docs – Quick Steps 1. Open Google Docs > Create a Doc 2. Click on Insert > Select Drawing > New 3. Start Drawing > Click “Save and Close†Creating a concept map can be a powerful and visually engaging way to organize your thoughts, ideas, and information. A
3 min read
How to Copy and Paste Text and Images in Google Docs
Google Docs is a versatile online document editor that allows you to easily copy and paste text and images for both personal and professional purposes. With features like customizable font styles, text alignment, and media insertion, Google Docs makes document creation straightforward and efficient.
10 min read
How to Convert a Google Doc to PDF - 4 Methods
Google Doc to PDF - Quick StepsVisit Google Docs > Open your documentClick File in the top-left menuSelect Download > PDF Document (.pdf).PDF downloaded > Locate the downloaded fileConverting a Google Doc to a PDF is a quick and efficient way to share or preserve your document with consiste
11 min read
How to Make Two Columns in Google Docs
Organizing text into two columns in Google Docs can significantly improve the structure and readability of your documents, making it perfect for articles, newsletters, or academic papers. This is great for things like newsletters or flyers. Google Docs is a tool that many people use for writing beca
8 min read