Selenium IDE is a powerful browser extension allowing you to record and replay interactions easily. However, for more advanced testing and integration with frameworks like JUnit, it is essential to convert recorded commands into Java code.
In this guide, we will walk you through converting Selenium IDE commands to Java, enabling you to create flexible and maintainable automated tests that can be integrated into your Java-based testing frameworks.
Steps to convert commands recorded in Selenium IDE to Java
Step 1: Creating New Project
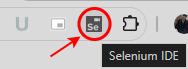
- Open the Selenium IDE by clicking on the extension in the web browser. It is compatible with Google Chrome and Mozilla Firefox.
- Now you will see a pop-up window. Click on "Create a new project".

- Now give any desired name to your project. Then click "OK" to confirm.

Step 2: Recording Test in Selenium IDE
- Now you need to give a base URL in URL tab for recording commands in Selenium IDE. Then click on "Rec" button on top right corner.

- Now it will open the base URL in new window and shows a message "Selenium IDE is recording...". It means that your each action is recording

- Perform actions like navigating to a website, clicking on buttons, and filling out forms, etc. It will record each action and assign commands accordingly. You can also see all the commands and their targets in the IDE performed by you.

- You can also create you own desired target by choosing command in the "Command" in the option and giving your custom target in the "Target" field given below.

- By specifying custom targets you can assign any command to do some specific task whenever that command is called or run by the test. For example, if we change the URL in the target field from "https://write.geeksforgeeks.org/" to "https://www.geeksforgeeks.org/" then it will open the "Home page" of GeeksforGeeks instead of "Write portal".
- You can also Enable and Disable commands by clicking on "Enable/Disable Command" button. Note that open, close, set window size and run script commands cannot be disabled. The disabled commands will not be executed when running test.

Step 3: Running Current Test
- Now click on the "Run current test" button to check how the Selenium recorded your actions and performing each action.

- You can also check log in the Selenium IDE to check each step followed by IDE.

Step 4: Export the Recorded Test
- Now, once the test recording is completed go to the File menu.
- Click on the three dots and choose the "Export" option and then select "Java JUnit" from languages and then click on "EXPORT" button.


- Save the generated Java file to your desired directory. The file will be saved with .java extension.
- You can also rename the Test from "Untitled" (by default) in Selenium IDE by choosing the "Rename" option.

Output
Now navigate to the file directory and open the file. You can open the file in VS Code, Notepad or any other editor you prefer. The commands will be saved in the form of Java code. Your code will look like this:

Exporting to Other Languages
Selenium IDE provides different languages option to export our file. We can export files in C# NUnit, C# xUnit, JavaScript Mocha, Python pytest, and Ruby RSpec. We only have to select the language while exporting our test file
To export the file in C# Nunit:
- Click on the three dots and choose the "Export" option and then select "C# Nunit" from languages and then click on "EXPORT" button.
- Save the generated C# file to your desired directory. The file will be saved with .cs extension.
To export the file in C# xunit:
- Click on the three dots and choose the "Export" option and then select "C# xunit" from languages and then click on "EXPORT" button.
- Save the generated C# file to your desired directory. The file will be saved with .cs extension.
To export the file in JavaScript Mocha:
- Click on the three dots and choose the "Export" option and then select "JavaScript Mocha" from languages and then click on "EXPORT" button.
- Save the generated JavaScript Mocha file to your desired directory. The file will be saved with .js extension.
To export the file in Python pytest:
- Click on the three dots and choose the "Export" option and then select "Python pytest" from languages and then click on "EXPORT" button.
- Save the generated Python pytest file to your desired directory. The file will be saved with .py extension.
To export the file in Ruby RSpec:
- Click on the three dots and choose the "Export" option and then select "Ruby RSpec" from languages and then click on "EXPORT" button.
- Save the generated Ruby RSpec file to your desired directory. The file will be saved with .rb extension.

Conclusion
Converting Selenium IDE recorded commands to Java enhances the scalability and maintainability of your test scripts. By exporting tests to Java, you can leverage advanced features in JUnit or TestNG frameworks and seamlessly integrate them into CI/CD pipelines.
This approach ensures more reliable and efficient automated testing throughout the entire development lifecycle, making it a valuable skill for any tester working with Selenium and Java.