Git cherry-pick allows you to apply a specific commit from one branch onto another without merging the entire branch.
- Selectively applies individual commits.
- Useful for hotfixes or targeted changes.
- Does not bring full branch history.
Git reapplies the selected commit on the current branch, creating a new commit with a different ID.
git cherry-pick <commit-hash>Working of Git Cherry-Pick
Each Git commit is uniquely identified by a SHA-1 hash, generated from:
- Commit content
- Metadata (author, timestamp)
- Parent commit(s)
Here’s what happens during cherry-pick:
- Identify the Commit: Git locates the commit based on the provided hash.
- Generate a Patch: Git calculates the differences (diff) introduced by the commit relative to its parent.
- Apply the Patch: Git applies these changes to your current working directory.
- Create a New Commit: After applying the changes, Git creates a new commit on your current branch with these changes. This new commit has a different hash due to its different parent commit.
This allows you to selectively transfer changes from one branch to another without merging the full history.
Cherry-Pick Vs Merge Vs Rebase
| Command | Description |
|---|---|
| git merge | Brings all commits from another branch. |
| git rebase | Rewrites history by changing the base of commits. |
| git cherry-pick | Applies only one specific commit to the current branch. |
When to Use Git Cherry-Pick?
Git cherry-pick lets you apply a commit from one branch to another without manually using commands like git show and patching.
- Transfers a specific commit automatically.
- Eliminates manual steps such as git show and reapplying changes.
- Recreates the commit on the target branch.
Visual Explanation
In order to understand better refer to the below diagram as follows:

Before Git Cherry-Pick
Branch Structure:
- The Main Branch has a linear sequence of commits (shown in green).
- At some point, a new branch (called Another Branch) was created from the main branch.
- The Another Branch has one extra commit (orange) that doesn't exist in the main branch.
Key Point:
- The orange commit represents a change that is only present in the "Another Branch".
- At this point, the Main Branch has no knowledge of this change.

After Git Cherry-Pick
What Changed:
- The orange commit from Another Branch has been cherry-picked and applied to the Main Branch.
- This is visually represented by the red arrow labeled "CherryPick".
Result:
- Main branch receives the same changes with a new commit hash.
- No other commits or history are merged.
- Both branches share the fix while staying independent.
Understanding Git Cherry-Pick Behavior
- Git cherry-pick is not a merge and does not include full history.
- It selectively applies only the chosen commit.
- Useful for applying a specific fix or feature to another branch.
Step-by-Step Guide to Use Cherry-Pick
Here is a step-by-step guide how to cherry-pick a commit from one branch to another:
Step 1: Initialize a Git Project
Opening the git bash and creating a new project named sample and initializing the repo using the git init command.

Step 2: Create and Commit a File
Creating a '.txt'file using vi command to the project let's say an index file and add it to our sample project and make a commit and write a commit message before pressing the Enter.
Note: After running the vi <file_name> command , type :wq to save and quit the file.

One can check your commit by git log command easily:

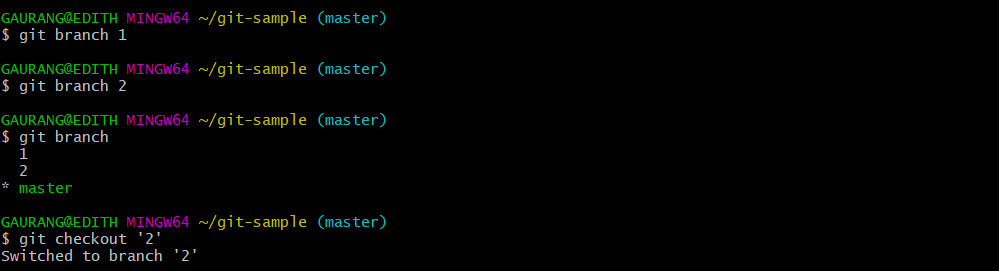
Step 3: Create Branches
Now assume we have 2 versions, so create 2 different branches by using the git branch command and move to a branch, let us say 2 by using git checkout command.
Note: One can simple view all the branches by running the git branch command as shown in the below diagram.
Step 4: Add a Feature File in branch 2
Now suppose you want to work on some new feature, so creating and adding a new feature file lets say feature.txt using vi and add command respectively as shown below. Then commit your changes with a commit message.

One can check your commit by git log command as shown below:

Step 5: Fix a Bug in branch 2
Suppose you discover a bug in the feature that also exists in another branch. Fix it by creating a file (e.g., fix.txt), add it to the current branch, and commit the changes.

Checking our final commits:

Step 6: Cherry-Pick Bug Fix into branch 1
The bug is fixed in branch 2, but the same fix is needed in branch 1 without merging ongoing feature work. In this case, copy the commit hash, switch to branch 1 using checkout, and apply the fix using git cherry-pick.

As seen clearly from the above, then we notice that previously we have only index.txt before doing cherry-picking, but now we have the fix.txt file also in our 1st branch.
Now if we try to check git log --oneline, we will be able to see that commit also came in the branch 1.

Commit hash: A commit hash is a unique identifier that is generated by Git for every commit. Each commit has its one commit hash.
Note: While using this command make sure you are on the branch you want to apply the commit.
Common Errors and Troubleshooting in Git Cherry-Pick
Cherry-picking can lead to various issues, especially when dealing with complex or diverged codebases. Understanding the root causes and how to handle them is crucial for effective Git usage.
1. Merge Conflict
Error Message:
error: could not apply <commit-hash>
hint: after resolving the conflicts, mark the corrected paths with 'git add'
Cause:
This occurs when the changes in the cherry-picked commit conflict with existing changes in the current branch.
Solution:
- Use git status to identify files with conflicts.
git status- Manually resolve the conflicts in each file.
- Stage the resolved files with git add <file>.
git add <file>- Continue the process using:
git cherry-pick --continue2. Cherry-Picking a Merge Commit
Error Message:
error: commit <hash> is a merge but no -m option was givenCause:
You tried to cherry-pick a merge commit without specifying which parent to use.
Solution:
Use the -m option to tell Git which parent to base the cherry-pick on (usually -m 1 for the first parent):
git cherry-pick -m 1 <merge-commit-hash>3. Cherry-Pick in Progress
Error Message:
You have not concluded your cherry-pick (MERGE_HEAD exists).Cause:
A previous cherry-pick operation was interrupted (due to conflict or manual abort).
Solution:
- To continue:
git cherry-pick --continue - To abort:
git cherry-pick --abort
4. Detached HEAD Warning
Scenario:
Running cherry-pick in a detached HEAD state can apply changes without a branch reference.
Solution:
- Always ensure you are on the correct branch:
git checkout branch-name