Endless RecyclerView in Android
Last Updated :
23 Dec, 2022
In this article, we are going to see how to build an endless RecyclerView in Android Studio. It is mostly used to design the user interface with great control over the lists and grids of android applications. We can implement both horizontal and vertical layouts using RecyclerView. Here, we will be creating a RecyclerView with a load more option. A sample video is shown below to get an idea about what we are going to do in this article. Note that we will be using Java as the programming language.
Step by Step Implementation
Step 1: Create a New Project
To create a new project in Android Studio please refer to How to Create/Start a New Project in Android Studio. Note that select Java as the programming language.
Step 2: Working with the activity_main.xml file
Navigate to the app > res > layout > activity_main.xml and add the below code to that file. Below is the code for the activity_main.xml file.
XML
<?xml version="1.0" encoding="utf-8"?>
<androidx.constraintlayout.widget.ConstraintLayout
    xmlns:android="http://schemas.android.com/apk/res/android"
    xmlns:app="http://schemas.android.com/apk/res-auto"
    xmlns:tools="http://schemas.android.com/tools"
    android:layout_width="match_parent"
    android:layout_height="match_parent"
    android:orientation="vertical"
    tools:context=".MainActivity">

    <!--RecyclerView is Added. The attribute
        app:layoutManager="androidx.recyclerview.widget.LinearLayoutManager"
        is used for Linear Layout Manager-->
    <androidx.recyclerview.widget.RecyclerView
        android:id="@+id/recyclerView"
        android:layout_width="match_parent"
        android:layout_height="match_parent"
        app:layoutManager="androidx.recyclerview.widget.LinearLayoutManager"
        app:layout_constraintBottom_toBottomOf="parent"
        app:layout_constraintLeft_toLeftOf="parent"
        app:layout_constraintRight_toRightOf="parent"
        app:layout_constraintTop_toTopOf="parent" />

</androidx.constraintlayout.widget.ConstraintLayout>
Step 3: Create a New layout Resource File
Create a new Layout Resource File with name item_row.xml. To create a new Layout Resource File, Navigate to res > layout. Right-click on the layout folder then click on New and then click on Layout Resource File, a dialogue box is opened, add a name to your Layout Resource File and then click on the OK button. Your new Layout Resource File is created. Follow the images given below:


Step 4: Working with the item_row.xml file
Go to layout > item_row.xml file and add the below code to that file. Here the layout for the rows of RecyclerView is defined.
XML
<?xml version="1.0" encoding="utf-8"?>
<androidx.cardview.widget.CardView
    xmlns:android="http://schemas.android.com/apk/res/android"
    xmlns:app="http://schemas.android.com/apk/res-auto"
    android:layout_width="match_parent"
    android:layout_height="match_parent"
    app:cardElevation="8dp"
    app:cardUseCompatPadding="true">

    <!--TextView Added for the layout
        of rows of the recyclerview-->
    <TextView
        android:id="@+id/tvItem"
        android:layout_width="wrap_content"
        android:layout_height="wrap_content"
        android:padding="16dp"
        android:text="Item X" />

</androidx.cardview.widget.CardView>
Step 5: Again Create a New layout Resource File
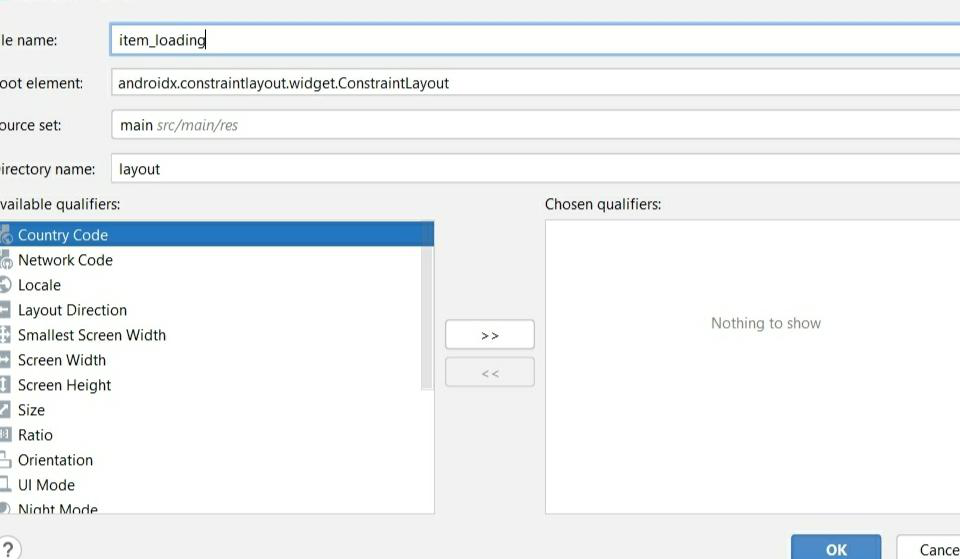
Create a new Layout Resource File with name item_loading.xml. To create a new Layout Resource File, Navigate to res > layout. Right-click on the layout folder then click on New and then click on Layout Resource File, a dialogue box is opened, add a name to your Layout Resource File and then click on the OK button. Your new Layout Resource File is created. Follow the images given below:
Step 6: Working with the item_loading.xml file
Go to layout > item_loading.xml file and add the below code to that file. Here the layout for the loading view is defined.
XML
<?xml version="1.0" encoding="utf-8"?>
<androidx.constraintlayout.widget.ConstraintLayout
    xmlns:android="http://schemas.android.com/apk/res/android"
    xmlns:tools="http://schemas.android.com/tools"
    android:layout_width="match_parent"
    android:layout_height="match_parent"
    android:orientation="vertical">

    <!--ProgressBar is added to show
        the progress of the content-->
    <ProgressBar
        android:id="@+id/progressbar"
        android:layout_width="wrap_content"
        android:layout_height="wrap_content"
        android:layout_gravity="center_horizontal"
        android:indeterminate="true"
        android:paddingLeft="8dp"
        android:paddingRight="8dp"
        tools:ignore="MissingConstraints" />

</androidx.constraintlayout.widget.ConstraintLayout>
Step 7: Create an Adapter class for RecyclerView
Create an adapter class for RecyclerView with the name RecyclerViewAdapter. To create the adapter class, you have to follow the images given below:


After adding a name to the adapter class press enter. Your RecycleviewAdapter.java file has been created.
Step 8: Working With the RecyclerViewAdapter.java file
Go to the RecyclerViewAdapter.java file and add the code given below to that file. Comments are added inside the code to understand the code in more detail.
Java
import android.view.LayoutInflater;
import android.view.View;
import android.view.ViewGroup;
import android.widget.ProgressBar;
import android.widget.TextView;

import androidx.annotation.NonNull;
import androidx.recyclerview.widget.RecyclerView;

import java.util.List;

public class RecylerViewAdapter extends RecyclerView.Adapter<RecyclerView.ViewHolder> {

    private final int VIEW_TYPE_ITEM = 0;
    private final int VIEW_TYPE_LOADING = 1;
    private List<String> mItemList;

    public RecylerViewAdapter(List<String> itemList) {
        mItemList = itemList;
    }

    // Based on the View type we are instantiating the
    // ViewHolder in the onCreateViewHolder() method
    @NonNull
    @Override
    public RecyclerView.ViewHolder onCreateViewHolder(@NonNull ViewGroup parent, int viewType) {
        if (viewType == VIEW_TYPE_ITEM) {
            View view = LayoutInflater.from(parent.getContext()).inflate(R.layout.item_row, parent, false);
            return new ItemViewHolder(view);
        } else {
            View view = LayoutInflater.from(parent.getContext()).inflate(R.layout.item_loading, parent, false);
            return new LoadingviewHolder(view);
        }
    }

    // Inside the onBindViewHolder() method we
    // are checking the type of ViewHolder
    // instance and populating the row accordingly
    @Override
    public void onBindViewHolder(@NonNull RecyclerView.ViewHolder holder, int position) {
        if (holder instanceof ItemViewHolder) {
            populateItemRows((ItemViewHolder) holder, position);
        } else if (holder instanceof LoadingviewHolder) {
            showLoadingView((LoadingviewHolder) holder, position);
        }
    }

    // getItemCount() method returns the size of the list
    @Override
    public int getItemCount() {
        return mItemList == null ? 0 : mItemList.size();
    }

    // getItemViewType() method is the method where we check each element
    // of the list. If the element is NULL we set the view type as 1 else 0
    public int getItemViewType(int position) {
        return mItemList.get(position) == null ? VIEW_TYPE_LOADING : VIEW_TYPE_ITEM;
    }

    public class ItemViewHolder extends RecyclerView.ViewHolder {
        TextView tvItem;
        public ItemViewHolder(@NonNull View itemView) {
            super(itemView);
            tvItem = itemView.findViewById(R.id.tvItem);
        }
    }

    private class LoadingviewHolder extends RecyclerView.ViewHolder {
        ProgressBar progressBar;
        public LoadingviewHolder(@NonNull View itemView) {
            super(itemView);
            progressBar = itemView.findViewById(R.id.progressbar);
        }
    }

    private void showLoadingView(LoadingviewHolder viewHolder, int position) {
        // Progressbar would be displayed
    }

    private void populateItemRows(ItemViewHolder viewHolder, int position) {
        String item = mItemList.get(position);
        viewHolder.tvItem.setText(item);
    }
}
Step 9: Working with the MainActivity.java file
Go to the MainActivity.java file and the code given below to that file. In MainActivity.java class we will be instantiating the above Adapter. Comments are added inside the code to understand the code in more detail.
Java
import android.os.Bundle;
import android.os.Handler;

import androidx.annotation.NonNull;
import androidx.appcompat.app.AppCompatActivity;
import androidx.recyclerview.widget.LinearLayoutManager;
import androidx.recyclerview.widget.RecyclerView;

import java.util.ArrayList;

public class MainActivity extends AppCompatActivity {

    RecyclerView recyclerView;
    RecylerViewAdapter recylerViewAdapter;
    ArrayList<String> rowsArrayList = new ArrayList<>();

    boolean isLoading = false;

    @Override
    protected void onCreate(Bundle savedInstanceState) {
        super.onCreate(savedInstanceState);
        setContentView(R.layout.activity_main);
        recyclerView = findViewById(R.id.recyclerView);

        // Following three methods have
        // been implemented in this class.
        populateData();
        initAdapter();
        initScrollListener();
    }

    // PopulateData() method shows after how many items load more option
    // should be made available. In our case, i have taken 20 items
    private void populateData() {
        int i = 0;
        while (i < 20) {
            rowsArrayList.add("ITEM " + i);
            i++;
        }
    }

    // initAdapter() method initiates the RecyclerViewAdapter
    private void initAdapter() {
        recylerViewAdapter = new RecylerViewAdapter(rowsArrayList);
        recyclerView.setAdapter(recylerViewAdapter);
    }

    // initScrollListener() method is the method where we are checking
    // the scrolled state of the RecyclerView and if bottom-most is visible
    // we are showing the loading view and populating the next list
    private void initScrollListener() {
        recyclerView.addOnScrollListener(new RecyclerView.OnScrollListener() {
        @Override
        public void onScrollStateChanged(@NonNull RecyclerView recyclerView, int newState) {
        super.onScrollStateChanged(recyclerView, newState);
        }
        @Override
        public void onScrolled(@NonNull RecyclerView recyclerView, int dx, int dy) {
        super.onScrolled(recyclerView, dx, dy);

        LinearLayoutManager linearLayoutManager = (LinearLayoutManager) recyclerView.getLayoutManager();

        if (!isLoading) {
            if (linearLayoutManager != null && linearLayoutManager.findLastCompletelyVisibleItemPosition() == rowsArrayList.size() - 1) {
            // bottom of list!
            loadMore();
            isLoading = true;
            }
        }
        }
        }
        );
    }

    // LoadMore() method is used to implement
    // the functionality of load more
    private void loadMore() {
        rowsArrayList.add(null);
        recylerViewAdapter.notifyItemInserted(rowsArrayList.size() - 1);

        Handler handler = new Handler();
        handler.postDelayed(new Runnable() {
            @Override
            public void run() {
                rowsArrayList.remove(rowsArrayList.size() - 1);
                int scrollPosition = rowsArrayList.size();
                recylerViewAdapter.notifyItemRemoved(scrollPosition);
                int currentSize = scrollPosition;

                // Next load more option is to be shown after every 10 items.
                int nextLimit = currentSize + 10;

                while (currentSize - 1 < nextLimit) {
                    rowsArrayList.add("Item " + currentSize);
                    currentSize++;
                }

                recylerViewAdapter.notifyDataSetChanged();
                isLoading = false;
            }
        }, 2000);
    }
}
Output:
Similar Reads
Android RecyclerView in Kotlin
In this article, you will know how to implement RecyclerView in Android using Kotlin . Before moving further let us know about RecyclerView. A RecyclerView is an advanced version of ListView with improved performance. When you have a long list of items to show you can use RecyclerView. It has the ab
4 min read
RecyclerView in Android with Example
RecyclerView is a ViewGroup added to the android studio as a successor of the GridView and ListView. It is an improvement on both of them and can be found in the latest v-7 support packages. It has been created to make possible construction of any lists with XML layouts as an item which can be custo
7 min read
DiffUtil in RecyclerView in Android
Have you ever created a List in Android? What did you use to make it? ListView or RecyclerView are two types of views. If you are an Android Developer it's sure you've used RecyclerView at some point. In this article, we'll go through how to update the RecyclerView with DiffUtils. What exactly is Re
5 min read
Expandable RecyclerView in Android with Kotlin
In this article, we will get to know how to implement the expandable RecyclerView. In General, we will show the list of items in the listview but in some situations like if you want to show the sub-list items, then we have to use an expandable list. See the below image for a better understanding. ex
7 min read
Android | Horizontal RecyclerView with Examples
Recycler View is a ViewGroup added to Android Studio as a successor of the GridView and ListView. It is an improvement on both of them and can be found in the latest v-7 support packages. It has been created to make possible construction of any lists with XML layouts as an item which can be customiz
4 min read
How to Add Dividers in Android RecyclerView?
In the article Android RecyclerView in Kotlin, it's been demonstrated how to implement the Recycler View in Android. But in the case of User Experience, the items need to be distinguished with the divider and proper padding and margins in each item. In this case, the Recycler View Item Decoration co
8 min read
TreeView in Android with Example
If you are looking for new UI designs to represent huge data, then there are so many ways to represent this type of data. You can use pie charts, graphs, and many more view types to implement these views. For displaying such huge data then we can prefer using a TreeView. TreeView is similar to that
4 min read
Elastic View in Android
In this article, ElasticView is added in android. The ElasticView is a regular CardView, which can flex from user touches. OnClickListener and other various important methods can also be added to the child view of ElasticView. It makes the user interface more attractive thereby enhancing the user ex
2 min read
How to Animate RecyclerView Items in Android?
RecyclerView Item animation is one of the modern features that we can add to our Android app, the basic working of this is when any user opens our app then the data items that are present in recycler view will animate and then it will show to the user.it is so easy to implement also it can enhance t
5 min read
How to Disable RecyclerView Scrolling in Android?
RecyclerView is a view group used for displaying data from arrays and databases. RecyclerView basically is a list of items from the data. RecyclerView is often referred to as a successor of GridView and ListView. More about RecyclerView could be found at RecyclerView in Android with Example. Recycle
3 min read