The du (Disk Usage) command in Linux is used to estimate and display file and directory space usage. It helps users identify which files or directories consume the most disk space. This command is essential for system monitoring and storage management. By default, it shows usage recursively for directories.
- Displays disk usage of files and directories
- Helps identify large files or space-heavy directories
- Supports human-readable output formats
- Allows limiting output depth for better readability
- Useful for disk cleanup and system maintenance
Example: Display Disk Usage of a Directory
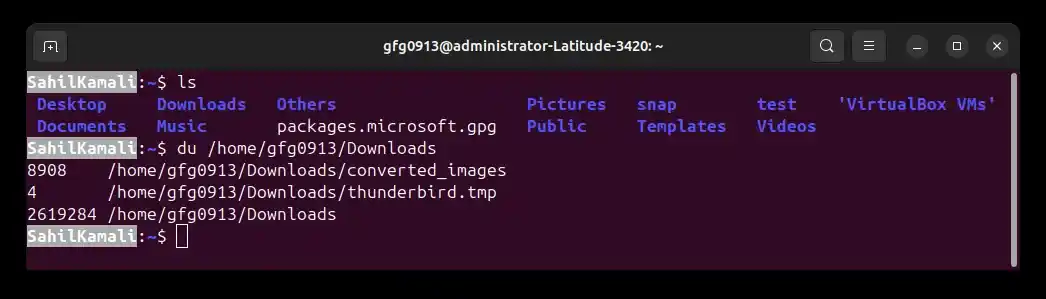
Command:
du /home/gfg0913/DownloadsOutput:
Syntax
du [OPTIONS] [FILE/DIRECTORY]- [options]: Optional flags that modify command behavior
- [FILE/DIRECTORY]: The target file or directory path to analyze, if no file or directory is specified, du uses the current directory (.)
Options available in du command in Linux
The du command provides several options to customize output and control how disk usage is calculated and displayed.
- -a, --all: Display disk usage for all files and directories, including hidden ones.
- -s, –summarize: Provide only a summary of the specified directory or file, without listing subdirectory details.
- -d, –max-depth=N: Print usage totals only for directories that are N or fewer levels below the specified directory.
- -S, –separate-dirs: For directories, do not include the size of subdirectories in the total.
- -h, –human-readable: Show sizes in a human-readable format (KB, MB, GB).
- -B, –block-size=SIZE: Scale sizes to the specified SIZE before printing (e.g., KB, MB).
- –apparent-size: Show the apparent size of files rather than the actual disk space they occupy.
- -0, –null: End each output line with a NULL character instead of a newline.
- -c, –total: Display a grand total of disk usage in addition to individual files and directories.
- –exclude: Exclude files that match a specific pattern from the output.
- –time: Show the time of the last modification of files or directories.
Demonstration of du Options
1. -h (Human Readable)
Displays file and directory sizes in human-readable format (KB, MB, GB). This is useful when default block-size output is hard to interpret.
Command:
du -h DownloadsOutput:

2. -a (All Files)
Shows disk usage for all files along with directories. Use this when you need detailed file-level disk usage instead of only directory summaries.
Command:
du -a -h DownloadsOutput:

3. -c (Total)
Displays a grand total of disk usage along with individual entries. This is useful when you want an overall usage summary in the same output.
Command:
du -c -h /home/gfg0913/Pictures/Output:

4. -d (Max Depth)
Shows disk usage only up to a specific directory level. This prevents too much detailed output from deeply nested folders.
Command:
du -h -d 1 Pictures/Output:

- Now try with level 2, you will get some extra directories
Command:
du -h -d 2 Pictures/Output:

5. -s (Summary)
Displays only the total disk usage of the specified directory without showing subdirectory details. Useful for quick checks.
Command:
du -s /home/gfg0913/DownloadsOutput:

6. --time (Last Modified Time)
Shows the last modification time of files and directories along with their disk usage. Useful for identifying recently changed data.
Command:
du --time -h /home/gfg0913/DownloadsOutput:
