Deployment of Spring MVC Application on a Local Tomcat Server
Last Updated :
24 Apr, 2025
Spring MVC is a Web Framework under the group of projects by Spring Team using Java EE technologies. It is an open source and fairly used to create robust and dependable web applications with Java Programming Language. Spring MVC is designed across the Model-View-Controller (MVC) Architecture. To run the Spring MVC web application, we want to install it on our local Tomcat Server. In this article, we will discuss the methods to installation our Spring MVC application on our local Apache Tomcat server.
Prerequisite
- Java
- Maven & Eclipse IDE
- Local Apache Tomcat
Project Structure:

Creating Spring MVC Application
Create a basic Spring MVC project to deploy it in our Local Tomcat server.
Step 1: Create a basic Maven starter project in Eclipse by going to New -> Maven Project and select web-app archetype.
Step 2: In the pom.xml file add the dependencies for Spring MVC and Maven War Plugin.
XML
<project xmlns="http://maven.apache.org/POM/4.0.0"
    xmlns:xsi="http://www.w3.org/2001/XMLSchema-instance"
    xsi:schemaLocation="http://maven.apache.org/POM/4.0.0 http://maven.apache.org/maven-v4_0_0.xsd">
    <modelVersion>4.0.0</modelVersion>
    <groupId>com.example</groupId>
    <artifactId>springmvcdeploy</artifactId>
    <packaging>war</packaging>
    <version>0.0.1-SNAPSHOT</version>
    <name>springmvcdeploy Maven Webapp</name>
    <url>http://maven.apache.org</url>
    <properties>
        <maven.compiler.source>1.8</maven.compiler.source>
        <maven.compiler.target>1.8</maven.compiler.target>
    </properties>
    <dependencies>
        <dependency>
            <groupId>org.springframework</groupId>
            <artifactId>spring-webmvc</artifactId>
            <version>6.1.1</version>
        </dependency>
    </dependencies>
    <build>
        <finalName>springmvcdeploy</finalName>
        <plugins>
            <plugin>
                <groupId>org.apache.maven.plugins</groupId>
                <artifactId>maven-war-plugin</artifactId>
                <version>3.4.0</version>
            </plugin>
        </plugins>
    </build>
</project>
Note: maven-war-plugin is used to generate war build file using maven command line tool.
Step 3: Open the web.xml under the /main/webapp/WEB-INF/ folder and configure the DispatcherServlet to handle every incoming request.
XML
<!-- web.xml -->
<!DOCTYPE web-app PUBLIC
 "-//Sun Microsystems, Inc.//DTD Web Application 2.3//EN"
 "http://java.sun.com/dtd/web-app_2_3.dtd" >

<web-app>
  <display-name>Archetype Created Web Application</display-name>
  <servlet>
        <servlet-name>dispatcher</servlet-name>
        <servlet-class>org.springframework.web.servlet.DispatcherServlet</servlet-class>
    </servlet>
    <servlet-mapping>
        <servlet-name>dispatcher</servlet-name>
        <url-pattern>/</url-pattern>
    </servlet-mapping>
</web-app>
- In Spring MVC, each request may be served through the DispatcherServlet so configure the DispatcherServlet to intercept every request to the “/” root context direction.
- Create a servlet with the <servlet> tag, map the magnificence DispatcherServlet magnificence to it the usage of <servlet-class> child tag, and also offer a name to it the use of <servlet-name> tag for servlet-mapping.
- Map “/” URL- pattern to the DispatcherServlet the usage of its servlet-name, right here dispatcher is used as servlet-name.
Step 4: Configure the servlet created above "dispatcher" using dispatcher-servlet.xml file under /main/webapp/WEB-INF/ folder.
XML
<!-- dispatcher-servlet.xml -->
<?xml version="1.0" encoding="UTF-8"?>
<beans xmlns="http://www.springframework.org/schema/beans"
    xmlns:xsi="http://www.w3.org/2001/XMLSchema-instance"
    xmlns:context="http://www.springframework.org/schema/context"
    xmlns:mvc="http://www.springframework.org/schema/mvc"
    xsi:schemaLocation="
        http://www.springframework.org/schema/beans
        http://www.springframework.org/schema/beans/spring-beans.xsd
        http://www.springframework.org/schema/context
        http://www.springframework.org/schema/context/spring-context.xsd
        http://www.springframework.org/schema/mvc
        http://www.springframework.org/schema/mvc/spring-mvc.xsd">

    <mvc:annotation-driven />
    <context:component-scan
        base-package="com.example"></context:component-scan>
</beans>
- A dispatcher-servlet.Xml is created to configure the servlet and upload an annotation-driven tag to use the annotation-primarily based configuration in the servlet.
- Configure the context’s component-scan base package for scanning for controllers and configurations.
Step 5: Create a simple response file under "/main/webapp/WEB-INF/" named hello.jsp. This jsp will be returned by our Spring Controller.
HTML
<!-- hello.jsp -->
<%@ page language="java" contentType="text/html; charset=ISO-8859-1"
    pageEncoding="ISO-8859-1"%>
<!DOCTYPE html>
<html>
<head>
<meta charset="ISO-8859-1">
<title>Insert title here</title>
</head>
<body>
    <h1>
        Hello there your Spring MVC is working!!!
    </h1>
</body>
</html>
Step 6: Create a controller under "/main/java" directory inside a basic package called com.example.
HelloWorld.java:
Java
package com.example;

import org.springframework.stereotype.Controller;
import org.springframework.web.bind.annotation.GetMapping;

@Controller
public class HelloWorld {
    @GetMapping("/hello")
    public String hello() {
        return "/WEB-INF/hello.jsp";
    }
}
- Create a Spring controller by annotating the class with @Controller annotation.
- A Get request is created at /hello and mapped to the hello() method using GetMapping annotation.
- Return the view hello.jsp along with its path starting from WEB-INF folder.
Creating War for Spring MVC
To deploy the Spring MVC application on our local Tomcat server, we need to build the project in war format. War stands for Web Application Archive which is similar to Jar where the entire resources necessary for the application is self-contained in the archive like the JAR files, Java servlets, Java classes, XML files, static resources.
- Open a new Terminal and go to the project directory.
- Use the Maven war plugin to generate the War file for the project.
mvn clean install
Below is the terminal where maven is being installed.

- This will remove the target folder and generate the fresh war file for the project.
- We can also use Eclipse IDE feature to directly create the war, right click on the Project and Go to Run as -> Maven Install.
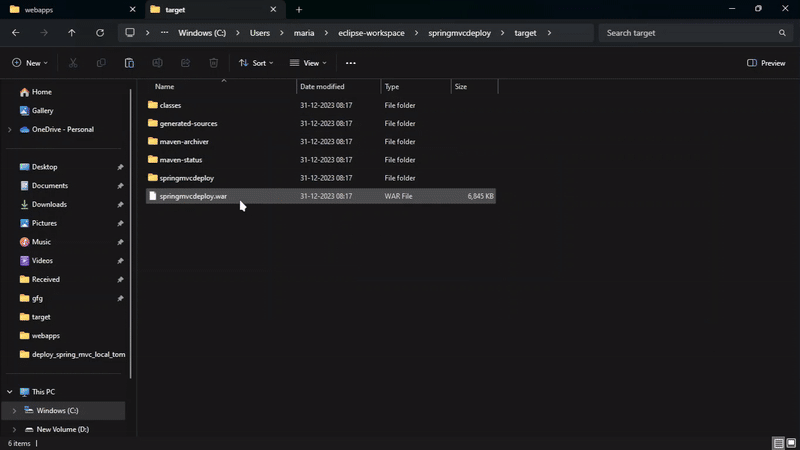
- This will generate project_name.war in your target folder under your project.

Deploying Spring MVC Application
There are two different ways to easily deploy the Spring MVC app to our Local Tomcat server.
Approach 1:
- Open the target folder and copy the generated war file.
- Go to the tomcat installation folder and paste it into the "/webapp/" folder.
- After that just start the tomcat server using bin/startup.bat or bin/startup.sh based on your system.
- On starting the server, it will automatically take the war file and deploy it in the webapp folder.
- To view the output, open the browser and go to http://localhost:8080/context_path/hello,
- where context_path is the project name.
Approach 2:
- Start your tomcat server and login to the Tomcat manager GUI by opening http://localhost in your browser.
- In the manager app, at the bottom Deploy area, select the file and click on the deploy button.
- Verify whether the app is deployed by visiting the context_path of the app and the hello.jsp page.

Similar Reads
How To Build And Deploy Spring Boot Application In Tomcat For DevOps ?
Spring Boot is a famous Java framework for building stand-alone applications. Now if we are going to build web applications using Spring Boot then it may not be useful to build stand-alone applications as we need to deploy the application on the web. Spring Boot by default packages the application i
9 min read
How to Create a Simple Spring Boot Application?
Spring Boot is one of the most popular frameworks for building Java-based web applications. It is used because it simplifies the development process by providing default configurations and also reduces boilerplate code. In this article, we will cover the steps to create a simple Spring Boot applicat
2 min read
How to Deploy Spring Boot Application in Kubernetes ?
The Spring Boot framework provides an assortment of pre-configured templates and tools to make the development of Java-based applications simpler. With little configuration, it enables developers to quickly design production-ready, stand-alone apps. Kubernetes, commonly referred to as K8s, is an ope
7 min read
How to Access Values From application.properties in Spring Boot?
In a Spring Boot application, application.properties is the central repository for defining configuration properties. These properties are accessible across the application to customize behavior. Accessing values from application.properties is a common requirement in Spring Boot projects. Spring Boo
3 min read
Add Build Properties to a Spring Boot Application
Spring Boot framework is an open-source framework for developing web applications with high performance and the Spring Boot makes it much easier to develop Spring-based applications developed by Java programming In this article, we will learn how to add build properties to a Spring Boot Application.
4 min read
How to Run Spring Boot Application?
Spring Boot is built on the top of Spring and contains all the features of Spring. And it is becoming a favorite of developers these days because of its rapid production-ready environment which enables the developers to directly focus on the logic instead of struggling with the configuration and set
8 min read
How to Set Context Path in Spring Boot Application?
The context path is a prefix to the URL path used to identify and differentiate between different context(s). In Spring Boot, by default, the applications are accessed by context path “/â€. That means we can access the application directly at http://localhost:PORT/. For example http://localhost:8080/
6 min read
How to Convert application.properties to application.yml for Spring Boot?
Spring Boot allows us to configure application properties in two formats that are application.properties and application.yml. Both serve the same purpose of configuring application settings such as database connections, server ports, and framework-specific configurations. Many developers prefer YAML
7 min read
How to Deploy Java Apps on JBoss Server
JBoss, now known as WildFly, is an open-source and lightweight Java-based application server developed by Red Hat which is used for deploying, hosting, and running Java applications. To deploy a Java application on JBoss we package it as a Web Application (WAR) File or Enterprise Application (EAR) F
3 min read
How to Add @RestController to Spring WebFlux Applications?
Spring WebFlux is fully non-blocking and supports reactive streamback pressure. It works well with non-blocking servers like Netty and Undertow. The reactive model allows handling more connections with fewer threads. It provides reactive support at multiple levels: Web layer, security, WebClient, te
5 min read