
Audio classification using models from Hugging Face enables developers to automatically categorize audio data into predefined classes such as speech, music, emotions or environmental sounds. With pre-trained transformer and audio models, it becomes easy to build audio‑based AI applications without training from scratch.
Working
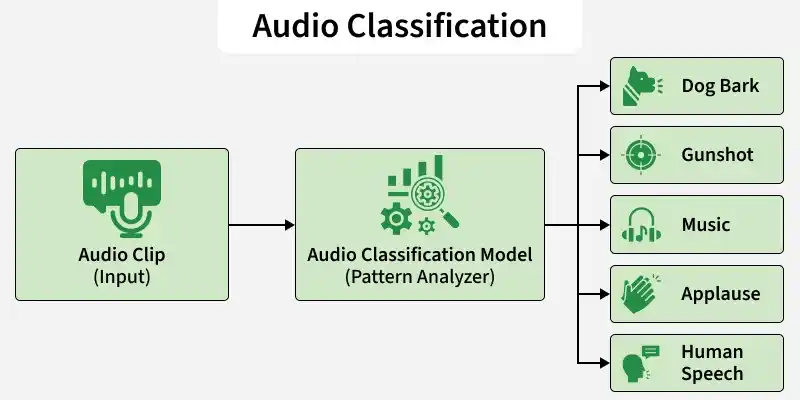
- Waveform Input: The raw audio signal is captured as a waveform representing sound intensity over time.
- Feature Extraction: The waveform is converted into numerical features (like spectrograms) so the model can process it mathematically.
- Pattern Learning: The model analyzes patterns across time and frequency to understand the characteristics of the sound.
- Prediction: It outputs the most probable sound category based on learned patterns.
Implementation
Step 1: Set Up the Environment
First, install the required libraries. Run the following command in your command prompt.
pip install transformers torch torchaudio requests
Step 2: Import Required Libraries
from transformers import AutoFeatureExtractor, AutoModelForAudioClassification
import torch
import torchaudio
import requests
Step 3: Download and Save the Audio file
You can also download the audio file from here
url = "https://github.com/karolpiczak/ESC-50/raw/master/audio/1-100032-A-0.wav"
r = requests.get(url)

with open("sample.wav", "wb") as f:
    f.write(r.content)

print("Audio downloaded.")
Step 4: Load the Model
In this step, we use MIT/ast-finetuned-audioset-10-10-0.4593, a transformer based Audio Spectrogram Transformer (AST) model developed at Massachusetts Institute of Technology and fine tuned on AudioSet. It is specifically designed for environmental sound classification, covering hundreds of real world audio categories.
- Feature Extractor: Converts waveform into log mel spectrogram features required by AST.
- Model: Loads the pre trained Audio Spectrogram Transformer fine tuned on AudioSet for environmental sound classification.
model_name = "MIT/ast-finetuned-audioset-10-10-0.4593"

feature_extractor = AutoFeatureExtractor.from_pretrained(model_name)
model = AutoModelForAudioClassification.from_pretrained(model_name)
Output:

Step 5: Load Audio File
- Audio Tensor: Audio contains waveform values.
- Sampling Rate: sampling_rate tells how many samples per second the audio has.
audio, sampling_rate = torchaudio.load("sample.wav")
Step 6: Resample the Audio
The model expects 16kHz audio input. If the audio has a different frequency, it is converted to 16kHz.
if sampling_rate != 16000:
    resampler = torchaudio.transforms.Resample(sampling_rate, 16000)
    audio = resampler(audio)
Step 7: Preprocess Audio
- Dimension Adjustment: squeeze() removes extra dimensions from the audio tensor.
- Format Conversion: Converts the tensor into a NumPy array.
- Feature Creation: Transforms the waveform into spectrogram based features.
- Tensor Output: Returns PyTorch tensors ready for model input.
inputs = feature_extractor(
    audio.squeeze().numpy(),
    sampling_rate=16000,
    return_tensors="pt"
)
Step 8: Run Inference
- No Gradient Mode: Disables training mode to save memory and speed up inference.
- Forward Pass: The model processes features and produces raw prediction scores (logits).
with torch.no_grad():
    outputs = model(**inputs)
Step 9: Get Predictions
- Logits: Raw output scores from the model.
- Softmax: Converts logits into probabilities.
- Top-K Selection: Selects the top 5 most confident predictions.
- Label Mapping: Converts predicted index into human readable sound category.
logits = outputs.logits
probs = torch.nn.functional.softmax(logits, dim=1)

top_k = torch.topk(probs, k=5)

for score, idx in zip(top_k.values[0], top_k.indices[0]):
    label = model.config.id2label[idx.item()]
    print(f"{label}: {score.item():.4f}")
Output:

You can download the full code from here