Android - Upload an Image on Firebase Storage with Kotlin
Last Updated :
20 Aug, 2024
Firebase Cloud Storage stores files in the Google Cloud Storage bucket and makes them accessible through both Firebase and Google Cloud. It allows us to upload and download files from mobile clients through the Firebase SDKs, and perform server-side processing such as image filtering or video transcoding using the Google Cloud Platform. In this article., you will explore how to upload images from a mobile gallery to Firebase Storage with Kotlin.
Note: If you want to implement it using Java. Check out the following article: How to Upload an image on Firebase storage with Java?
Step-by-Step Implementation
Step 1: Create an Android Project
Create a new project in Android Studio or add Firebase to an existing one. In Adding Firebase to Android Apps, the process for adding Firebase is very clearly detailed.
Step 2: Create a project in Firebase and Create Firebase Storage
Go to the Firebase console, and create a project.
 Firebase Console : Create new project
Follow these 3 steps
 Enter name of project and click on continue
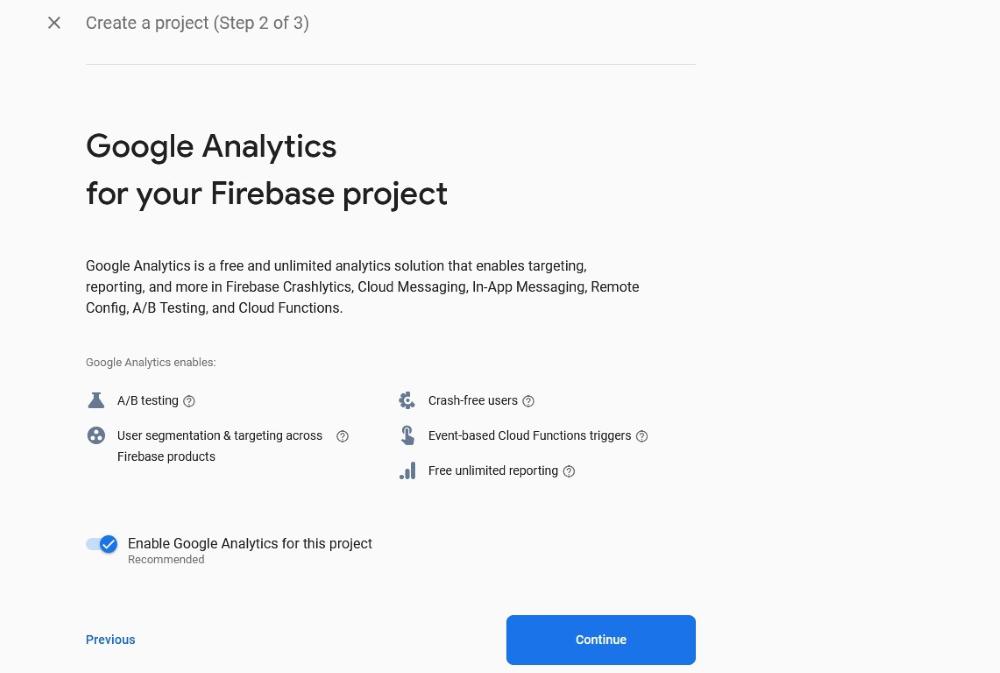 Let the default setting as and continue
  Select 'Default account for Firebase' and finally create a project
After a couple of minutes, you will be redirected to the Dashboard page of the new Project. Under the left corner Build Section, click on Storage.

Click on 'Get started' and the Dialog box will appear.

Follow these two-step, and set up rules and bucket storage location.

For now, let the default setting be as it is and click on Next to set up the cloud storage location. It is always advised to set the location as per the target audience, as we are learning to develop it is recommended to choose the nearest location. If you don't know the set default location i.e nam5(us-central) finally complete the process and It will create a default bucket and security settings for us. Firebase has a well-defined set of security rules under its documentation. For learning purposes, change this as per the below implementation To change the security rules for Firebase Storage, go to firebase Storage after configuration as given above under the storage dashboard click on the Rules.
 Default storage Dashboard of firebase
For learning purposes give access to read and write to the default bucket. Please note do not set deploy application with such settings.
rules_version = '2';
service firebase.storage {
  match /b/{bucket}/o {
    match /{allPaths=**} {
      allow read, write: if true;
    }
  }
}
After making changes any changes do not forget to publish it. To publish it click on Publish button.
 Publishing the settings
Publish take some time to make changes happen.
Step 3: Create a storage reference from our app
A reference to the full path of the file, including the file name is required to upload an image to Firebase Storage. To do so, create storage reference.
Kotlin
// creating a storage reference
storageRef = Firebase.storage.reference;
Step 4: Create Intent for Gallery Pick
Below is the code for the gallery pick intent button. To do something like this, we should implement the intent action (ACTION PICK). Throughout this project, the item is just an image. Note initialization of type of pick mime type intent, which is desired input item for pick intent. Then we launch the callback ActivityResultLauncher.
Kotlin
// button Click listener
// invoke on user interaction
btnSelectImage.setOnClickListener {
    // PICK INTENT picks item from data
    // and returned selected item
    val galleryIntent = Intent(Intent.ACTION_PICK)
    // here item is type of image
    galleryIntent.type = "image/*"
    // ActivityResultLauncher callback
    imagePickerActivityResult.launch(galleryIntent)
}
Step 5: Save image in Firebase Storage and download it from Storage to display it
After selecting the image, this intent activity receives a call back with a single select photo. Then after getting the URI of the selected image. (Remember, to upload any kind of file to any server, web browser, or form, we need its absolute path). In this case, it is URI. Extracting the file extension and original filename, to store it in the bucket with the same name and extension. It is separated as a procedural function.
Here for using Glide library, open app/build.gradle file in the app folder in the Android project and add the following lines inside it.
dependencies {
   implementation ‘com.github.bumptech.glide:glide:4.11.0’
   annotationProcessor ‘com.github.bumptech.glide:compiler:4.11.0’
}
Kotlin
private var imagePickerActivityResult: ActivityResultLauncher<Intent> =
        // lambda expression to receive a result back, here we
        // receive single item(photo) on selection
        registerForActivityResult(ActivityResultContracts.StartActivityForResult()) { result ->

            if (result.resultCode == Activity.RESULT_OK) {
                // getting URI of selected Image
                val imageUri: Uri? = result.data?.data

                // extract the file name with extension
                val sd = getFileName(applicationContext, imageUri!!)

                // Upload Task with upload to directory 'file'
                // and name of the file remains same
                val uploadTask = storageRef.child("file/$sd").putFile(imageUri)

               // On success, download the file URL and display it
                uploadTask.addOnSuccessListener {
                  // using glide library to display the image
                    storageRef.child("file/$sd").downloadUrl.addOnSuccessListener {
                        Glide.with(this)
                            .load(it)
                            .into(imageview)

                        Log.e("Firebase", "download passed")
                    }.addOnFailureListener {
                        Log.e("Firebase", "Failed in downloading")
                    }
                }.addOnFailureListener {
                    Log.e("Firebase", "Image Upload fail")
                }


            }
        }

    @SuppressLint("Range")
    private fun getFileName(context: Context, uri: Uri): String? {
        if (uri.scheme == "content") {
            val cursor = context.contentResolver.query(uri, null, null, null, null)
            cursor.use {
                if (cursor != null) {
                    if(cursor.moveToFirst()) {
                        return cursor.getString(cursor.getColumnIndex(OpenableColumns.DISPLAY_NAME))
                    }
                }
            }
        }
        return uri.path?.lastIndexOf('/')?.let { uri.path?.substring(it) }
    }
This is the entire Main Activity Code.
Kotlin
package com.example.gfg_image_storage

import android.annotation.SuppressLint
import android.app.Activity
import android.content.Context
import android.content.Intent
import android.net.Uri
import android.os.Bundle
import android.provider.OpenableColumns
import android.util.Log
import android.widget.Button
import android.widget.ImageView
import com.google.firebase.Firebase
import androidx.activity.result.ActivityResultLauncher
import androidx.activity.result.contract.ActivityResultContracts
import androidx.appcompat.app.AppCompatActivity
import com.bumptech.glide.Glide
import com.google.firebase.storage.StorageReference
import com.google.firebase.storage.storage


class MainActivity : AppCompatActivity()  {

    lateinit var btnSelectImage: Button
    lateinit var storageRef: StorageReference
    lateinit var imageview: ImageView

    override fun onCreate(savedInstanceState: Bundle?) {
        super.onCreate(savedInstanceState)
        setContentView(R.layout.activity_main)

        btnSelectImage = findViewById(R.id.button)
        imageview = findViewById(R.id.imageView)
        storageRef =  Firebase.storage.reference

        btnSelectImage.setOnClickListener{
            // PICK INTENT picks item from data
            // and returned selected item
            val galleryIntent = Intent(Intent.ACTION_PICK)
            // here item is type of image
            galleryIntent.type = "image/*"
            // ActivityResultLauncher callback
            imagePickerActivityResult.launch(galleryIntent)

        }
    }

    private var imagePickerActivityResult: ActivityResultLauncher<Intent> =
        // lambda expression to receive a result back, here we
        // receive single item(photo) on selection
        registerForActivityResult(ActivityResultContracts.StartActivityForResult()) { result ->

            if (result.resultCode == Activity.RESULT_OK) {
                // getting URI of selected Image
                val imageUri: Uri? = result.data?.data

                // extract the file name with extension
                val sd = getFileName(applicationContext, imageUri!!)

                // Upload Task with upload to directory 'file'
                // and name of the file remains same
                val uploadTask = storageRef.child("file/$sd").putFile(imageUri)

               // On success, download the file URL and display it
                uploadTask.addOnSuccessListener {
                  // using glide library to display the image
                    storageRef.child("file/$sd").downloadUrl.addOnSuccessListener {
                        Glide.with(this)
                            .load(it)
                            .into(imageview)

                        Log.e("Firebase", "download passed")
                    }.addOnFailureListener {
                        Log.e("Firebase", "Failed in downloading")
                    }
                }.addOnFailureListener {
                    Log.e("Firebase", "Image Upload fail")
                }


            }
        }

    @SuppressLint("Range")
    private fun getFileName(context: Context, uri: Uri): String? {
        if (uri.scheme == "content") {
            val cursor = context.contentResolver.query(uri, null, null, null, null)
            cursor.use {
                if (cursor != null) {
                    if(cursor.moveToFirst()) {
                        return cursor.getString(cursor.getColumnIndex(OpenableColumns.DISPLAY_NAME))
                    }
                }
            }
        }
        return uri.path?.lastIndexOf('/')?.let { uri.path?.substring(it) }
    }
}
Step 6: Open the activity_main.xml and implement this XML code.
XML
<?xml version="1.0" encoding="utf-8"?>
<androidx.constraintlayout.widget.ConstraintLayout
    xmlns:android="http://schemas.android.com/apk/res/android"
    xmlns:app="http://schemas.android.com/apk/res-auto"
    xmlns:tools="http://schemas.android.com/tools"
    android:layout_width="match_parent"
    android:layout_height="match_parent"
    tools:context=".MainActivity">

    <Button
        android:id="@+id/button"
        android:layout_width="wrap_content"
        android:layout_height="wrap_content"
        android:layout_marginBottom="128dp"
        android:text="SELECT AND UPLOAD"
        app:layout_constraintBottom_toBottomOf="parent"
        app:layout_constraintEnd_toEndOf="parent"
        app:layout_constraintHorizontal_bias="0.497"
        app:layout_constraintStart_toStartOf="parent" />

    <ImageView
        android:id="@+id/imageView"
        android:layout_width="288dp"
        android:layout_height="338dp"
        app:layout_constraintBottom_toTopOf="@+id/button"
        app:layout_constraintEnd_toEndOf="parent"
        app:layout_constraintHorizontal_bias="0.495"
        app:layout_constraintStart_toStartOf="parent"
        app:layout_constraintTop_toBottomOf="@+id/textView"
        app:layout_constraintVertical_bias="0.559"
        app:srcCompat="@mipmap/ic_launcher" />

    <TextView
        android:id="@+id/textView"
        android:layout_width="330dp"
        android:layout_height="56dp"
        android:layout_marginTop="68dp"
        android:text="GEEKS FOR GEEKS"
        android:textColor="#008000"
        android:textSize="35sp"
        app:layout_constraintEnd_toEndOf="parent"
        app:layout_constraintHorizontal_bias="0.493"
        app:layout_constraintStart_toStartOf="parent"
        app:layout_constraintTop_toTopOf="parent" />

</androidx.constraintlayout.widget.ConstraintLayout>
Output:
Demo of working of Image Uploader App.