
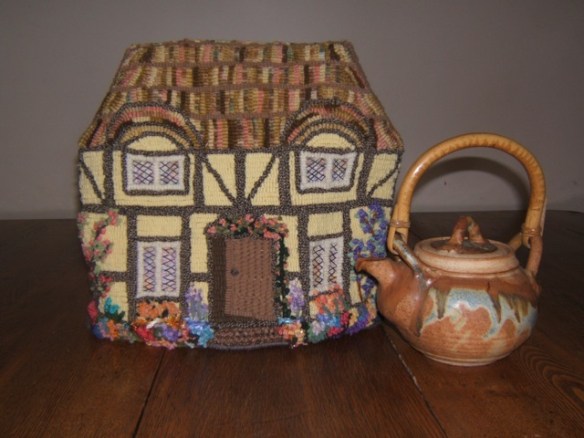
To take some of the starkness away from all the stone work in the arch and flagstones, I decided to add some flowers on top of the finished hooking. As I mentioned in the last post, I had done this once before on an English Cottage tea cozy and really liked the effect (see previous post for photo). With that in mind, I purchased a large ball of variegated wool that moved through pink, to mauve to red purple, to blue….all colours already used in my piece.  I rolled off the pink into several small balls of various shades of pink (this is what is left over now that I’m done), then using a blunt ended large needle, I made french knots on top of the hooking to create some window boxes of flowers. I started with a knot on the back, using 3 loops for the french knot, I made the french knots, then knotted the tail on the back (just as you would in embroidery). For the leaves, I used a 3 cut of green, hooked large loops amongst the flowers, then cut the loops …….
 ………to create the leaves.
 I made sure the shank of each (french knot) flower was loose enough to let the knot sit comfortably on top of the hooking. By inserting the hook gently between the rows, it’s amazing how much you can add over the hooking.
I wanted a large vine to run up the wall of the arch on the right, but I felt I needed a pattern to follow so it would be balanced and look right……hmmmm…..what could I use? I glanced at the bureau and saw a roll of toilet paper left there after a “kitty mishap clean-up”. That might work!
I rolled out the length, used a sharpie to gently sketch the vine, and then pinned it in place.
I think you can buy ‘tear away stuff’ at the fabric store for this sort of purpose, but I’ll bet my solution was cheaper, and readily available.
Many, many years ago, my craft of choice was crewel work. Was there still some crewel wool amongst my stash of supplies? Yes indeed, and I was actually able to find it. I even had a variety of browns to choose from. Using a needle with not such a blunt end, I began making the vine using a chain stitch right over top of the pattern.
 ….. as I progressed, I realized I didn’t have enough of the brown to do the whole vine, so I switched to a split stitch . (doesn’t use nearly as much wool). Actually I liked that stitch better, and wished I’d started with it, but decided not to try and rip out what I’d done. I was afraid that was a recipe for disaster.
 I think the flowers and leaves will hide the difference in the stitches. It was then a simple matter to rip away the toilet paper, and use tweezers to take out the small pieces caught in the wool. (you can still see a few pieces near the top that I missed….they’re gone now).
The flowers were once again french knots, this time made with 4 or even sometimes 5 loops on the needle so they would be bigger. I let them shade over from the pinks into the mauves. 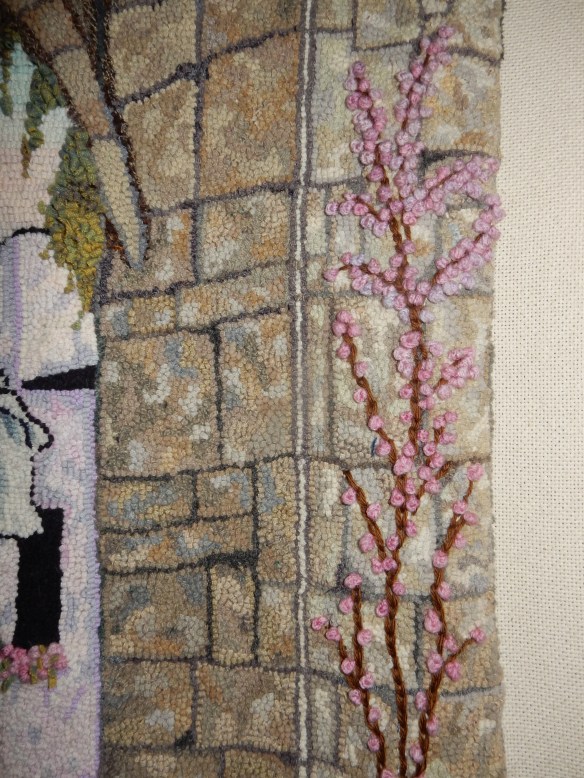
I tried doing individual small prodded leaves, but they frayed trying to pull them through. I removed those and went back to the cut high loops. I found a piece of left over dip dyed wool in a yellow green. …..using a 4 cut I divided the strips in three for light medium and dark leaves, then after pulling them with high loops, I cut them on a sharp angle to make them a little more realistic.
I’ve some final touches to add…some extra brown on the stem to hide the chain stitch loops, and some earth at the base and a bit wider stem there.
My favourite part is the three dimensional effect of the vine sitting on top of the wall.
So after more than a year (working on and off) it is done. (I think). I haven’t decided if I will add a vine on the balcony door…to add or not to add….that is the question!  …..of course the finishing is next…(my least favourite part of any piece). I’m always mentally planning my next hooking adventure while I do that.
Thanks for stopping by.
 First of all, the test pieces I dyed were of course WAY too narrow. To figure out how wide the wool would need to be …..
 ….I hooked a row from side to side at the widest point, pulled it out and measured it. The only Dorr natural wool I had on hand left was not quite wide enough (78″ of wool needed to hook one row from side to side), but I decided I would be able to fill it in with left overs that would blend . (said with fingers crossed).
 I marked the right side of the wool with a pin, and used tape to keep the strips in order. ….keeping the right side on the top (as opposed to the left).
 I put tape on the right end of the strip before hooking it….
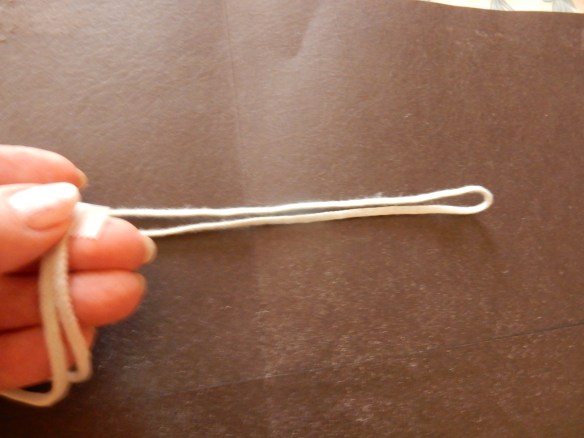
 …then hooked that middle loop on the centre line marking……hooked the right side over, then the left, leaving the extras hanging

 …..and took a chunk out of the middle so that the blues blended where they met.
 I finished by hooking from the bottom up using the strips that were hanging. There were lots of left overs to fill in the few spaces left over on the edges.

 Many thanks to Jean for her help and to Marg for sharing her expertise after her own “flagstone, cobblestone journey” and sending photos of her wonderful end results. I am so fortunate to have such knowledgeable hooking friends.
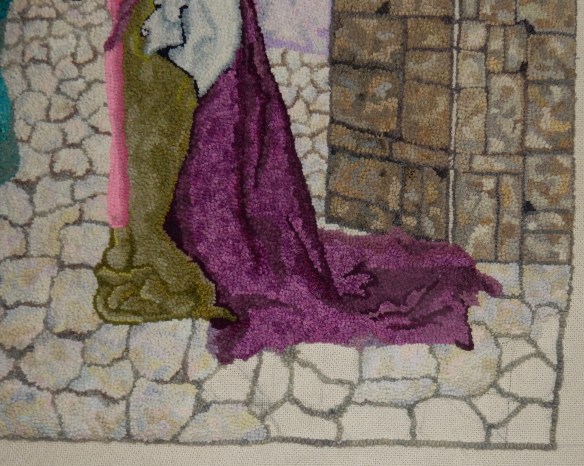
 The left piece is much too strong, the right, too weak, the middle has too much strong pink at the bottom. I tried redyeing more blue on the top of the lightest piece, but it was still too insipid.
  My present plan is to use the middle piece, but not the bottom couple of inches of the pink.
 Next decision was what colour? I had dyed some gold/grey for the arch and subsequently discarded it, and considered perhaps using that…..
 ….and just as quickly threw out that idea…..far too strong. I wanted something light and with some interest, but not attracting attention away from the women or the arch. Hmmmm….that’s exactly what I had wanted for the buildings….and….I had lots of very pale tints left over….

 Yarn would be much easier to handle than tiny strips ….and I had some left over.
 To my delight, I soon realized that it was 2 ply and for the small further away sections, it could be easily separated to make the grout line even tinier.
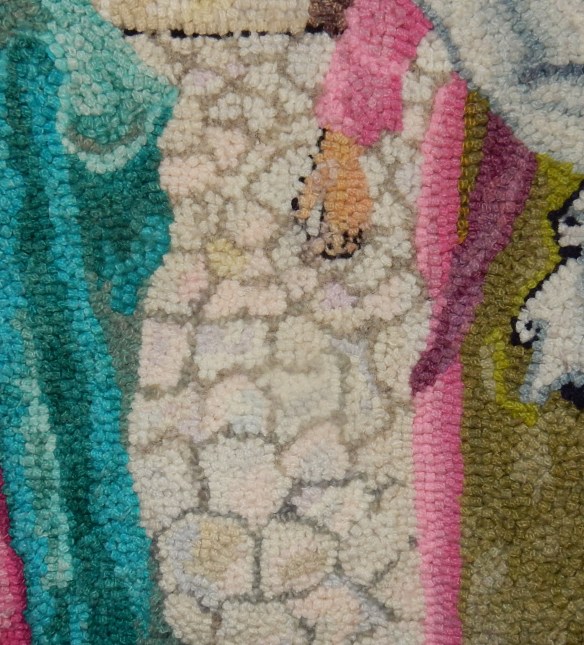
 …and for the nearer stones, I’d use the 2 strands for a bit more depth.
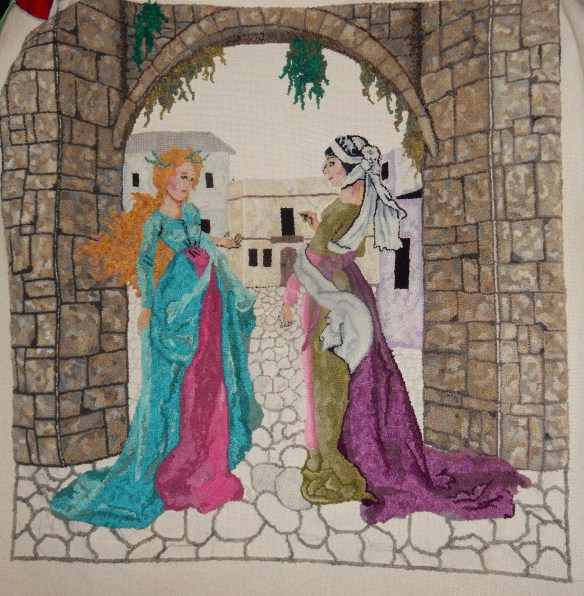

 ….I didn’t like the pink effect at all and the perspective was all wrong, I did like the touches of light purple, so I searched my stash for some light mauve.
  I quickly realized that didn’t have enough light shades, so off to the dye pots and I dyed some very light violet and ‘cushing’ purple.


 I wanted the roof of this building to appear to be of tile, and mused about the best way to create that impression. I considered using a light plaid and selectively using the strips, I considered separating rows with a tiny (#2) row of black, and finally decided to simply try this light mottled grey, hooking it in straight lines matching each loop carefully all the way down. Ta dah…the simplest solution worked. (love it when that happens)
 I chose brown and yellow tones for the next building, with a bit of mottled taupe wool for the door and beams.
  One row of natural helps to highlight the corner of the building. I’m using quite a bit of antigodlin hooking for this ‘stucco’ and I find it harder on my hands. So….a day of no hooking yesterday and the sore finger feels much better. My plan is to use the mahogany tones for the third building (they turned out peachy pink) . I’m not sure how I’ll like that, but I’ll see what happens.
 So as I carefully hooked the archway around her lovely red hair, I was so disappointed to see the flyaway curls I liked so well fade into obscurity. (sorry, but I neglected to take a picture of it at this stage) I wanted it to still pop out as it had done so well against the white rug warp. But it didn’t. I edged it with grey, which worked well for the wall, but the hair detail got lost. I tried Deanne Fitzpatrick’s trick of small dot of colour along the edge…nope! I tried some black, then some white, then I went in search for the left over wool from her hair.
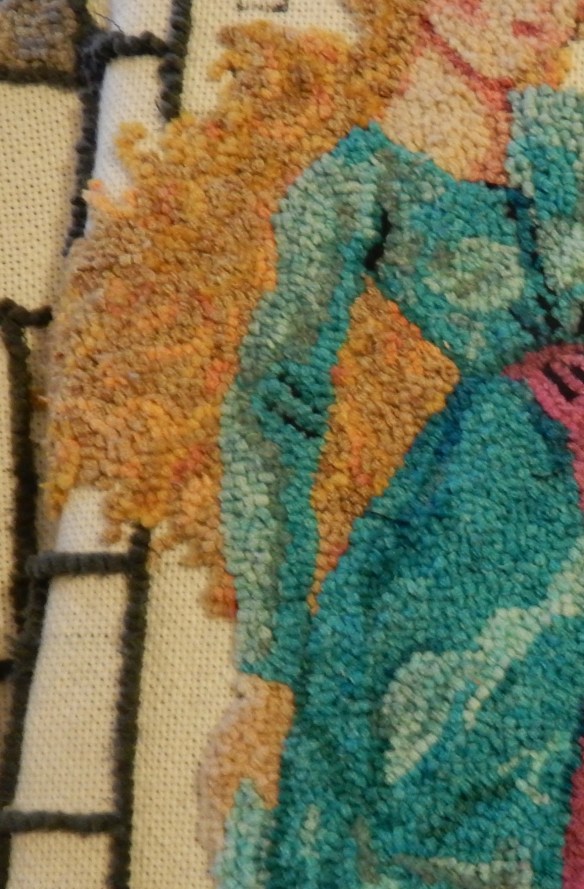
 With the bright vibrant orange/yellow added the curls popped back out. As so often happens with me, I had to see it wrong before I was able to figure out how to do it right. (my curse of being a visual learner).


 …here it is underway
 I am determined to compete the arch before going on to the village, and I’ve actually hooked quite a bit of the light left hand section in the past few days. I still have lots to go , as you can see, and I’m being very careful not to waste any wool, so that I will have enough. Much of it was left over from the background of my ‘stacked log cabin’ piece, and I’m even cutting down my left over #8 strips.
 ….now I’m using #3, so while a bit fiddley….it works well.
 ….becomes 3 (or 2….depending)
 Now to turn my full attention to the sky.
 ….but as I experimented, I didn’t like the effect of the very dark blues at all. I needed more pale shades.
  I took this photo awhile ago and I’m not sure why there are only two pieces since I actually dyed four light shades these being the lightest and darkest.
 My biggest dilemma was this…….would I hook the sky straight across (bottom right sky sample) or wavy and directional (cloud beginnings). I thought about this for a number of weeks while completing the bottom roadside section. The answer I came up with? Do both. I’ll make the clouds contour the actual shapes and the sky will be pretty well straight lines. Every time I go through this sort of process, I think afterwards….that is so OBVIOUS! why did it take me so long to figure it out? So I’m on my way…
 I knew I would need to dye more pale blue shades and yesterday was the day.
 I now have a wide variety of blue shades to use in finishing my sky.