
Hump jumpers and jean-a-ma-jigs… oh my!
Today I’m sharing a tutorial / tip for the Finish-A-Long!
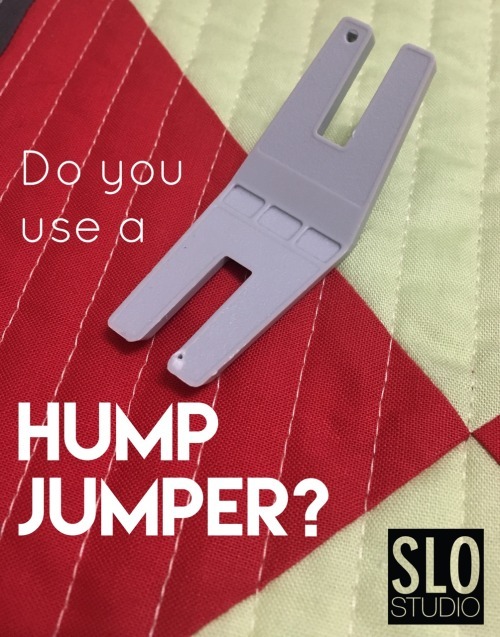
In chatting with friends recently, I realized that not all of them were familiar with one of my most indispensable sewing tools: the “hump jumper.” (Apparently, it also known in some circles as a “jean-a-ma-jig.”) It’s a tiny tool that I got for about $2 when I first got my sewing machine at my local sewing machine shop. I have heard that some sewing machines come with one, too! Its been with me through thick and thin – and has the battle scars to show for it!
So, what does it do??
Basically: the hump jumper allows you to bridge your sewing machine foot over a hump or thick part of a seam. See in the photo below how the foot is trying to climb over a hump?

Just add the hump jumper underneath the sewing machine foot, and it creates an even base. The machine can then get through thick layers smoothly, without anything getting stuck. (Yes, seriously.)
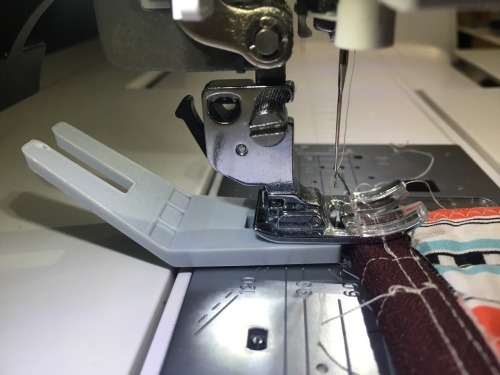
Let’s say you want to top stitch through lots of layers. Here’s a quilted panel (patchwork, batting, backing), with a zipper attached and double layered zipper tabs. It’s pretty thick!
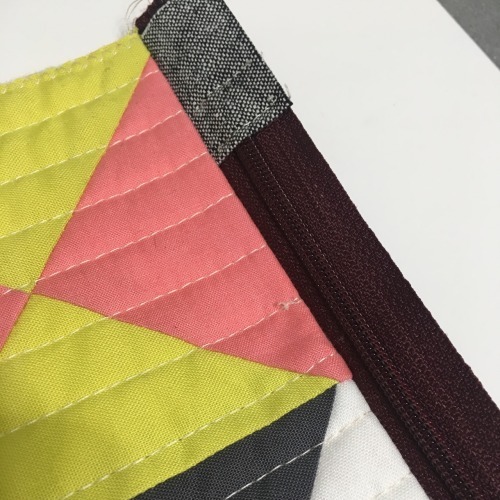
I used the hump jumper to get started at the end, by just placing it under the sewing machine foot. As you sew, it moves along with the fabric so will fall away to the back. I also picked it back up to get over a thicker seam (of patchwork), below.
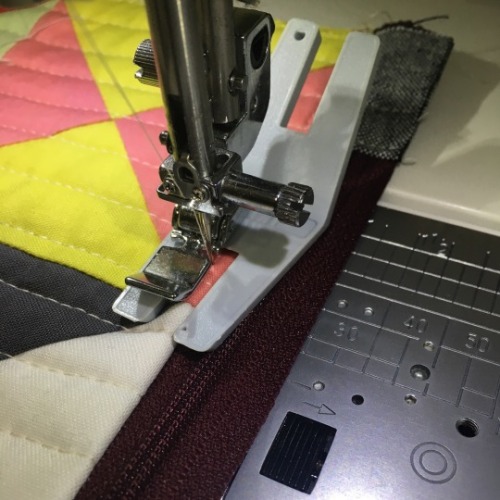
I also use it in the same way to finish off the pouch corners around zippers, where it gets really thick.

I use a hump jumper whenever I am making bags, pouches, wallets – or even sometimes when I making a quilt blocks that have a lot of seams meeting in the same spot, and becomes really thick. The hump jumper has a thicker side and a thinner side, so you can use the size that you need to match the hump that you were trying to get over.

I hope this tutorial / tip is helpful! Let me know if you are a regular hump jumper, too!
Thanks to the Finish-A-Long hosts for all the hard work! And, good luck with your finishes for the last quarter of the year!
Hourglass Block Addiction… and a tutorial!
Lately, I’ve been really into making hourglass blocks. I’ve made them in a variety of ways for a variety of projects (including pillows, baby quilts and this black-and-white quilt). I have been constructing the blocks in a pretty traditional way - by making two half-square triangle blocks, then sewing them together.

I thought for today - since it’s my turn for the Finish-A-Long tutorial - that I’d share a basic method on how to make two 4″ (3.5″ finished) hourglass blocks from two 5″ squares of fabric. Of course - this method can be adapted to any size!
You need:
- 2 - 5″ square (also known as “charm squares”)
- Marking tool
- Pins
- Cutting tools, sewing machine, etc!

1) First, place one square on top of the other, right sides together. Pin.
2) Draw a line diagonally across the blocks.
3) Sew a line ¼ inch from each side of the line.
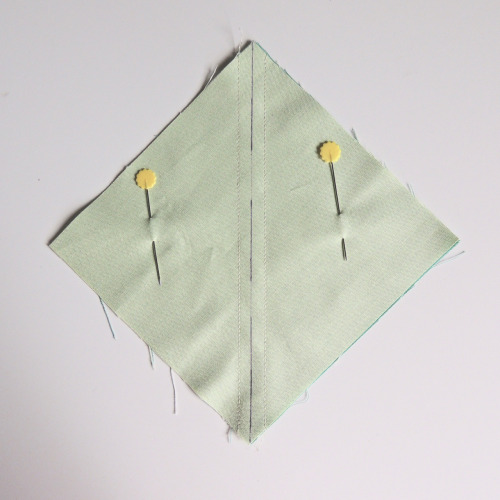
4) Cut down the line that you drew.
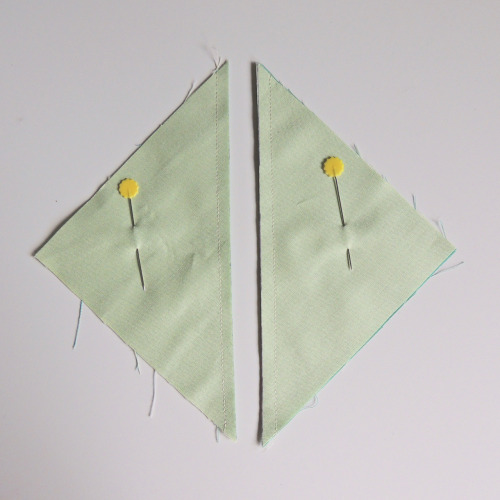
5) You now have two half-square triangle units! (or, HSTs!) Using an iron, press the seam allowance towards the dark fabric for both of these.

6) Now, place one piece on top of the other, right sides together, so that the opposite colours match up.
IMPORTANT! Nest the seams together: Since you’ve pressed the seam allowances to either side, when you place one block over the other the two blocks will kind of fit / interlock together. Make sure that the two pieces are nested all the way along the seam prior to pinning the two blocks together. (Random side note… Nesting seams is one of my favourite parts about piecing.. I don’t know why but I find it oddly satisfying! Ha ha!)

7) As you did before, draw a line down the centre - this time, perpendicular to the sewn seam.

8) Sew a line ¼ inch from either side of the seam, then cut down your drawn line.
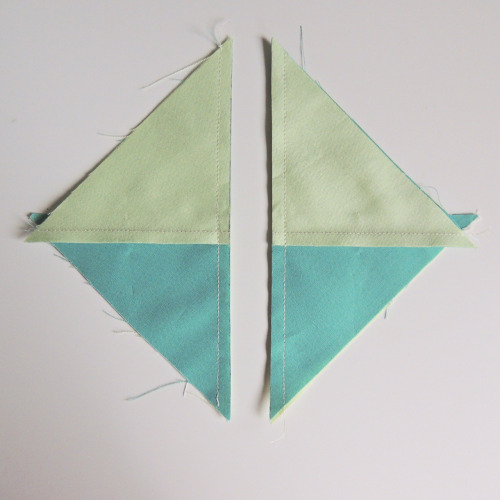
9) Press blocks to one side. You now have two hourglass blocks!
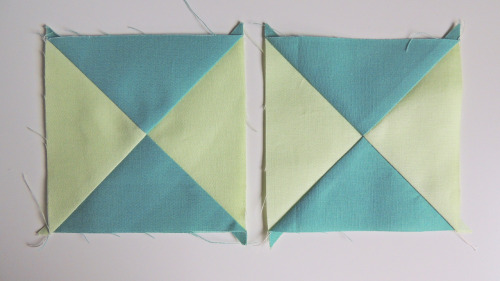
But, not quite done yet!
10) Squaring up: It’s important that you square up blocks before putting them together. Squaring up blocks is one of the keys to getting perfect points! Here are some tips for squaring up hourglass blocks -
Line up your block so that the very centre seam is at ½ of the final (unfinished) block size. In the photo below, see that the centre of the block is right where the 2″ mark is - horizontally and vertically - and the diagonal is lined up with the diagonal line on my ruler:

Trim the exposed ends off, then flip the block around so that the untrimmed side is out.
Do the same thing again! Line up the centre at the 2″ mark, then trim the exposed edges.
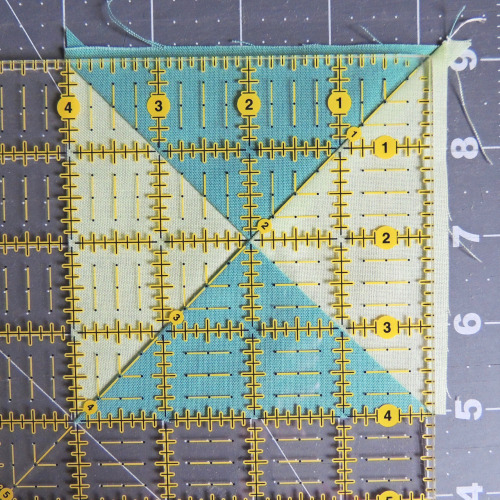
Then when you’re done, you have a 4″ block that is perfectly centred!
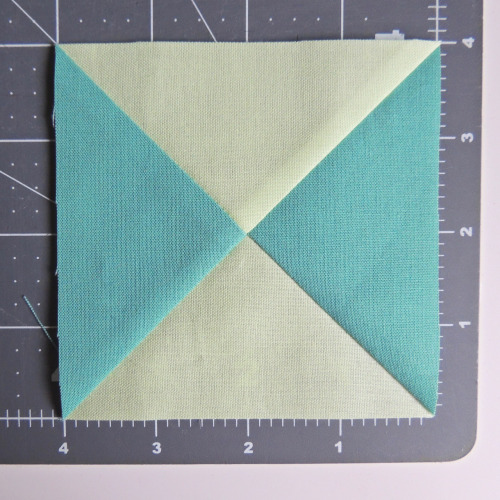
Repeat for your second block!
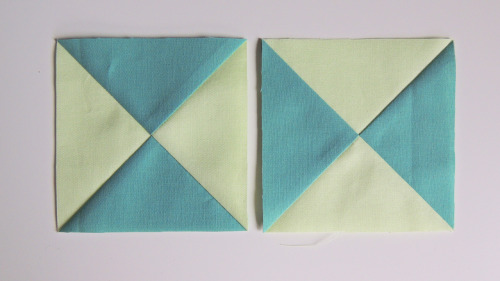
And then… if you’re like me… you might get obsessed and just keep going! I just chain-piece a bunch all at the same time.
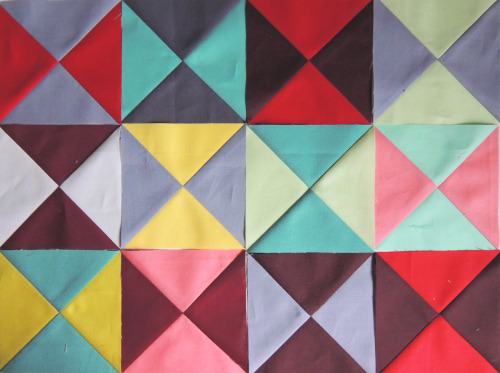
There are definitely other ways to make these blocks, but I’ve been enjoying taking the time to put these together. It’s nice to have a project that I can take my time with!
Have fun!
Maple Leaf block tutorial
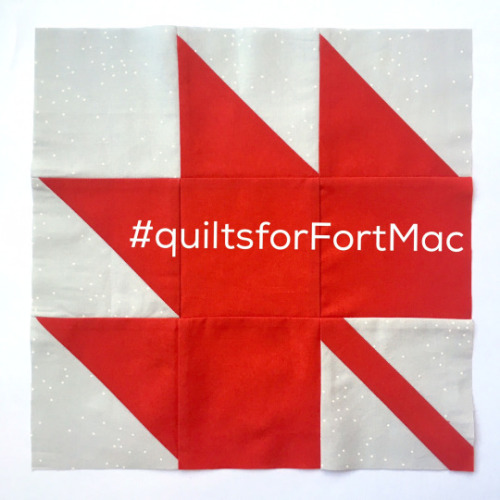
In my previous post, I mentioned that some of us from the Ottawa Modern Quilt Guild are collecting blocks to make quilts for those affected by the wildfires in Fort McMurray, Alberta. For all the details, please see here.
If you’d like to help out, here is a tutorial for a simple Maple Leaf block to send to us - and we’ll put it into a quilt to donate. We are collecting blocks made with blue / yellow / green / red / white (Alberta flag colours) - just combine any two of the colours together for your block.
12.5″ Maple Leaf Block
Use a ¼ seam allowance throughout.
STEP 1: Cut fabric as shown in the photo below:
Fabric 1 (Leaf):
- - 2 x 5″ squares
- - 3 x 4.5″ squares
- - 7.5 x 1.5″ strip
Fabric 2 (Background):
- - 3 x 5″ squares
- - 1 x 4.5″ squares
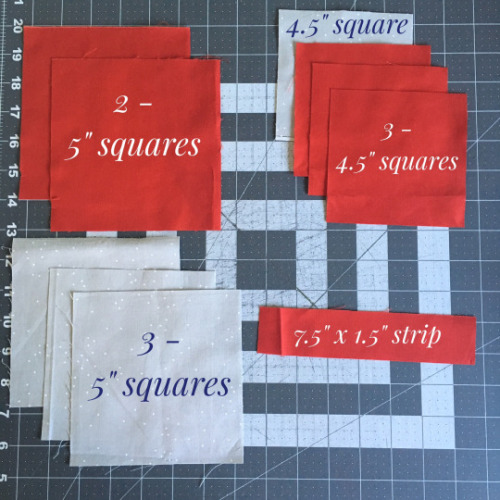
STEP 2: Make the half-square triangle units - Pin 5″ squares of Fabric 1 and 2 together. Draw a line diagonally across the square and sew a seam 1/4″ from the line on each side.
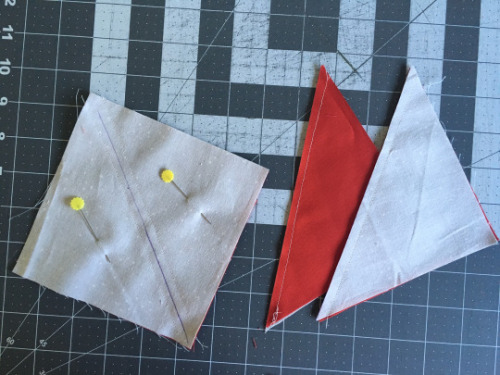
Cut down the centre line to make two half-square triangle units. Press to the darker fabric and trim to 4.5″ square.
Repeat for a second pair of 5″ blocks, so you will have 4 finished half-square triangle units.
STEP 3: Make the leaf “stem” -
Cut the remaining 5″ background fabric square in half diagonally.

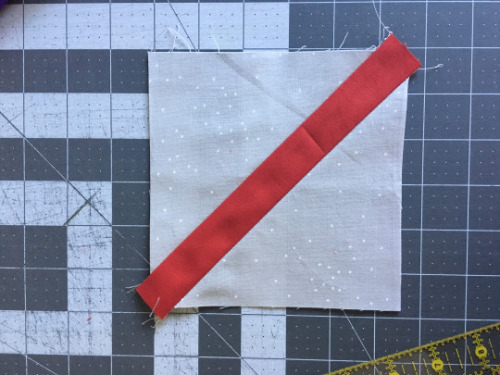
Sew the 7.5″ strip to the cut edge.
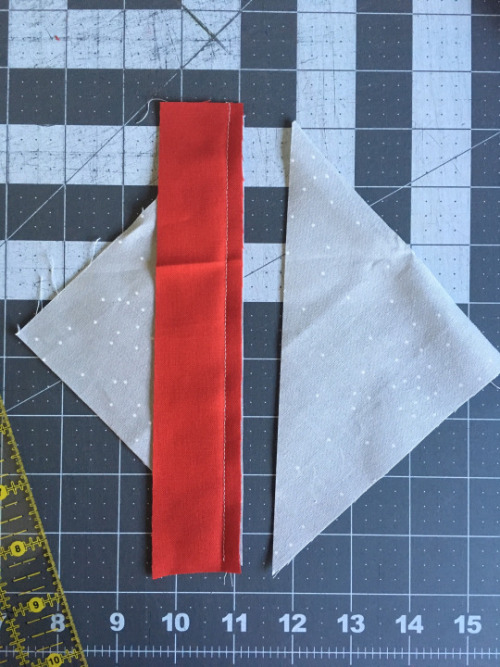
Press seam, then align the second piece on top so it is centred and sew together.

Press seam and trim block to 4.5″ square.
STEP 4: Sew the blocks together as per the diagram below.
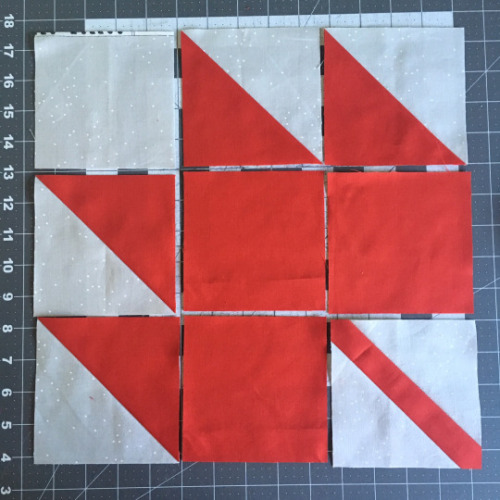
And press to finish.

This block should finish up at 12.5″ square unfinished, so they can be joined and finish at 12″ square.
I hope this tutorial was helpful! But, you don’t need to use it to contribute - as mentioned in my previous post, you can do an improv leaf block or use a different sort of Maple Leaf tutorial, we’d be happy to have your help.
* * *
Please mail blocks by June 30, 2016 to:
Quilts for Fort McMurray, c/o Mad About Patchwork, 2477 Huntley Road Stittsville ON, K2S 1B8, CANADA
Sewing Curves: Video Tutorial
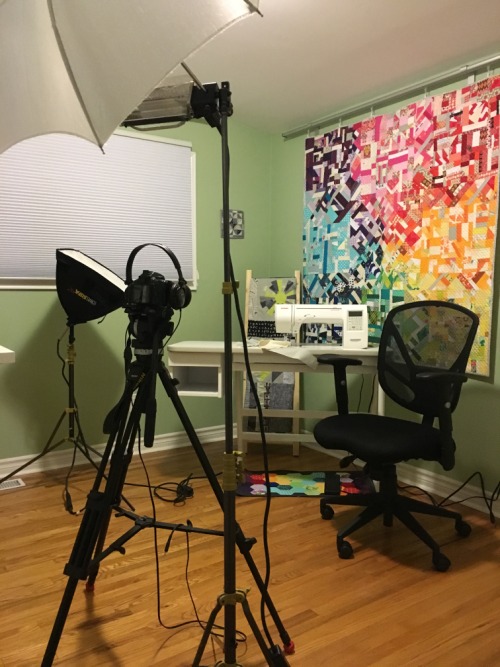
So back around Christmas, a friend of mine had asked me to make some stockings. This particular friend happens to be a professional filmmaker, so I asked him to do a trade: I’d make the stockings, and he could help me make a video tutorial! I had been planning for the class that I’m teaching in February for my Polarity Quilt, and I thought it might be good to put together a small tutorial on how to sew curves.
Being a professional, he brought over all of his equipment - including lights, a microphone, camera, etc. He asked me to put together a script. He set up my studio to have different areas like a set. We did a few takes of each scene. My hubby had to be the “boom operator” holding the microphone!

I will say that it made me appreciate how hard it is to be a good presenter on video! It feels quite unnatural to have a camera, microphone and lights in your face - when the goal is to seem natural and conversational. Kudos to all those people who are good at this!

In terms of production: the video is light years better than what I’d imagined, or what I could do myself. I’m so impressed with what my friend was able to do, and the work he put into making it a polished, finished video. My studio looks better than ever as a background, too! THANK YOU Darren! (You can check out more from him on Instagram @sweet_hooligan.)
In terms of seeing and hearing myself in a video: I can’t even handle it, I need to avert my eyes and cover my ears! Ha ha. So embarrassing. I’m sure many of you might feel the same way seeing yourself on film.
In terms of what I say and show in the tutorial itself: I wanted to provide an overview of a few different ways to sew curves for quilt blocks. There are a few things that I didn’t get to say, or maybe didn’t communicate as clearly as I’d hoped:
1) There are lots of ways to piece curves. This video shows three options: pinning, one centre pin and no pins. These are just a few methods that I find work for me, but they are by no means the only ways to sew curves! It’s good to try different methods to find the one that works best for you! (For example, at my guild meeting last time someone was showing how to glue-baste curves, which is a totally different option).
2) I often use different methods depending on the situation and size of pieces I’m sewing. For small, tight curves, I will pin. For big, gentle curves, I don’t use any pins. For sewing together pieces that have a lot of seams on them already (e.g., the gemstones that I pieced), I use the “one-pin” method.
3) The way I show here is not necessarily the “right” way, it’s just how I’ve come around to doing things! You may have ways that work better for you; I’m just sharing some of the ways that I approach curves, in hopes it will help others to try sewing curves, too.

The pieces used in the video are large 10" blocks from my “Polarity” quilt pattern - which has built in additional space for trimming the block after sewing, so it’s good for practicing! (So even when I’m a bit off one the last block, I definitely still trimmed and used it to make my Winter Polarity quilt!)
OK - without further ado, here’s the video!
Let me know what you think!

Over the last year I’ve been doing a lot of English paper piecing - or making “hexies.” As I’ve finished projects, I’ve gotten a lot of questions from friends and others who aren’t necessarily quilters, but were interested in trying this method of hand sewing patchwork. So, I’ve put together a couple of tutorials showing how I do it!
English paper piecing is great because it’s easy, requires very few materials (no sewing machine - and only needs small scraps of fabric), and you can play with fun patchwork designs!
My tutorial is broken into two steps: Part 1 covers basting (that is, attaching fabric to paper templates), and Part 2 covers sewing the hexies together.
Later, you take the papers out and can use the patchwork for any type of project you’d like! (I’ve made sleep masks, trivets, pouches, quilts and more!)
I hope the tutorial is helpful! Have fun!

Sew Your Own Notebook Tutorial: I’ve posted a step-by-step tutorial for how to make your own simple notebook, over in my new Tutorial section! It’s easy and fun make and personalize your own notebook with your favourite fabrics.
For more pictures of the finished notebook in the photo, see my previous post.

Just in case you were wondering how I put my new sleep mask together, or wanted to make your own … I’ve made a tutorial and a printable template for a handmade sleep mask! :)
The finished sleep mask is a larger size than some others, in terms of coverage - it’s my preference because it’s more comfortable on your face, and keeps out the light effectively. I’ve been wearing mine every night and I’m happy with it!
(The tutorial doesn’t have instructions on how to make the patchwork part, just on how to sew the sleep mask together. I have some hexie tutorials coming soon, though!)
Happy sewing (and sleeping!) :)