
Hourglass quilt - Finished!
I was really happy to finish the hourglass quilt that I’ve been working on since sometime in fall 2016. It’s one of only a few really big, queen-sized quilts that I’ve made.
I finished it up with faced binding, because I didn’t want to have the visual of the binding / border look around the edges. I like how it turned out and how the blocks just meet the end of the quilt. I’ve only done faced bindings on mini or small quilts before, but I think I might do it more often for larger quilts, too.
The last step for this one is to throw it in the wash, then on a bed! I had originally wanted to use it for our bed but this one may end up going to my parents’ house.
Quilty details:
- Approximately 95 x 97″ finished size
- Made of 64 rectangular “blocks” which each include 1 large hourglass block, 3 small hourglass blocks, and 1 strip
- Quilt top used 256 hourglass blocks and 96 strips of fabric in a mixture of Kona Cotton, Riley Blake Confetti Cottons and RJR Cotton Supreme Solids fabrics
- Long arm quilted myself (rented time from Kirstin on her Handiquilter, here in Ottawa)
- Faced binding to finish.
Linking up with Finish it up Friday.
* * *
For more on this project, here are some related posts:
- Longarm quilting hourglass project
- Finished quilt top
- Hourglass overload (project layout)
- Hourglass project progress (making rectangular blocks)
- Hourglass blocks (getting started on this project)
- Tutorial: Hourglass block
A while back, I started making hourglass blocks from 10″ and 5″ squares, and then creating blocks by putting them together with some 2.5″ strips.
I have been working on this project here and there - it’s the sort of project that I find relaxing because I don’t have to think about it (”don’t think, just sew!”) But there came a time where I decided I should start to consider how it will all go together.
So, I took out my trusty “design wall” (a.k.a., a piece of batting that I hang up) and started to lay some blocks out randomly. I want to make this into a queen sized quilt, so I also was able to figure out how I need to lay out the blocks to get the desired size. I’ve got about half of the blocks I need at this point (but I’ve got many more hourglass blocks already pieced that just need to be joined).
I’m kind of liking the overall look. It’s a bit frenetic, but I don’t mind. I have been thinking of this project as a “simple” one - because it’s made of straightforward, simple blocks - but I think it has a bit of complexity when the blocks are all coming together! I’m looking forward to spending a nice weekend day on this and starting to piece it together.
(If you want to try some hourglass blocks, I’ve got a tutorial over here!)
Hourglass project: Last year, I started a project using hourglass blocks. I cut a bunch of my solid fabrics into 5″ and 10″ squares and 2.5″ strips. I paired up colours of squares to make hourglass blocks, which end up at 8.5″ and 4.5″ finished.
This weekend, I was playing around with the blocks and decided to piece some together, along with a 2.5″ strip to the side of each of the larger hourglass blocks. I ended up making 12 of these rectangular blocks. When arranging them on the floor, I felt rotating them gave a fun, random look.
Each of the rectangular blocks will end up at 12″ x 10.5″ finished (so right now before piecing the rectangles together, they are 12.5″ x 11″). I think I’ll just keep going, since I have quite a lot more left that I cut back in October. I’m sort of in the mood for something that I don’t have to think too much about and that I can work on little by little - so this seems like a nice project for me right now!
Hourglass block project: So, as I mentioned this in my goals for the last quarter, I’ve started a new project using hourglass blocks.
I want to make a quilt for our bed for the winter - something a little warmer than what we have now. (We’ve been mostly using the scrappy star quilt that I made back in spring 2015). I also wanted something with a lot more colour - with a feeling of saturated, bright colours to cheer a winter day!
So, I collected up a bunch of solid fabrics - Kona solids, RJR Cotton Supreme Solids and Riley Blake solids from previous projects - and I decided on a palette. I then cut blocks to two sizes - 10″ and 5″ squares, as well as cut a bunch of 2.5″ strips. I don’t have a specific plan in mind, I just want to make a pile of hourglass blocks and start connecting, with some strips in between - and see where it takes me!
If you want to try some of these blocks too, I’ve got a tutorial here!
Hourglass Block Addiction… and a tutorial!
Lately, I’ve been really into making hourglass blocks. I’ve made them in a variety of ways for a variety of projects (including pillows, baby quilts and this black-and-white quilt). I have been constructing the blocks in a pretty traditional way - by making two half-square triangle blocks, then sewing them together.

I thought for today - since it’s my turn for the Finish-A-Long tutorial - that I’d share a basic method on how to make two 4″ (3.5″ finished) hourglass blocks from two 5″ squares of fabric. Of course - this method can be adapted to any size!
You need:
- 2 - 5″ square (also known as “charm squares”)
- Marking tool
- Pins
- Cutting tools, sewing machine, etc!

1) First, place one square on top of the other, right sides together. Pin.
2) Draw a line diagonally across the blocks.
3) Sew a line ¼ inch from each side of the line.
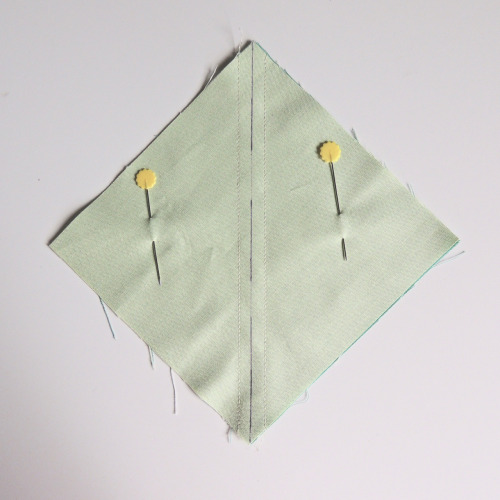
4) Cut down the line that you drew.
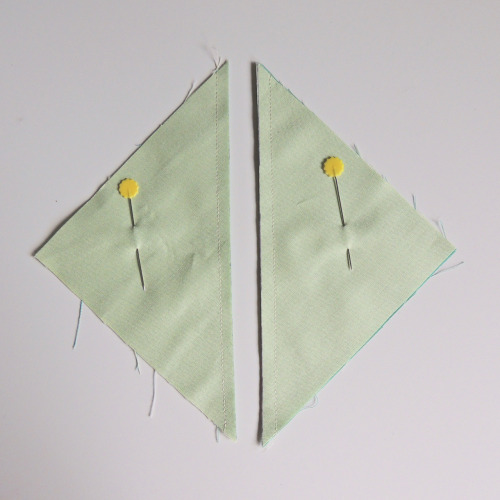
5) You now have two half-square triangle units! (or, HSTs!) Using an iron, press the seam allowance towards the dark fabric for both of these.

6) Now, place one piece on top of the other, right sides together, so that the opposite colours match up.
IMPORTANT! Nest the seams together: Since you’ve pressed the seam allowances to either side, when you place one block over the other the two blocks will kind of fit / interlock together. Make sure that the two pieces are nested all the way along the seam prior to pinning the two blocks together. (Random side note… Nesting seams is one of my favourite parts about piecing.. I don’t know why but I find it oddly satisfying! Ha ha!)

7) As you did before, draw a line down the centre - this time, perpendicular to the sewn seam.

8) Sew a line ¼ inch from either side of the seam, then cut down your drawn line.
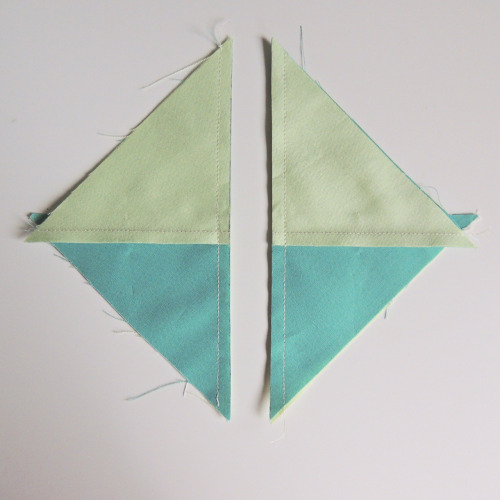
9) Press blocks to one side. You now have two hourglass blocks!
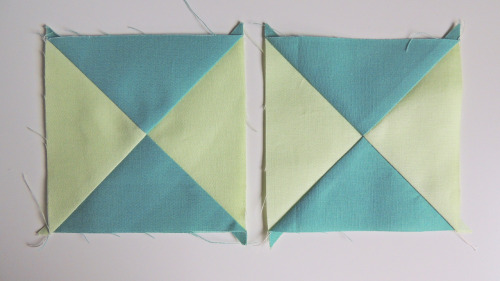
But, not quite done yet!
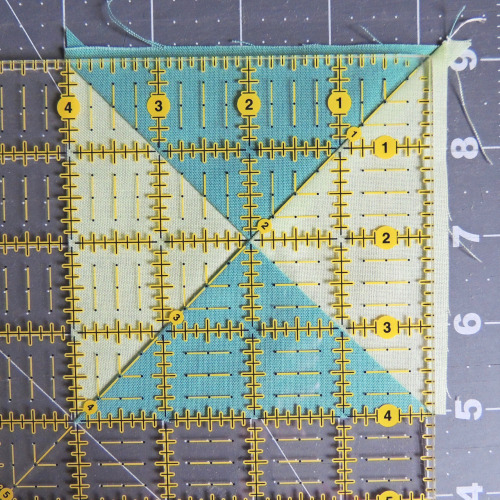
10) Squaring up: It’s important that you square up blocks before putting them together. Squaring up blocks is one of the keys to getting perfect points! Here are some tips for squaring up hourglass blocks -
Line up your block so that the very centre seam is at ½ of the final (unfinished) block size. In the photo below, see that the centre of the block is right where the 2″ mark is - horizontally and vertically - and the diagonal is lined up with the diagonal line on my ruler:

Trim the exposed ends off, then flip the block around so that the untrimmed side is out.
Do the same thing again! Line up the centre at the 2″ mark, then trim the exposed edges.
Then when you’re done, you have a 4″ block that is perfectly centred!
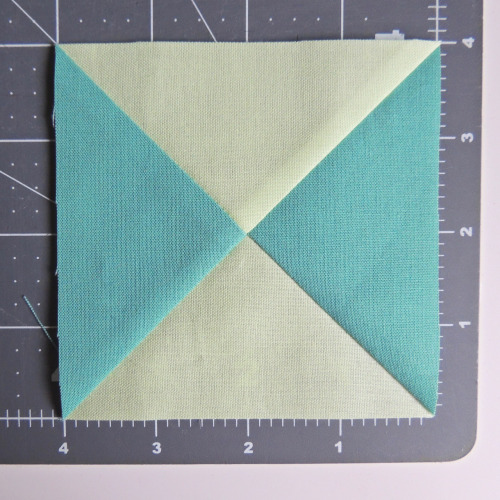
Repeat for your second block!
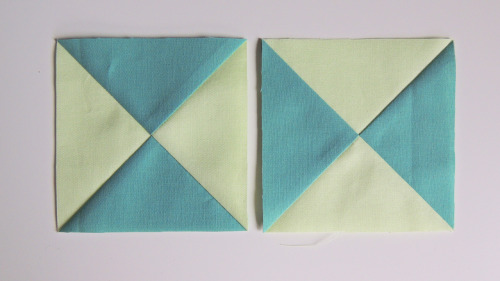
And then… if you’re like me… you might get obsessed and just keep going! I just chain-piece a bunch all at the same time.
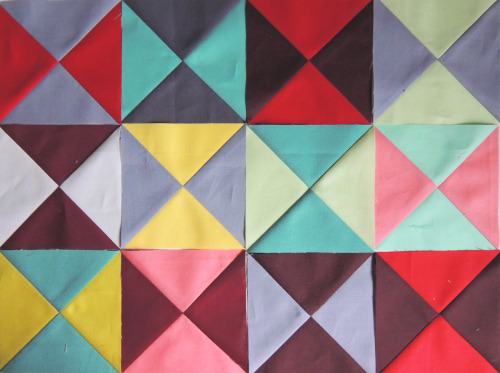
There are definitely other ways to make these blocks, but I’ve been enjoying taking the time to put these together. It’s nice to have a project that I can take my time with!
Have fun!