Newsletter

Showing posts with label pretty kitty. Show all posts

Friday, 17 May 2019

Pretty Kitty birthday card


Another birthday card request! This time for a lady who loves her cats!
How perfect is Pretty Kitty stamp set for this card.
If you like it though, please buy it now as it retires end of May!!

How I made this card:
1. My base card is a5 in size.
2. I cut the gingham gala in 3 strips measuring 5 2/8" x 2".
I adhered these onto my base card and added some faux stitching
using a silver gel pen.
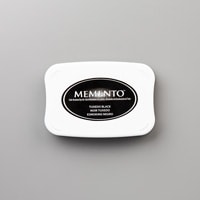
3. I stamped 5 cat images onto whisper white card using memento ink.
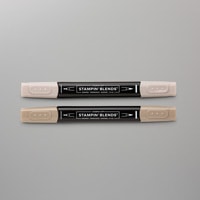
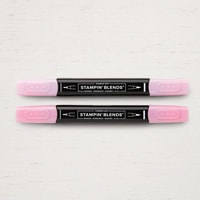
These were coloured using blends and cut out.
The centre image was also stamped directly onto the gingham and coloured.
4. Add the cat images using dimensionals as shown in card photo.
5. Stamp your sentiment onto whisper white in highland heather.
Punch out using the tailored punch tag and add faux stitching.
6. I generated the recipients name on my computer using the Highland Heather
Hex Code and punch using the everyday label punch.
All sentiments and names were added using dimensionals.
7. I stamp the flower pot cat partially, making sure I got the flower I wanted.
I cut it out and coloured with blends and adhered in place.
8. I finished the card with some adhesive-backed sequins.

I would like to enter this into:

Hope you have a lovely weekend.

Product List
Keep blog land alive by commenting and following blogs.
I am on the lookout for new bloggers, so follow me or leave a comment
and I will come check you out!
 Thanks for dropping by today.


Those leaving a comment on any post on this blog do so in the knowledge that their name and blog link are visible to all who visit this blog.
I personally, do not use any of your information.


Wednesday, 1 May 2019

Love what you do - card step up


This week I will be showing 3 cards using the same stamp set
but stepping it up each time from a new stamper, happy stamper and avid stamper.
This one is for the happy stamper and is a nice little shape but very easy to make.

How I made this card
1. Cut an a4 card down to 29cm, then cut at 14 1/2cm which creates two card bases.
2. Using one of these bases, fold in half and then cut 2 1/16" from front.
3. Cut dsp for front - 1 7/8" x 5 1/2", stick in place.
4. Cut dsp for inside measuring 3 7/8" x 5 4/8", stick in place.
5. Cut two rectangles in rich razzleberry card using 3" wide die.
6. Cut two whisper white rectangles using next size down.
7. Stick one razzleberry rectangle to front.
Be sure to add glue to left side only and make sure it is central to the whole card base.
Now stick 2nd razzleberry rectangle directly under the front one
onto inside of card.
Stamp your sentiment onto whisper white rectangle and stick to inside.
8. Stamp the flowers as above in memento ink
Make a mask for the flower heads and cover the 3 flowers.
Now stamp the background stamp using soft sea foam.
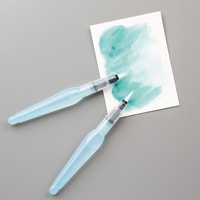
9. Remove masks and watercolour your flowers using an aqua brush and ink.
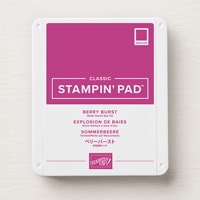
I used Berry Burst for a lighter look.
10. Stamp sentiment onto whisper white and punch out using pretty label punch.
Cut away as shown in photo.
Punch another one in razzleberry, adhere sentiment to it using dimensionals
and then trim away as in photo. Add two pearls or enamel dots.


I would like to enter this into:


Have a lovely day and thanks for dropping by!

Product List
Keep blog land alive by commenting and following blogs.
I am on the lookout for new bloggers, so follow me or leave a comment
and I will come check you out!
 Thanks for dropping by today.



Those leaving a comment on any post on this blog do so in the knowledge that their name and blog link are visible to all who visit this blog.
I personally, do not use any of your information.


Tuesday, 21 August 2018

Stocking filler sewing kit


I was away last week on a wee break and stayed in a lovely hotel in Ballina.
It was a four star hotel and it provided a lot of luxuries, one of which
was this cute little sewing kit. Of course I had to take it home and decorate it up
for a Christmas stocking filler!!
I will check online where you can buy these and hopefully post a link here.
Found one in The Works 

I have a video for you to watch showing how I made these cute packages.


If you like it please subscribe and make my day!!


Measurements you will need:
Whisper White card - 4 6/8" x 5 1/8"
Score short side - 1/2", 2 1/8", 2 5/8", 4 2/8"
Score long side - 1/2", 1", 4 1/8", 4 5/8"
Red card - 1 1/2" x 4 6/8"
Piece of ribbon just longer than red card

Stamp sets I used - Pretty Kitty, Tabs for everything and Spirited Snowmen

Hope you get time to have a go and hopefully share with me.

I would like to enter these into:
Incy Wincy - winter in August
Christmas Crafts all year round - use hot/warm colours
everybody Art - stamp


Bonus Days are back. Spend £45 in August
and receive £4.50 to spend in September!!

Enjoy £130 worth of craft goodies of your choice for £99


Thursday, 19 July 2018

Flower Seed Package


 My Thursday Tutorial shows how to make this adorable little box which can hold
maybe 6 or more packs of seeds. Perfect little gift for a green fingered friend.


I have used berryburst card and garden impressions 6x6" dsp for the one box.
The other box was made with very vanilla card stock.
I added a window sheet circle and the stamp set is my favourite
stamped in memento ink and coloured with stampin' blends.
For the circle and frame you will need circle framelits.

Measurements needed:
Piece of card measuring 7 3/4" x 9 1/2"
Score long side - 3/4",4 1/2", 5 1/4", 9"
Score short side - 1/2", 1 1/4", 6 1/2", 7 1/4"
DSP - 3 1/2" x 5" by 2 pieces

You can watch the tutorial here


Thanks for dropping by and supporting my adventure!


Check out July special offer HERE


July is a great time to join with the special ink pad offer

Monday, 16 July 2018

Enjoy!


I am starting my week with some lovely fruity tea!


I love using my envelope punch board to make these cute little packages.
I have delved into my Garden Impressions dsp again for this one.
You just simply decide on the size of envelope you want,
cut the paper and follow the instructions provided
right there on your envelope board!
I finished mine off using Tabs for Everything stamp for sentiment,
Pretty Kitty for the little kitten and Bella & Friends for the bird.
I wrapped some linen thread for the closure.
I also invested in some Stampin' Blends, yes they are in stock again!!!
to colour my images.

I would like to enter this into:


Get your choice of inks FREE
as well as the £99 starter kit!


Monday, 25 June 2018

Hello pretty kitty!


4 CC Golden Egg Award

I have been dying to make a shaker card for ages so finally did it!
Is this not the cutest little kitty ever and she works perfectly in my shaker card.
I love the background which I have embossed using my lovely new embossing folder

PINEWOOD PLANKS 

So I started by embossing the base card.
I then stamped my kitty to fit inside the largest square die.
I coloured her up with promarkers and stampin' write pens then stamped my greeting.
I added 3 gems to each side of sentiment.
I then made a frame by cutting the largest square and the second size next to this.
I cut a window sheet to fit behind the pink square and glued in place.
I added a layer of foam adhesive strips around the inside edge of the frame.
I used the large die to draw round my image and cut it out.
I sprinkled some confetti sequin on top of image, keeping them in the centre.
Removing backing paper from strips I then placed carefully over my image.
And there you have your shaker image which can now be stuck to the card base.
I finished my card with 4 pearls and a ribbon.


I would like to enter this into:
Sunny Day Crafting - any animal on project


Thanks for stopping by my blog today!
Have a great week.


Related Posts Plugin for WordPress, Blogger...