Heading
Heading
Headings are the titles and subtitles displayed on your webpage, defined by H1 through H6 tags. H1 represents the most important heading, while H6 represents the least.
Why Use Headings
Headings play a key role in both user experience and SEO. Search engines rely on them to understand the structure and content of your page, while visitors use them to skim and navigate content. It’s important always to use headings in order – H1 for the main title, followed by H2, H3, and so on.
Add a Heading

To add a Heading to your page:
- Open the Kirki editor and navigate to the Insert Panel in the left sidebar.
- Head over to the Elements → Base Elements.
- Locate Heading, then drag and drop it onto your editor.
Switch Header Tags

To assign the relevant tag to a Heading:
- Select the Heading element.
- Head over to the Right Panel → Settings tab.
- Locate Tags under Custom Properties.
- Set the relevant tag, from H1 to H6.
You can use this to either switch a heading’s hierarchy level (e.g., from H2 to H1 or H2 to H3) or turn any text element into a heading by assigning it any of the heading tags.
Style Headings
Kirki gives you plenty of ways to style your headings. Select a Heading (or any text within it) and head over to the Design tab in the Right Panel.
From Typography, customize font style, size, line spacing, and more. From Style, adjust color, border, shadows, and other properties. You can also fine-tune position and layout from here, and animate your text from the Interaction tab using Text Animation and more.
Learn more about the Right Panel.
Set Heading Link
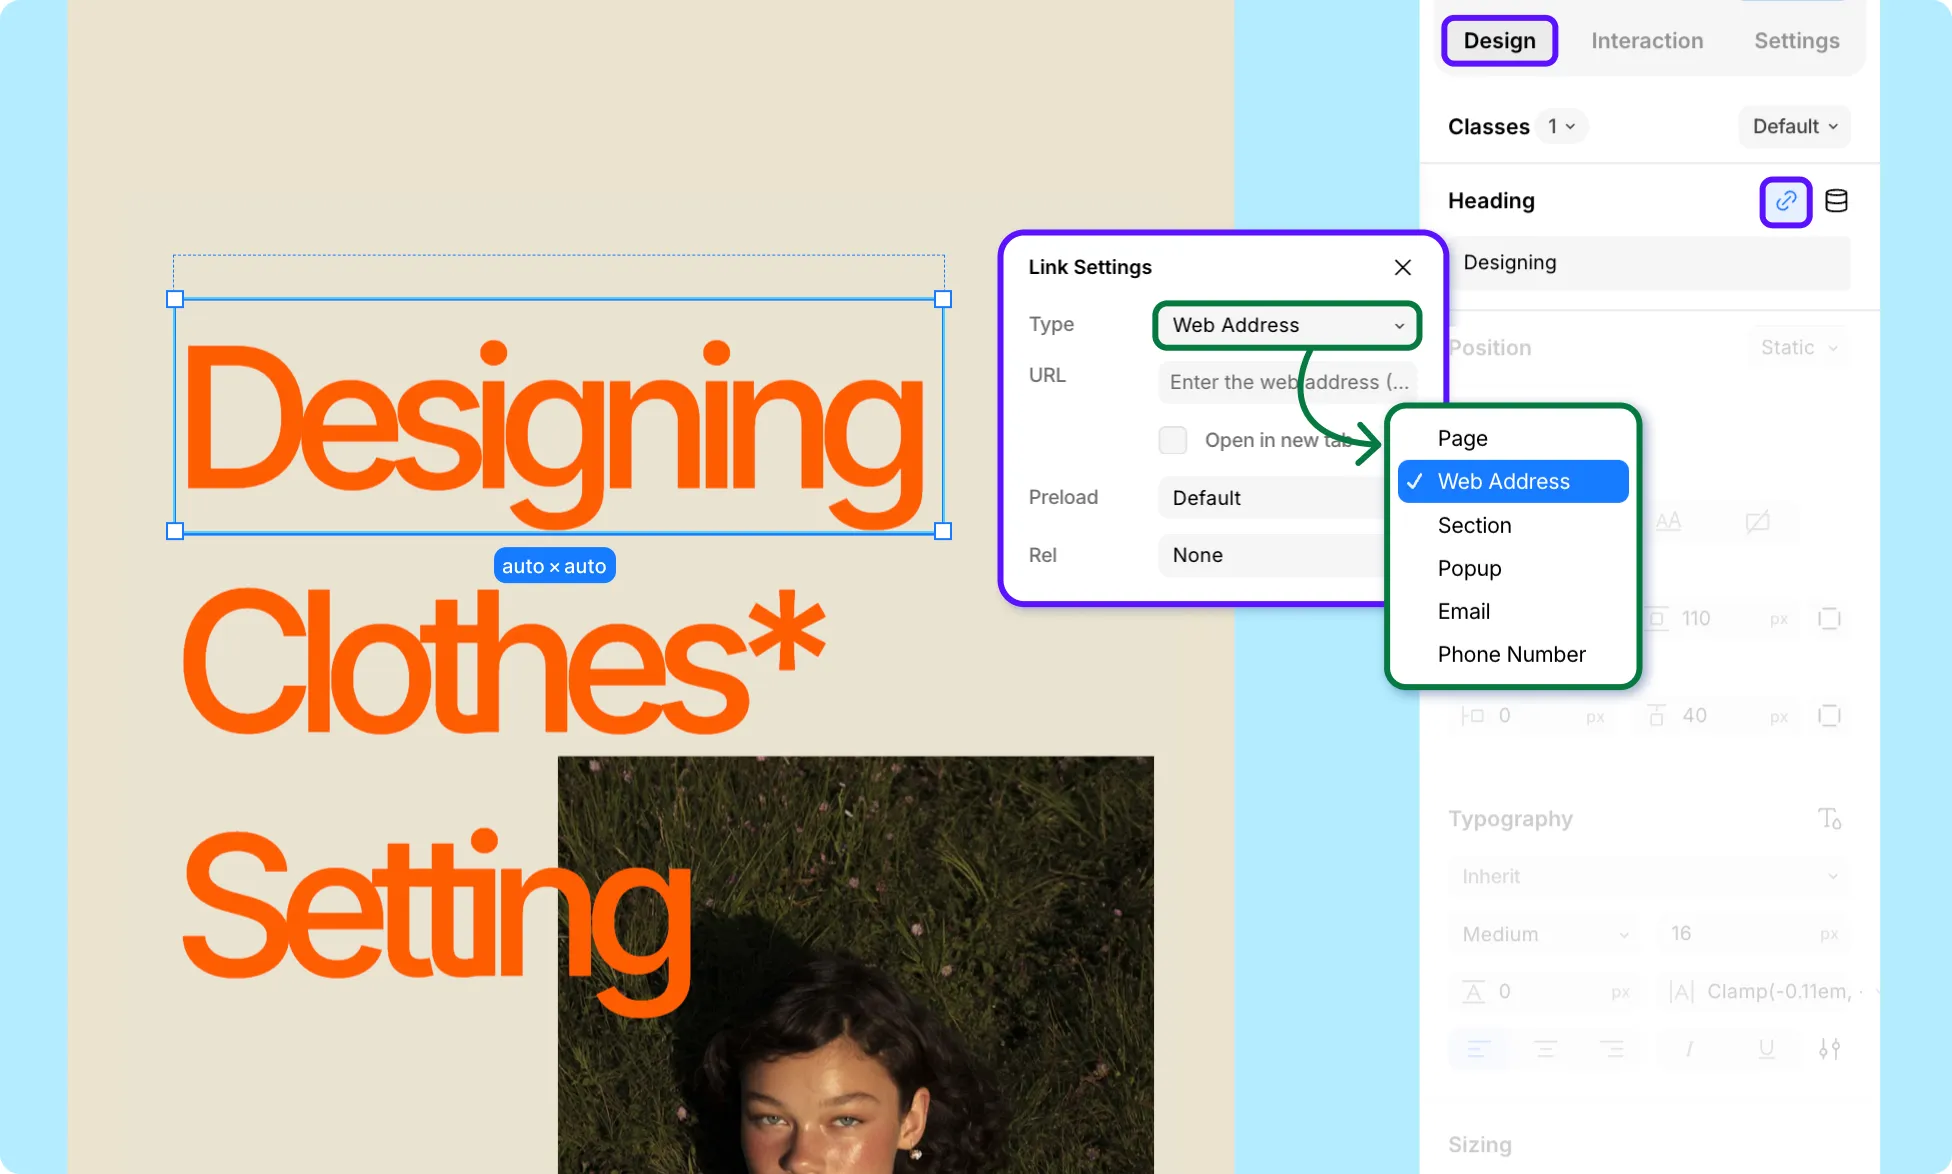
Turn a Heading into a clickable link:
- Select the Heading element.
- Click the link icon next to the Heading label in the Design tab.
- Choose your desired redirect type (Page, Web Address, Section, Popup, Email, or Phone Number).
- Enter the corresponding value.
Learn more about Link Settings.
Set Dynamic Heading
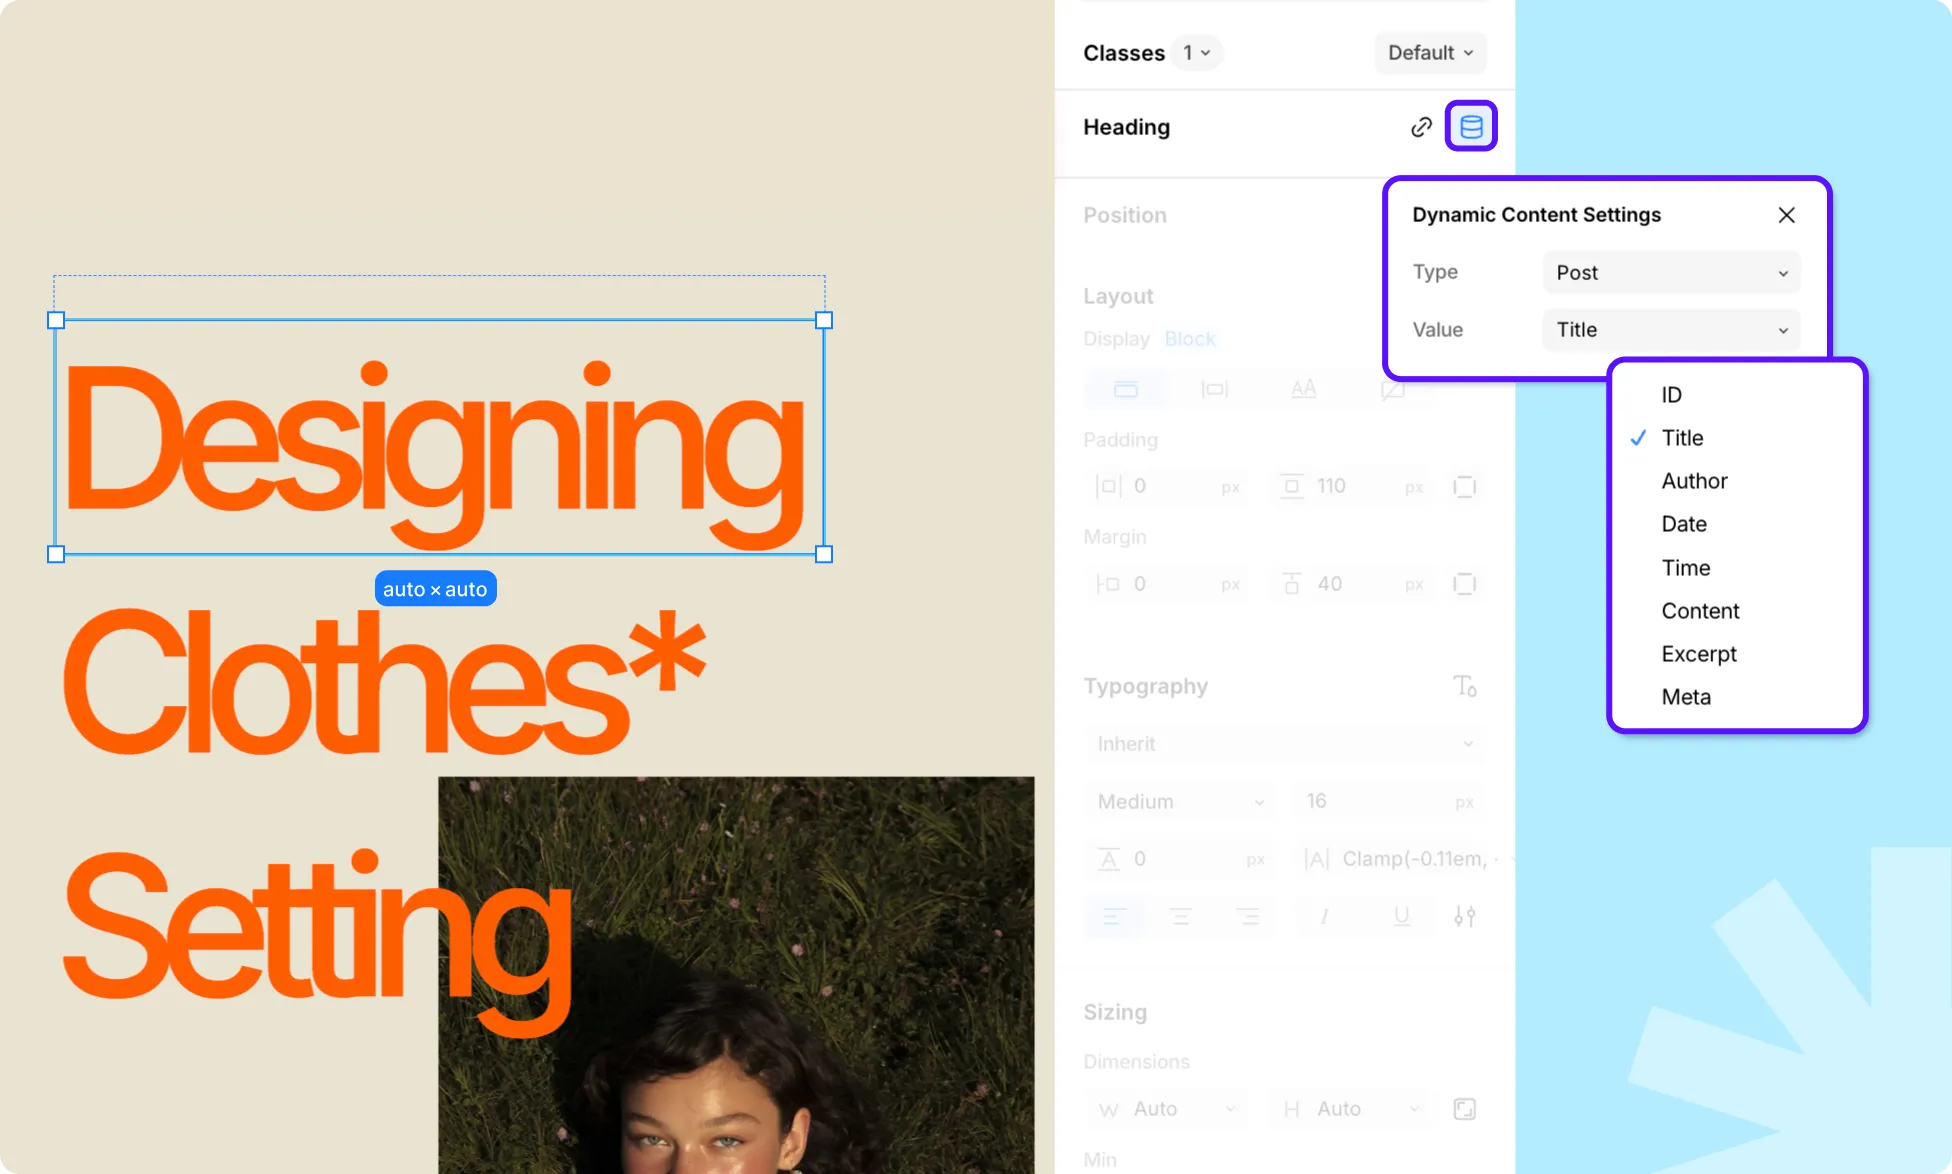
To pull Heading content directly from your collection:
- Select the Heading element.
- Click the database icon next to the Heading label in the Design tab.
- From Type, select the collection you want to pull values from (e.g., Post).
- From Value, set the collection field you display as a heading.
Learn more about Dynamic Content.
Was this page helpful?