English Siteproxy 2.0 使用了service worker, 使得代理更加稳定, 可以代理了的网站更多。 同时使用hono替代express,速度提高4倍。 支持cloudflare worker部署。 反向代理, 免翻墙访问youtube/google, 支持github和telegram web登录(请注意不要通过不信任的代理登录)。 支持duckduckgo AI Chat(可免费使用gpt3.5和claude3)。 纯web页面的在线代理, 客户端无需任何配置,反向代理到internet。
                                                 +----> google/youtube
                             +----------------+  |
                             |                |  |
user browser +-------------->+ siteproxy      +-------> wikipedia
                             |                |  |
                             +----------------+  |
                                                 +----> chinese forums
请勿将本项目用于非法用途,否则后果自负。 注意: 由于支持多个网站的login,为了减少钓鱼风险,siteproxy2.0代码进行了混淆,同时禁止了默认主页网址的修改。
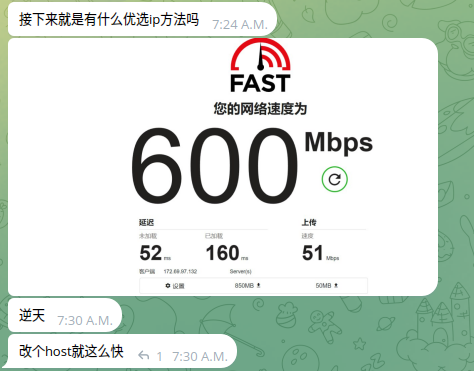
来自telegram网友的展示siteproxy部署后,加上优选IP的速度测试:
- 使用hono替代express,速度提高4倍。
- 支持cloudflare worker部署。
- 支持duckduckgo AI Chat(可免费使用gpt3.5和claude3)。
- 支持密码控制代理,知道密码才能访问代理。
- 不需要客户端的任何配置,访问代理网址即可访问全世界。
- 支持github和telegram web登录。
- 使用RSA+AES加密用户login密码,减少中间人攻击。
- 输入部署siteproxy的代理网址,就可以访问全世界,并隐藏你的IP。
- 客户端不需要任何软件安装,客户浏览器也不需要任何配置。
- 可以通过部署的siteproxy进行git clone,方法:
git clone https://your-proxy-domain.name/user-your-password/https/github.com/the-repo-to-clone
- 假设你的域名已经管理在cloudflare名下;
- 下载build/worker.js: 链接, 并使用文本编辑器打开.
- 搜索
http://localhost:5006字符串,将它替换为你的代理服务器的域名,比如https://your-proxy-domain.name,注意修改为https - 同时搜索user22334455,将其修改为你自己想设置的密码, 为空时表示不需要密码就可以访问。
- 创建一个worker,并编辑worker,将上一步编辑过的worker.js拷贝粘贴到worker里面,不要管错误提示,保存部署。
- 在Workers & Pages页面,打开刚才保存的worker,点顶部的'设置'->'触发器', 之后'添加自定义域', 设置为你的代理域名。自定义域名设置成功后,dns页面下面显示对应的dns类型应该是worker。
- 现在可以直接访问
https://your-proxy-domain.name/user-your-password/, 最后的斜杠不能少。注意这里的域名和密码替换为你自己的域名和密码。 来自telegram网友Lo A的展示优选IP的配置方法:
- 假设你的域名已经管理在cloudflare名下;
- git clone https://github.com/netptop/siteproxy.git
- 用文本编辑器打开siteproxy/build/cf_page/_worker.js, 搜索
http://localhost:5006字符串,将它替换为你的代理服务器的域名,比如https://your-proxy-domain.name,注意修改为https - 同时搜索user22334455,将其修改为你自己想设置的密码, 为空时表示不需要密码就可以访问。保存。
- 登录cloudflare, 在"Workers和Pages"里面"使用直接上传创建"一个page, 上传 siteproxy/build/cf_page目录部署。
- 在Workers & Pages页面,打开刚才部署的page,点顶部的'自定义域', 之后'添加自定义域', 设置为你的代理域名。激活域。
- 现在可以直接访问
https://your-proxy-domain.name/user-your-password/, 最后的斜杠不能少。注意这里的域名和密码替换为你自己的域名和密码。
1. 创建一个ssl website(使用certbot and nginx, google下用法), 配置nginx,
   /etc/nginx/conf.d/default.conf需要包含以下内容:
   ...
   server {
      server_name your-proxy.domain.name
      location / {
        proxy_pass       http://localhost:5006;
      }
   }
2. 执行:sudo systecmctl restart nginx
3. 用户环境下执行下列命令安装node v21或者以上版本:
   (1)curl -o- https://raw.githubusercontent.com/nvm-sh/nvm/v0.39.7/install.sh | bash
   (2)source ~/.bashrc
   (3)nvm install v21
4. 执行:git clone https://github.com/netptop/siteproxy.git;
5. 执行:cd siteproxy;
6. 测试是否能运行: node bundle.js, 如果没有错误,按ctrl+c结束程序。
7. 打开并修改保存config.json文件:
   {
      "proxy_url": "https://your-proxy.domain.name", //这个是你申请到的代理服务器域名,注意是https
      "token_prefix": "/user-SetYourPasswordHere/",  //这个实际上是你的网站密码,用来防止非法访问,注意保留首尾的斜杠。为空时表示不设置密码
      "local_listen_port": 5006, // 这个不要修改, 以便和前面nginx配置一致。
      "description": "注意:token_prefix相当于网站密码,请谨慎设置。 proxy_url和token_prefix合起来就是访问网址。"
   }
8. 安装forever: npm install -g forever;
9. 执行:forever stopall; forever start bundle.js
10. 现在就可以在浏览器中访问你的域名了, 网址就是前面的proxy_url加上token_prefix.
11. 如果想套CloudFlare加速, 可以参考CloudFlare说明
1. 配置域名对应的ssl证书和nginx,指向本地5006端口。
2. git clone本项目.
3. 打开并修改保存config.json文件:
   {
      "proxy_url": "https://your-proxy.domain.name", // 这个是你申请到的代理服务器域名
      "token_prefix": "/user-SetYourPasswordHere/",  // 这个实际上是你的网站密码,用来防止非法访问,注意保留首尾的斜杠。
      "description": "注意:token_prefix相当于网站密码,请谨慎设置。 proxy_url和token_prefix合起来就是访问网址。"
   }
4. 进入docker-node子目录。 sudo docker compose up
5. 现在可以直接访问https://your-proxy-domain.name/user-your-password/, 就可以了。注意这里的域名和密码替换为你自己的域名和密码。
www.netptop.com默认主页由telgram网友SenZyo设计, 感谢贡献!
Telegram群: @siteproxy
email: netptop@gmail.com