Tag Archives: Patchwork

Quilt Labels Tutorial

Do you use labels for your finished quilts?

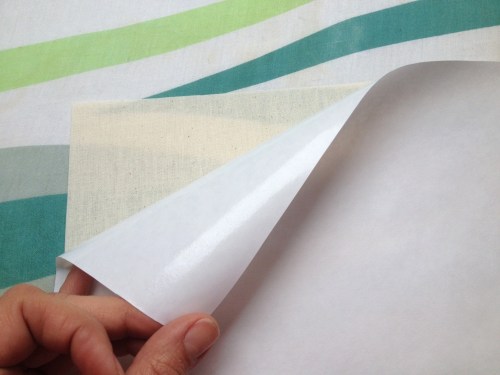
When I finished my first proper quilt, the lady who gave me my first quilting lesson told me I should label all my quilts, so dutifully I did and bought a pack of 3 or 4 sheets of printable fabric. These are A4 sized white cotton fabric glued to a sheet of paper. You can  load them on your printer to print your labels.

A friend told me that I could actually make them with freezer paper. I asked my husband to buy me a roll from the US during one of his work trips and I still have most of it left. I did try and with a bit of skill, it works. Here’s how I did it.

You will need:

Freezer paper

cotton fabric (I use calico cotton)

scissors

a stick of glue (for general paper crafts)

a printer (mine is a HP deskjet)

an iron

labeltute1

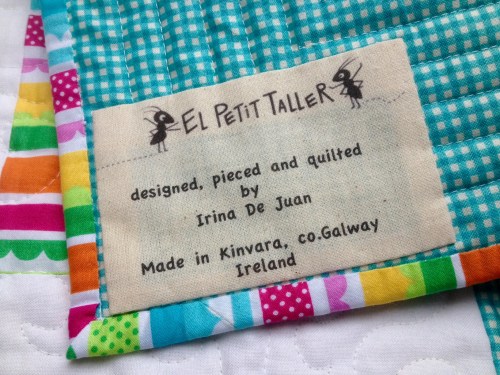
1. First you need to design your label on a word processor, you can add your logo and be as creative as you want.

2. Cut a piece of fabric the same size of an A4 sheet or slightly smaller and do the same with the freezer paper.

labeltute2

3. Prepare your iron by setting it a medium heat and press the freezer paper onto the fabric making sure that the glossy side is onto the fabric.

labeltute3

4. Press on the paper side and then on the fabric side to smooth it better.

This slideshow requires JavaScript.

5. Refine the size by cutting the edges with your ruler and rotary cutter.

labeltute6

Here’s a good tip: Sometimes I was able to load this sheet in the printer as it was and it went through perfectly fine. But other times it got stuck and created a PAPER JAM PAPER JAM…!!! This is easy to resolve by sticking the back (the freezer paper side) of your prepared sheet onto an A4 sheet of paper with a bit of glue. You only need to glue the bottom side, the one that starts to feed into the printer, to help it go through. This way it won’t get stuck and it will come out perfectly.

labeltute8

6. Make the most of  it by printing two or three labels at a time, depending on the size you want. You can then cut them with your ruler and rotary cutter, press the edges to the back and sew them onto your quilts.

FullSizeRender-2

I hope you find this useful!

Have you got any other tricks to make your own labels? I’d like to know if you do.


8 Comments

Filed under COSTURA- SEWING, fabric, PATCHWORK, quilting, TUTORIALS

Still here! Come and have a tour around my new sewing room

It’s been too long, way too long! I even considered closing this blog account, but oh no… how could I?  I’m back! 9 months later… and many things have changed. (pst…Scroll down to the bottom for a giveaway…)

First of all: we moved into a new home. Not very far from where we were but equally beautiful. We have absolutely stunning views from every single window (I think I will blog about it some day, when the sunny sun decides to come out for once!)

It is a smaller place than the one we had but I love it much more, the light in the kitchen is so beautiful and it warms up the whole house. It is just now with the gradually longer evenings that we are realizing how bright this place is. We moved in at the beginning of winter, and boy we’ve had a bad, cold, windy, rainy, stormy miserable winter…

Best of all: my sewing room! I think I have been very lucky to be able to have my own sewing space since I started to sew, here’s a post about my sewing room in my old home.

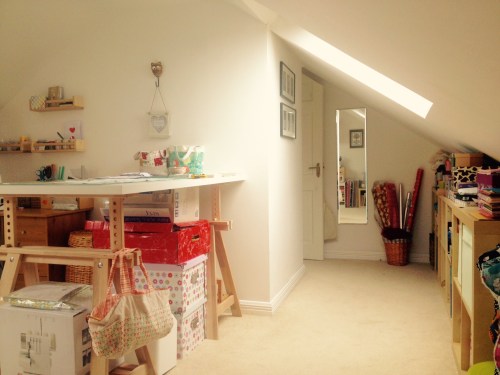
FullSizeRender.jpgI have two Velux windows (windows on the roof) giving the perfect light for the whole room. One of them projects the light onto my worktop (that I recently got so I didn’t need to use a camping table any more!) which is great for taking good photos.

I still have to put up some pictures and decor on the walls, but it is looking pretty much the way I want it to be. I have to be careful with my head when I come in though, the roof is quite low (so low that the doors are cut on the top angle! Can you see it in the photo below?) and I still get the odd bump if I’m not paying attention… At least I can use the very low space to put my bookcases horizontally. FullSizeRender-6.jpg

I love my new work top. In my old place I was using our dinner table (as there was already a big marble table in the dining room that was impossible to move), but obviously being a dinner table it was not ideal for a worktop. Too low. And I had constant lower back pains. Ergonomics! So important!

FullSizeRender-1.jpgWith a bit of shuffling around, I could move the furniture I had and use it very well. As you can see, they could probably use this room for one of the Ikea catalogue pages! That’s what happens when there isn’t much of a choice for furniture shopping in your area. Most of it is donated and up-cycled. Good thing that almost everyone loves Ikea… I have lots of baskets that I get in charity shops, they look nice and are great for storing small items  and I can always use them as preps for my Christmas market stall.FullSizeRender-4.jpgI love the light from the other window above the futon… Sometimes the kids come up to stay with me (I do feel guilty many times, spending a long time upstairs completely forgetting about the time! I do need a clock on the wall) so they can sit down and watch a movie on my laptop, do some homework or play with a few toys.

You can see the dress I am working on at the moment. This is something I’m planning to blog about too (like in 9 months…? just joking – I hope). And of course, the Supernova Star quilt that some busy bees and I managed to create.FullSizeRender-2.jpgOne thing I have mixed feelings about is the carpet. I do not like them. I am allergic to dust and I think they are not hygienic at all. But I did not have a choice. What annoys me most is that if I drop a pin, as it happens sometimes, I can’t hear it and it is hard to find too! Then my foot is the one finding it, and it’s not fun. But it is nice to walk bare feet on them. I am not allowing shoes upstairs anyway…FullSizeRender-3.jpgI’m using my old desk for the sewing machine, and I finally got my shelves up (yes, Ikea spice racks), which never had the fortune to be up in my old sewing room. It helps having the desk clear. The big wicker basket is where I keep all my wool and knitting stash. Lots of boxes under the work top, my serger (I got a new one! – will blog about it too) and my Brother sewing machine, which is taking a rest at the moment. I use an ottoman to store my wadding and it serves me as a seat too.FullSizeRender-5.jpgFinally, I have found a place for my ironing board that has it tucked in and out of the way when I’m not using it. I have a tiny travel iron that works perfectly when I only need to press seams when piecing. I still can’t believe I got it 5 years ago in a local shop for €1! When I need to press and iron big quilt tops I use my proper iron that I keep in one of the baskets when not in use. One thing I do really need is a new cover for the ironing board…

So this is it, pretty much. I have added a few things since these photos were taken.

I am working on 3 custom quilts at the moment and I have prepared 2 tutorials while I am working on them. Just useful tips to help a beginner. I am hoping to share more posts with useful information besides showing my WIPs and I also hope you readers are still here! Sorry it took me a very long time to come back!

By the way, I am now on Instagram! You can find me @ElPetitTallerEtsy (you won’t believe it but I’m still getting the hang of it…)

And… I am holding a giveaway on my Facebook page to celebrate Paddy’s Day! You are in for the chance to win one of my Irish Cottage pillows.


9 Comments

Filed under COSTURA- SEWING, GIVEAWAYS - SORTEIG, My Sewing Space, PATCHWORK, PHOTOGRAPHY

Fancy a Charming Swap?

photo copy

 The two groups are now full

So who’s up for some fabric?
Me me me!!! I hear you saying?

Here’s a fun way to increase your stash of precuts and to end up with a nice pile of rainbow coloured charm squares. I have done a few charm swaps in the past, two rainbow themed and one for Japanse fabric (which I wouldn’t mind to repeat again, Cindy…  -blink blink- ). They are really useful when you are making small projects and need a good varied selection of squares. So what do you think? Would you like to add 112 charms squares in your stash?

 I’ve hooked up with Cindy from Fluffy Sheep Quilting to organize this charm square swap.
This is how it works:
We need 28 participants but it would be great if we got 56…
1. To sign up, comment below with your email address. Sign ups will close on the 12 of October at midnight.
2. You will then receive an email by the 17th of october from either Cindy or me with your assigned colour.
3. Once you have your colour, you must find 2 prints (1 yard each) where you assigned colour mainly predominates BUT one will be light and the other dark. Bear in mind that you will have to cut the fabric into 5″ squares, so try not to get prints with big motifs or with big sections of a different colour. The fabric must be 100% good quality quilting cotton, modern prints and no solids, please.
photo copy 2
This photo above gives you a general idea for the 2 contrasting shades of each colour.
4. Once you choose your fabric, check this flickr group to make sure that someone hasn’t got it first and upload a photo of each print. This way we will be able to check all the prints and dribble a bit at the goodness that is coming to us.
5. Cut your fabric into 5″ squares, (if you have never cut charm squares before you can follow this tutorial), put them in a plastic bag (those resealable food bags work brilliantly) and post them to Galway by 22 November.  Include in your parcel a pre-addressed return envelope. No return envelope, no returned charms.   
Since this is a Fluffy Sheep Quilting sponsored swap, a 10% discount is offered on any fabrics purchased from the shop.  You will find a discount code in the email with your colour assignment.  If you buy from FSQ, your fabric will also be cut into charms AND you will not have to pay shipping.  Big thank you to Cindy!
See how gorgeous  they looked in the last swap?
Cindy and I will sort all the charms and you will receive 112 charms, 56 prints in duplicate.  When shipping comes around, send (via paypal) to Cindy the cost of your shipping so that she doesn’t loose out on paypal fees. She will not be invoicing you, but requesting you send the payment directly to her by email.
So, want to join the fun???

10 Comments

Filed under SWAPS

Happy St Patrick’s Day!

Happy St.Patrick’s Day! I hope you had a nice day. We stayed on the island, went for a walk, had scones with cream and jam… For a change it didn’t rain!Hooray!  That means no rainbow in the sky but there was one in my house!

I have finished the third Rainbow Wonky Squares Quilt. Oh, how I love it! It is ready to be posted to America. I think it will look so pretty as a wall hanging for a nursery, and I hope both mummy and baby will like it as much as I do!

photo 1

Feliç dia de St Patrici! Avui ens hem quedat a casa tot el dia, hem anat a passejar, hem menjat scones amb nata i mermelada… i no ha pogut! (sempre plou per StPatirci…) aixo vol dir que no hi ha hagut cap Arc de St Marti, pero en canvi el tenim a casa!

Ja he acabat el Rainbow Wonky Squares Quilt, com m’agrada aquest quilt! Ja esta llest per a enviar a America. Crec que quedara tan bonic penjat a la paret de l’habitacio on ha d’anar. Espero que tant a la mare com al nado els agradi tant com a mi.

photo 4

There is some exciting things going on too. I am working on my logo, labels, business cards, banners, etc… it takes so long! So now at last you get to see a small sample of it and know who are the main characters of El Petit Taller. My little ants!!! You see, the first name I thought for my blog was La Formigueta (the little ant), because I loved making those quilled ants and that’s how I saw myself… working like a laborious ant in my sewing room… but alas, that name was taken! So my sewing room got the name instead, The Little Workshop it is. Some English speakers don’t get it (and why should they), I know, and they thing Taller is in English (like the opposite of shorter) and that together with Petit… well, it doesn’t make much sense… does it? So now you know, taller is pronounced “tayeh”, and it’s the word for workshop!

photo 4 copy

Com ja sabeu, estic enfeinada preparant el meu logo, noves tarjetes, etiquetes, etc… i sabeu qui son les protagonistes? les meves formiguetes! i es que en un principi, el nom del meu blog volia ser La Formigueta, perque era aixi com em veia, com una formiga laboriosa treballant en el seu taller… pero el nom ja l’havien agafat, aixi que el taller va ser el protagonista i que va agafar el nom. Tinc uns quants problemes aqui amb la gent de parla anglesa, es pensen que taller esta escrit en angles (que vol dir “mes alt”) i es clar, ja em diras tu “El Petit Mes Alt” no te gaire sentit…

photoSo there you go, here’s the story of my blog/shop’s name, my ants and my Rainbow Quilt!

Doncs aqui us deixo… amb el meu Arc de St Marti i les meves formiguetes…!

8 Comments

Filed under PATCHWORK

Merry Christmas everyone! Bon Naldal a tothom!

Oh dear Oh dear, I do miss blogland a lot! I miss you all!But really… I have work coming out of my ears, as the Spaniards say… I’m “on holidays” from the primary school where I have been working as a Special Needs Assistant, but I am still working for the charity organisation as a social carer. I’m happy though that I can breath a bit more. So what have I been doing?

It is Chrsitmas Eve now and we have lovely stormy weather out on this tiny island. You should see our hens trying to walk against this wind! Sometimes I think they’ll fly across the bay over to Galway city

Last night, after a few days of madness, just when I had the children in bed and I was snuggling on the sofa, looking forward to doing nothing but to watch a filim (as the Irish say it), the electricity went off. The only time I decide to watch TV. So no filim for me. Anyway, I’ll try to snuggle up later on, after making sure that Santa has left all the pressies

Besides doing my duties as WOHMACWASAHM (Working Outside Home Mum And Continue Working As a Stay At Home Mum) I kind of managed to frantically sew a good decent amount of stock for (wohoo!!!!) my stall at the local Christmas Market!!! It took me 4 years to finally get myself sorted and make it to the market. I had so much fun! I was sharing table with my crafty neighbour who makes the most beautiful hand bound journals. People were saying our stall had the best cutest display… I learnt a lot about displaying though, people seemed really attracted to the stall because there was a lot of colour, a lot of stuff on the table and they were allowed to touch. Athough I booked the place for only one day, somebody had cancelled their place so I was offered to go back on the next day. Then my stock was much better displayed, a friend had lent me a nice cast iron screen where I could hang the bibs, cardigans and dresses. You can see some shots (sorry for the quality of the photos, taken with my phone!)

photo

The different sized baskets worked really well and the linen cloth over the stripy fabric was nice too. It was funny though, that before I had made any sale, a lady approached to ask me how much was the bunting… Altough I made it (for my daughter’s birthday party) it wasn’t for sale… and when I was packing up at the end of the day, a lady came to ask me how much were the baskets!!!

photo 1

some of the knitwear I have under the label “Lamama Knits”

So here’s a few things I learnt (and if you have any tips to share the more the merrier!):

– Have different height levels to display on your table, use boxes or baskets stacked on top of the other.

– Go around your house to see if you have any little bits and bobs, nice wooden boxes, baskets, bowls, etc to display your stock in.

– Have something made that is easy and fast and can sell at a very affordable price. I had lots of hairbands that didn’t seem to sell online on my Etsy shop. People go to crafts markets prepared to buy at least something. If you have something less than €10, it will probably go quick. So I put all the hairbands in a basket (Hana’s doll’s clothes basket)  at €5 together with the dummy holders at €7. They sold fast!

–  I didn’t have any patchwork quilts for sale for 2 reasons. I didn’t have time to build a good stock and I thought they’d be too pricey for what people would be looking for. Instead, I had patchwork blankets, they sold and people now know that I also make quilts.

Overall, I think I did pretty well, I wanted to let people know I am here and I am local and I handed out lots of business cards (and what a good idea it was, I got a call yesterday from a customer who wanted to buy one of my bags that his girlfriend liked!).

I hope you are all doing well, stitching a lot and making beautiful things! Have a lovely Christmas and a Happy New Year! Thank you so much to those of you who have made contact in some way to say hello and ask about my whereabouts. It is really so nice to feel appreciated like this! And I’m sorry that I haven’t visit your blogs or participated as much as I’d have liked to… Life is a bit crazy at the moment! Crazy but fun…

photo 4

Una’s hand bound journals, cards and bookmarks

***************************

Buf buf, com trobo a faltar llegir els vostres blogs i els vostres comentaris! Pero es que no paro no paro i no paro! Per fi estic “de vacances” de l’escola de primaria on he estat treballant pero segueixo com sempre a la organitzacio de treball social. Aixi que quan no estic treballant fora de casa, segueixo treballant dins de casa (com tothom, oi?).

Aquesta nit ens estem preparant per a que Santa Claus aterri a la teulada amb els rens. Ho he intentat, pero cada vegada que parlo del Cagatio la gent em mira com si estigues ben boja, i ja no us dic res del Caganer… aixi que segueixo la tradicio del Santa que baixa per la xemeneia… 

photo 2

hairbands in a basket, dummy holders, fabric covered notebooks and business cards…

No se per que els catalans som tan escatologics, em pregunta el meu company:  entre el Cagatio, el Caganer, el conte del Patufet, que ma mare li desitji molta merda abans de pujar a l’escenari i que ens caguem en tot quan ens emprenyem o enviem allo que no ens agrada a la merda… apa aqui, es curios que mai no m’havia adonat fins que ell m’ho va fer veure… Doncs si, debem tenir una fixacio amb les femtes. Que hi farem. Segur que a hores d’ara tota Catalunya esta fent cagar el Cagatio a cops de pal (aixo tambe els va sobtar als irlandesos, que despres de cuidar-lo i mamnt-lo tant durant dies, ben calentet sota la manta, acabem fotent-li pals per fer-lo cagar). 

Be, us dic que es el que he fet aquests dies. No se com, vaig poder fer d’una revolada un estock prou decent per poder tenir una parada al mercat de Nadal! i que be que m’ho vaig passar. Per sort, una persona va cancel.lar la seva parada, i en comptes d’estar-m’hi un dia, m’hi vaig estar dos! Vaig compartir taula amb la meva veina que enquaderna unes llibretes supermaques. La gent ens deia que la nostra parada era la mes maca del mercat… he he, tampoc deuria ser per tant, pero si que feiem goig…

photo 3

cardigans, dresses and bib-aprons

Si algun dia teniu pensar fer parada en una fira, aqui teniu el que he apres:

– Intenteu tenir els articles sobre la taula a diferents nivells d’alçada, apilant caixes o cistells, etc…, queda mes atractiu a la vista.

– Segur que per casa teniu coses maques com cistellets, capsetes, bols, plats…etc… on podeu posar les coses de maneres diferents.

– Tingueu articles que siguin facils i rapids de fer i que es puguin vendre a preus molt assequibles. La gent acostuma a voler comprar alguna cosa, el que sigui, i si es a menys de €10 ja ho teniu fet. Jo tenia una pila de cintes per al cabell que no es venien gaire be a Etsy, en canvi a la parada, posades dintre d’un cistell a €5 van volar quasi totes.

I be, si teniu alguna idea o consell mes que podeu afegir a aquesta llista, compartiu-la!!!

De mentres, espero que passeu un Bon Nadal i us desitjo un Feliç Any Nou 2014. Moltes gracies a tots (totes, vaja) les que heu contactat per una via o altra amb mi per saludar-me i preguntar com anem. De bolit! Perdoneu que no visiti els vostres blogs i no hi participi tant com m’agradaria. A poc a poc anire treien el cap!

9 Comments

Filed under CHRISTMAS, COSTURA- SEWING, Etsy, fabric, NADAL, PATCHWORK, PUNT- KNITTING

Dancing Squares and busy days

Hello! Not long ago I told you about my new version of the Wonky Squares. I finally bound it! It took me a bit longer than usual. A quilt that small I’d normally bind in an hour sitting in the sofa in front of the TV but the reason for the extra time was that I have been on my own with Hana and Conor for the last 2 weeks. I had planned to finish a few things while I was on my own but as the days went by I could feel my energy levels dropping at a tremendous speed and by the second week I was going to bed straight after them… So I think it’s been a huge achievement to have this finished! In the end I went for a dark red -burgundy colour for the binding. I had a very dark blue and a black but it was a bit too dark.

foto 1 copy 2

Oh Conor… This little Button of mine is pretty busy, I was so used to Hana being so quiet and content (but of course I didn’t have any other child around beside her). I could have lots of things done with her around. But let’s say Conor needs to move about more, he’s into something all the time, although he is really good… He started to walk about 3 weeks ago and now is flying! I suppose he’s just doing what any boy of his age should be doing, and, in fairness, I can’t really ask him to stop acting like a one year old, can I?

He won’t stay still, his new obsession is throwing things down the toilet and climbing onto the sofa to walk from one end to the other… You have to constantly watch him, unlike Hana… so yes… my hands have been really full and we’ve been trying to be out as much as possible and do lots of things while the man of the house was away. And that didn’t involve much sewing, but still I manage to treat myself one day… So what did we do? Here’s my wee man, looking very tiny among these huge trees!

foto copy 2

We have this park nearby, Coole Park, which is amazing and I absolutely love. I don’t know if you’ve heard about Lady Gregory, but maybe you’ve heard about George Bernard Shaw or W.B. Yeats… You can read more about it here. If you ever come to Ireland, to the west of Ireland, I recommend to visit this spot, it’s beautiful any time of the year, whether it rains or it’s foggy or the sun is out. There is this autobiographic book of short stories written by one of Lady Gregory’s grand-daughters, it’s a nice short and easy read that I like: Me & Nu.

foto copy 3

Then, one morning I packed up the children and drove up to Tuam to meet Roisin at The Quilt Shop, in Shop St. I have been following her via Facebook and finally I could get a spot to go and visit the shop. She’s lovely and so helpful, she had been keeping some yardage of flannel for me to make some PJ’s for Hana, and I was low on wadding too, so I had a good excuse for the trip. And oh… when you go in and see all these colours around you… I could contain myself and focus on what I really needed, but it was HAAAAARD… You can see in the photo above a bit of Conor’s rainbow star quilt ( ahem, yes… still in progress,  I want to add a border and something else…but I have the backing now!) Can you spot the stripy fabrics on top and beside it? I was trying to choose which one looked better as a backing and Hana found the right one. I won’t reveal anymore of it and hopefully it won’t be long before it’s finished… Roisin has a great stock of fabric and notions, she also runs classes and I just wished there was a shop like this much closer to where I am. Although I generally get my fabric online, it’s nice to be able to walk into a shop like this… I’m sure I’ll find another excuse to drive up to Tuam. It’s funny though, many Irish people I know here were a bit perplexed when I told them I was going to Tuam…  “Tuam? going to Tuam? what for? there’s nothing there!” well… there is a Quilt Shop!!!

Then, “the quilter’s widow” came back and brought me a few goodies. He’s a musician and works abroad pretty often. He spent some days in the USA, in the East Coast, and then flew to Canada. He spent a whole week in Goderich, Canada, were there was a Celtic Festival he was taking part in, and guess what? He called me saying he had found a quilt shop in the Main Square and if there was anything I needed. Yeeha! anything I needed? mmm… the whole shop maybe? I couldn’t really think of anything there and then and told him I needed some of those stickers for my Omnigrid rulers. Then I sent him an email with a more detailed list of things but it was too late :-(… He got me three random magazines besides what I asked , which was really nice of him.

foto 1 copy 3

And well, no worries… as he’s going back to the States in September and I hope he’ll come across some other quilt shops. If there are any readers here from Tenessee, Virginia, N. Carolina… I might ask you for some tips on quilt shops soon…

foto 2 copy 3

3 Comments

Filed under Celtic Music, COSTURA- SEWING, FAMILIA, IRELAND, IRLANDA, PATCHWORK

Quilting again

Remember this quilt? The “Wonky Squares” that a friend had commissioned me for her nephew? Well, it’s one of my favourites. I like that it looks so simple, there’s solids and it’s so colourful.  It is quite successful among readers too…

A while ago I was asked to write the tutorial, so I did.  I didn’t make it exactly the same, because I want my quilts to be unique, but the technique is the same. The top has been ready for ages! but I just couldn’t find the time to quilt it and the space in my sewing room was a bit restricted as well. I have a few other tops queuing up, so I hope to have them done over the next few weeks.

photo copy


It’s a bit wrinkled because I had to turn the fabric so often with all those zig-zags!

Now I only have to hide those treads and make the binding. I’m still deciding what colour should I use. What do you think? The backing is an apple green, although you can’t really appreciate it because of the light (it’s raining today…). Should I stick to solids for it? or maybe I could use a small busy print…?

***************************

Recordeu aquest quilt? El “wonky Squares” que una amiga em va encarregar pel seu nebot? Es un dels meu preferits. M’agrada perque es veu molt senzill, sense estampats i amb molt de color. Tambe te bastant d’exit entre els lectors…

Fa temps que em van demanar si podia escriure el tutorial i aixi ho he fet. Ja fa temps que el tenia fet pero mai no trobava el temps per encoixinar-lo, i tampoc hi havia gaire lloc… No es exactament el mateix, l’he fet una mica diferent i mes petit perque m’agrada que els quilts que faig siguin unics, pero la tecnica es la mateixa.

photo

Esta una mica arrugat perque havia d’anar girant-lo tnat sovint amb tantes zigazagues… Ara nomes falta amagar uns quants fils i fer la beta, pero encara estic decidint quin color fer servir… El darrere es de color verd poma, ben viu. Quin color penseu que aniria be? Segueixo amb colors llisos o potser que faci servir algun estampat petit? que farieu vosaltres?

5 Comments

Filed under PATCHWORK

About notions, useful or useless?

How often do you buy notions? Are there any that you’ve bought thinking  they would be very useful and you still haven’t used? I often wonder how essential some notions and sewing gadgets are… I suppose it depends on what you do more, if it’s quilting or garment making, embroidery, etc…

I started making patchwork with almost nothing. Just my mum’s sewing basket. Scissors, thread, pins and needles. I never used a thimble for hand sewing because it bothered me and it got in the way. I couldn’t hold the needle properly with it. (Now I always use it). I remember designing a pattern on graph paper, cutting the templates, using a pencil to trace them onto the fabric and hand sewing the pieces because I wouldn’t have a clue how to use a sewing machine.

Now I love my cutting mat, rotary cutter and ruler and my sewing machine (or machines I should say, about which I’ll dedicate another post). I don’t think I would even attempt to make any big patchwork project without them. Well, I would if there wasn’t really anything else. I’d say it’s like when you get a dishwasher for the first time. Once you have the dishwasher, it’s kind of hard to go back without one…You’ll wash the odd plate, that’s all.

******

Compreu sovint estris per cosir? Heu comprat alguna vegada algun estri que pensaveu que us serviria molt i encara no l’heu utilitzat? Suposo que depen del que feu n’hi ha que us faran mes servei que d’altres… vaig començar a fer patchwork amb quasi res, nomes amb el que hi havia al cistell de cosir de la meva mare. Tisores, agulles, fil i para de comptar. Cosia a ma perque no tenia ni idea de cosir a maquina. Ara no crec que pogues fer-ho sense el regle, el cutter “talla-pizzes” i l’estora de tallar… Es com quan de cop tens un rentaplats, costaria tornar als temps quan no el tenies… (i si no el tens no passa res perque vas fent). Amb el temps he anat comprant mes eines que creia que em farien servei. Algunes ho han fet i d’altres no tant… Com que ultimament m’interessa cosir roba, m’he adonat que les tisores que tenia eren una perdua de temps. Per fi em vaig comprar unes SUPER TISORES de modista com aquestes: 

*****

Over time, I have bought a few other bits and bobs. There is one tool I have been taking for granted and because I’ve become more interested in garment making, I realised I hadn’t paid  attention to it. I now own a REALLY GOOD pair of dressmaker scissors like these ones:

scissors

I also love my shear scissors and embroidery ones too. I think investing in good scissors is really important, no matter whether  you are only into patchwork or a more varied sewing life. My good scissors ONLY live in my sewing room, they’re not allowed to leave the room or be used for anything else.  You don’t want to know the amount of scissors that have been kidnapped and never worked properly when I saw them again. Sigh. Something tells me I’m not alone here…

**

Tambe m’encanten les meves tisores de zig-zag i les de brodar. Ara nomes viuen a l’habitacio de cosir i no surten d’alla per a res. La quantitat de tisores que m’han desaparegut i han tornat fetes malbe… Ai… Hi ha una cosa que vaig comrar i que encara no l’he fet servir, estic tant acostumada a fer la meva veta que no li trobo el que per fer-ho servir. Una maquineta de fer vetes:

**

I do have a little thingy that I still haven’t used, just because I’m so used to not using it that I actually wonder is it any use at all!

bias

A bias tape maker. It’s still in the box… I should try it some of these days. Do you have one? Is it worth having? Is it easy to use? And this other thingy below…

**

I que me’n dieu del d’aqui sota? un peu de maquina per a cosir vetes. Vaig interntar fer-lo servir i no me’n vaig sortir. Viu al calaix. Ja ho intentare un altre dia…

**

feet

A bias binder foot. Tried to use it. Failed. Lives in the drawer. Maybe I should give it another go…

Now, as I said,  I spend a fair amount of time making clothes and I’ve even taken up some alterations recently (that’s what happen when your neighbours and friends know that you have a sewing machine… but I like the challenge and I’m learning a lot at the same time, and they know I’m not a professional and that I do me besht)

so… in the dressmaking area…

I love my sewing gauge! So much better than using a measuring tape which I kept doing for ages…

***

En l’area de fer roba, el que m’agrada molt es aixo, que no tinc ni idea de com se diu en catala… a “gauge” en angles (pronunciat “gueig”, com “lleig'” pero canviant la “ll” per “gu”, ja ho se, jo tampoc ho hagues dit mai…) i la rodeta per marcar patrons (que penso que tambe podria anar be per fer raviolis de pasta fresca).

Hi ha dues coses que vaig comprar fa unes setmanes i les recomano totalment. Una estora per afilar les agulles, tant de maquina com les de ma. Va perfecte! i l’afilador de fulles per al cutter rotatori (o talla pizzes que dic jo), m’encanta! (va venir d’EEUU i faig servir un adaptador, no cal convertidor per un aparell tant petit):

***

gauge

and my pattern tracing wheel

tracing wheel

A few weeks ago I bought 2 things that I’m very happy with and would recommend:

needle sharp

A needle sharpening pad. You can use it for your machine needles, hand sewing needles or pins. It’s great!

And another sharpening tool:

cutter

A rotary blade sharpener, after reading some reviews like this one, I decided to purchase it. I sharpened 2 old blades and I’m so happy with the result. I know I’ll save a lot of money…

There are 2 things on my wish list: I desperately need a new self-healing cutting mat which I hope to get soon. The other one will probably take a while to get… I’d love to have a dressmaker’s mannequin. I’m still deciding what would suit me best since I’m a beginner. Should I get an adjustable one or one that is my size? I’ve got a very tight budget, so I still don’t know what to do, but I’m tempted by this

Hi ha dues coses que tinc a la llista dels desitjos. Necessito immediatament una nova estora per tallar amb el talla pizzes, i espero poder tenir-la aviat. L’altra portara una mica mes de temps… un maniqui de modista. No se que seria millor si comprar un ajustable o un de la meva mida. El pressupost es petitet i aquest d’aqui em tempta…En teniu un les que feu roba? quin em recomanarieu? 

Aixi doncs, quina es la vostra experiencia amb eiens de cosir, quines son les que trobeu imprescindibles i que us agraden molt, i quines creieu que son una perdua de diners?

mannequin

Have any of you got one? which one would you recommend?

So, after all my ranting, what is your experience with notions? Are there many that you find useless? which ones? Any good found that opened your eyes? what is it?

24 Comments

Filed under APRENDRE, COSTURA- SEWING, Notions, PATCHWORK

Finishing UFO’s

It took me a while to figure out all those acronyms in the quilting world. Now I’m getting used to them… UFO, UnFinishedObject…

Well, this is a quilt I started about 6 months ago, using a jelly roll that someone gave me about… 2 years ago??? Then, about… a year ago I bought this book, Jelly Roll Inspirations, and I chose this pattern:

IMG_6139

Hi ha molts acromins en el mon del partchwork blocaire, i aquest “UFO” es refereix a  Un Finished Objects, objectes no acabats… Doncs tinc un quilt que vaig començar a fer fa uns sis mesos, amb un jelly roll que em van donar fara… uns dos anys??? i fa cosa d’un any vaig comprar aquest llibre:  Jelly Roll Inspirations, i vaig escollir aquest projecte que veieu a la foto de dalt.

IMG_6041

I have changed a bit the display of the blocks, and why not confess that I made a mistake while cutting a block from the 5 sewn strips. That resulted in trying to find 5 other strips that coordinated with the rest of the roll and start again… so from then on, the pattern was modified a bit, by accident. Hana was helping me to arrange the triangles before sewing them into blocks, just so we could have a quick peek at how it would look.

IMG_6036

He canviat la posicio dels blocs i per que no confessar que em vaig equivocar al tallar uns quants blocs de les 5 tires que has de cosir. Aixo em va fer buscar 5 altres tires que coordinessin amb la resta del roll i des d’aqui que el patro ja v anar modificant, per accident. La Hana em va ajudar a organitzar una mica els triangles per veure com quedaria.

IMG_6039

Once all blocks were sewn, I arranged them randomly like this to have another look. So the next step now is to sew  them together. It has quite a traditional look with this fabric, so I’m thinking of the quilting and I’d like to try the knot tying technique. I found this tutorial which I might follow. But I wonder, have any of you tried tying a quilt? do you know a good tutorial? any tips that you could share? I have no idea about what kind thread/needle are the best…

IMG_6046

Un cop cosits tots en blocks, els vaig posar junts i aqui estan. Ara els he de cosir i acabar el top. Te un look molt tradicional amb aquestes teles i estic pensant de com fare l’encoixinat de lligar nusos. Vaig trobar aquest tutorial i crec que el seguire. Algu de vosaltres a probat mai de fer un encoixinat aixi? no tinc ni idea de quin es el fil  mes adient o quin tipus d’agulla, pero ja ho esbrinare…

7 Comments

Filed under COSTURA- SEWING, PATCHWORK

The Wrapped Up Zipper Bag (or Origami Pouch…): Tutorial

IMG_5991

I just realised there already was a zipper pouch (one of maaaaaany) that used the name Origami, you’ll find it in Amy Butler’s book Styles Stitches. I wasn’t aware of that so I think I should find a nother name for this zipper bag… It reminds me of a wrapped up present, so Ithink I’ll call it the Wrapped Up Zipper Bag, even though it involves some Origami folding!

If you like Origami and are good at it then you won’t have any problem with this… If you are not good at folding, don’t worry, I’ll teach you how to do it!

Si us agrada l’Origami i domineu la tecnica no tindreu pas problema per fer un estoig com aquest… Pero si no teniu gaire practica, no us preocupeu que ja us ensenyo com es fa!

IMG_5959

You can choose whatever size you want, just make sure that your zipper is 2″ longer on either side to make your life easier.

Podeu fer-la de la mida que volgueu, nomes heu de tenir en compte de fer servir una cremallera que sigui 5cm mes llarga a cada extrem per no complicar-vos la vida.

IMG_5903

For the flowery type box:

15″x10″rectangles of outer fabric and lining fabric

100% cotton wadding for quilting the 2 layers

5″x4″ rectangle of outer fabric

2 rectangles of 3″x4″ of outer fabric or any contrasting fabric with the lining

14″ zipper

Per un estoig com el de les flors:

rectangle 25cm x 35cm de de tela exterior

rectangle  25cm x 35cm de tela interior

guata de 100%coto per encoixinar els dos rectangles anteriors

rectangle de 12cm x 10cm

2 rectangles de 7.5cm x 10cm de tela exterior o que contrasti amb la interior

cremallera de 35cm

IMG_5962

For the linen type pouch:

11″x10.5″ rectangle of exterior fabric (you can see I used a patchwork panel)

11″x10.5″ rectangle of interior fabric

fusible fleece to quilt both rectangles

5″x4″ rectangle of outer fabric

2 rectangles of 2.5″x4″ of outer fabric or any contrasting fabric with the lining

Per un estoig com el de lli :

rectangle 25cm x 35cm de de tela exterior

rectangle  25cm x 35cm de tela interior

Entretela tipus forro polar per encoixinar els dos rectangles anteriors

rectangle de 12cm x 10cm

2 rectangles de 6cm x 10cm de tela exterior o que contrasti amb la interior

cremallera de 35cm

The process will be the same in any size, I’ve used photos from both pouches for the tutorial.

El proces es el mateix per a qualsevol mida, veureu que hi ha fotos dels dos estoigs en aquest tutorial

IMG_5963

1. Sew one side of the zipper on to the 10″ side of the rectangle, FACING DOWN at 1/8″ from the edge.

1. Cosiu un costat de la cremallera CARA AVALL a 0.5mm del costat de 25cm del rectangle. 

IMG_5966

2. Trim the excess fabric with shears.

2. Talleu l’exces de tela amb unes tisores zigzag.

IMG_5967

3. Press onto the right side and topstitch.

3. Planxeu a la banda del dret i cosiu un repunt.

IMG_5923

4. Mark the zipper with a pen at the point where both edges end.

4. Marqueu la cremallera amb boligraf alla on la tela acaba.

IMG_5968

5. Sew the other side of the zipper by folding the rectangle over (zipper FACING DOWN onto RIGHT SIDE of fabric).

5. Cosiu l’altre costat de la cremallera, doblegant el rectangle de manera que la cremallera mira cap AVALL sobre la tela del DRET). 

IMG_5969

6. Cut the excess fabric again and this time you will need to fully open the zipper to press and topstitch.

6. Talleu l’exces de tela i aquest cop haure d’obrir la cremallera per a poder planxar i fer el repunt.

IMG_5970

IMG_5971

7. Stich the bottom edge of the zipper

7. Feu unes puntades a la part d’abaix de la cremallera.

IMG_59728. Take the small rectangle and press in half, then press both edges inwards towards the centre crease.

8. Agafeu el rectanlge petit i planxeu-lo per la meitat, torneu a planxar els extrems cap al doblec del centre.

IMG_5973

IMG_59749. Sew both edges and sew a tag if you use one.

9. Cosiu els costats i cosiu-hi la vostra etiqueta si voleu.

IMG_597510. Right, now for the Origami session… Turn the pouch inside out and fold it flat with the zipper at the centre.

10. Be, ara comencem amb l’Origami… Gireu l’estoig del reves i el xafeu de manera que la cremallera quedi al centre.

IMG_5976

11. Use a pin to mark the centre

11. Col.loqueu una agulla per marcar el centre

IMG_5978

12. Tuck in the edge towards the centre where the pin is. Excuse all the frayed threads!!!

12. Col.loqueu el doblec exterior cap endins cap a l’agulla. Perdoneu per els fils desfilats!

IMG_5980

13. Do the same on the other side and repeat these last steps for the other edge of the pouch.

13. Feu el mateix amb l’altre costat i repetiu els dos ultims punts amb l’altre extrem de l’estoig.

IMG_5981

15. Place the tag strip into one edge.

15. Col.loqueu la tira de l’etiqueta dins d’un extrem.

IMG_5985

16. OPEN THE ZIPPER before you sew both edges.

16. OBRIU LA CREMALLERA abans de cosir cada extrem.

IMG_598617. Trim the excess fabric and the zipper.

17. Talleu l’exces de tela i de cremallera.

IMG_5949

18. With the 2 small rectangles left, make a binding for each seam by following the instructions in step 8.

18. Amb els dos rectangles petits que us queden feu una veta per cobrir les costures dels extrems seguint les instruccions del punt 8.

IMG_5987

IMG_5990

20. Turn de pouch and you’re done! I hope you’ve enjoyed this tutorial. I’d love to see your pouch if you make one so feel free to come back and share your link in a comment below. Thank you!

20. Gireu l’estoig del dret i ja el teniu fet! Espero que us hagi agradat. Magradaria veure el vostre estoig si en feu un, podeu compartir l’enllaç en un comentari per a que tots el veiem. Gracies!

IMG_5988

IMG_5992

IMG_5993

IMG_5959

IMG_5995


18 Comments

Filed under COSTURA- SEWING, TUTORIALS