Showing posts with label copic. Show all posts

Thursday, June 18, 2026

Gopher It!


Good morning friends! I have 3 cards to share with you using this adorable new set called, Gopher It, by Whimsy Stamps.  The first two cards were done with Copics and the last card, I did a no line coloring, colored pencil technique. This first card was colored and cut out using the Wonky Stitched Rectangles Die.  The brown plaid paper is from the Cottagecore 6 x 6 paper collection.  I added this little paper clip from my old Stampin' Up days.  (It has to be VERY old! LOL)
This card was done the same way as above.  Same supplies, except I used a button instead of the paper clip to embellish it. 

My last card I decided to do a no line coloring with colored pencils.  It has been a hot minute since I've done that technique! I ended up changing this little gopher's face a bit, not intentionally, but it ended up rounder and maybe a bit more bear like?  But I thought he was still cute, even if it didn't quite look like a gopher. ;)  Sometimes it's fun just to play.  I added a couple of sequins and called it done.  

Thank you for stopping by!
I hope you have a wonderful week!


Wednesday, June 10, 2026

Too Hot to Haunt!

Hello friends!
Just a quick post to share this fun card using Whimsy Stamp's Summerween Scream stamp set!  It is such a fun set! Halloween and summer?  Yes!  This set is going fast and once it's gone, it's gone! I colored the image using Copics and used the coordinating dies to cut her out.  I added clouds to the background using the, It's Cloudy stencil.   I added waves for her to float in using the Making Waves Stencil.   The frame was created using the Wavy Pierced Rectangles Die
Thanks so much for popping by! Have a great day!


Tuesday, May 5, 2026

Whimsy Stamp's New Release!

Howdy friends!
Whimsy Stamps just had their fabulous new release! New stamps, dies, and papers! 
The stamp set I used is called, Cowboy Obsession.  It was stamped in black ink and colored with Copic Markers.  I kept the colors neutral as to not compete with the rest of the card.  The image was cut out using the Ropes and Barbs Die set.  For the barb wire portion I added Tim Holtz Grit paste and let it dry.  I dry brushed black, orange, and patina paints to achieve a rusty appearance.  When it was completely dry I added a bit of Tim Holtz Foundry Wax in Statue.  I heat set it.  Around the image itself, I added a bit more Grit paste with my finger and once dry, inked up the edges.  I also added a bit of the Foundry Wax, with my finger, to finish off the rustic look.  The papers in the background are from the Rustic Mountain paper pack.  A bit of twine and ribbon were tied to finish everything off. 
I hope you can see the "rust" on the barbed wire.  I am completely obsessed with making tthis faux rust! You will be seeing a bit more of it soon!
Thank you for stopping by!
Have a great day!


Thursday, April 16, 2026

Fairy Special

Hello friends! I have a couple of cards to share with you today using Whimsy Stamp's new Fairy Special stamps.  These fairies are darling! I colored both images with Copic Markers and used the coordinating dies to cut them out. For the first card I used the Mix and Match Scallop Rectangle die and squished it in some ink.  I adhered the image with Crafty Foam Tape.  I added a sentiment and some tulle to the top.  
For this second card I used the circle dies and the Pastel Butterflies 6 x 6 paper pack. I added glitter to the circle "frame" as well as her wings.  I tied coordinating green ribbon vertically to finish off the card. :)

Thank you for stopping by today! :)


Monday, February 2, 2026

Bear Love!

Hello friends!
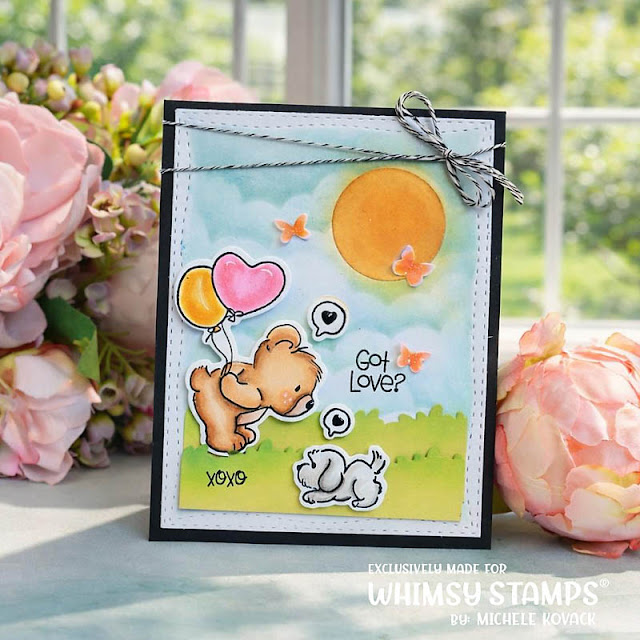
I have two cards to share today using Whimsy Stamp's Bear Love stamp set. This set is so cute!The first card I colored the images with Copics and used the coordinating dies to cut them out.  I used the Terrific Tickets Add On die to create the background.  I adhered the images including a spot of grass from the Field of Flowers die set. A few extra hearts and twine were added to as finishing touches. 
My second card I colored and die cut everything out.  The background cut out using the Wonky Stitched Rectangles Die and clouds were added with the It's Cloudy stencil.   The Grass and butterflies were cut out using the Field of Butterflies Die set.  

Thank you for stopping by today!
Have a wonderful day!


Thursday, January 15, 2026

Winter Friends!

Hello friends!
It's been a minute since my last post. I went back to school and it has thrown my whole schedule off! LOL.  I actually have been creating quite a bit, but am not on my computer as much lately.  So here I am with a fun wintery card to share!
 It is perfect timing with our frigid temps in the Chicago area. 
I used Whimsy Stamp's Winter Friend's set.  It is an adorable set! Just look at that snowman's face!
Everything was colored with Copics and then I ink blended the background.  The image was given a splattering of white paint. I used a large circle die to frame the image.  A bit of machine stitching and a vintage ribbon were the finishing touches. 
I WILL be back tomorrow with Whimsy's new release! Stay tuned!
Have a great day!


Monday, December 29, 2025

Cappy Birthday!

Hello friends!
Hope you all had a wonderful Christmas! 
Ours was good, but much different this year, as we were one less. The "firsts" are always difficult. 
I have two fun birthday cards to share with you today. They both use Whimsy Stamp's Cappy Birthday stamp set.   Copics were the medium of choice for both cards.  I created some depth with a black colored pencil.  A bit of grass, shadows, and sky were added.  I used the Inverted Scallops die to frame the image.  A pink bow and gold music charm were my finishing touches on this first card. 
For my second card, I stamped additional balloons and fussy cut them out.  This cutie was also colored with Copics and then cut out. I adhered everything to a navy blue background and added some stars and white gel dots. A bit of machine stitching to add interest, and   topped off with gold ribbon.


Wednesday, November 19, 2025

A Mouse and an Elf

Hello friends! I just wrapped up my first trimester at school and heading into conferences next week.  I will be glad for a few days off to recharge and spend time with family. If this year has taught me anything, is to not take loved ones for granted. 

I have two Christmas projects to share with you using lots of Whimsy products
This adorable mouse is part of the Christmas Portraits stamp set.  It was colored with Copics and cut out using  the Pierced and Stitched circle die  I decided to make a gift box to be able to give to a coworker.  It uses the Hexagon Treat Box Die.  I covered the box with glossy accents and sprinkled it with clear glitter.   I added a satin bow, a little posy, and a gift tag. 
This next project uses the Elven Tags Die Set.  It is perfect for cards, tags, and would make a cute bookmark too!  I cut all the pieces and colored them with Copics. I added the candy stripes using the Terrific Tickets Shadows and Patterns Stencil. As a finishing touch, I added string and a jingle bell.  Everything is better with a jingle bell.  LOL. 
Thank you for stopping by today! I really appreciate your visits!


Sunday, November 9, 2025

Whimsy's New Release!

Hello friends!
I am a bit late posting my cards for the new Whimsy Stamp's release. 
Life has been crazy again.  My FIL was back in the hospital.  He had a heart attack.  He is back home and doing okay, but has home nursing coming every day.  It's been a lot again. My husband has been nothing but patient, but I can see him getting weary. 

Anyway, that is why I am a bit late. 
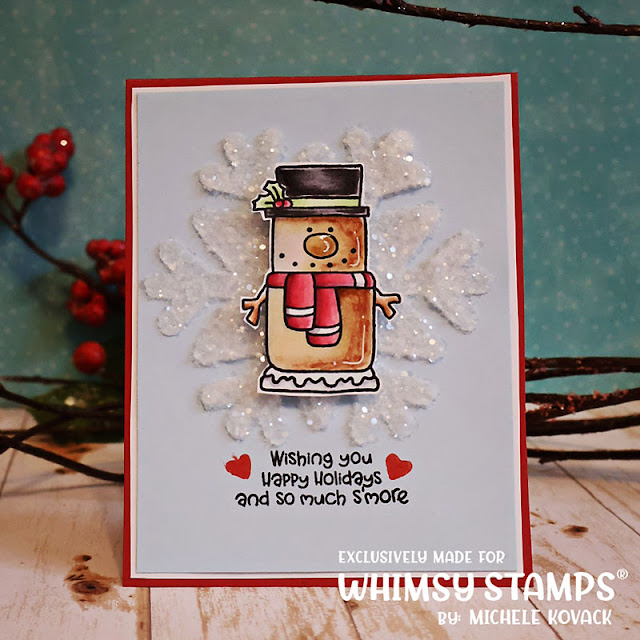
This new set, S'mores,  is so stinking cute, I had to make 3 cards with it.  Each image was colored with Copics and fussy cut.  There are dies to go with it, but I didn't have those.  ;)  The background was done with the Snowflake Mask Stencil, texture paste, and chunky glitter. I tried the sentiment in both red and black, not sure which one I prefer?  


Thank you for stopping by today!!